
How to Hang a Poster Without Damaging Your Wall


No holes, no torn paint, no lost deposit. Here is how to hang a poster so it holds firmly now and peels off clean later, with the right method matched to your wall.
To hang a poster damage-free, match the adhesive to your wall and remove it slowly. Wipe the wall clean and dry, mark the corners with a level, apply removable strips or reusable putty at all four corners plus midpoints on big prints, press from the center out, and take it down by pulling tabs straight down. Mounted or laminated posters survive repeated hanging best.

Start here
Hanging a poster damage-free in one paragraph
Damage-free hanging is about matching the method to the wall and removing it patiently. Clean and dry the surface, mark the corners with a level, apply removable strips or reusable putty at the corners with midpoints on larger posters, and press from the center outward for full contact. Take it down by pulling tabs slowly straight down or rolling putty off gently. The methods and walls below show exactly which pairing to use.
Why hang a poster damage-free

Nails and tacks work, but they leave holes, and permanent tape can peel paint off in sheets when you take a poster down. For renters staring at a security deposit, for dorm rooms with strict rules, and for anyone who likes rearranging, that is a real problem. Damage-free hanging solves it: the poster stays put while it is up and comes off clean when you are done, with no holes, no torn paint, and no marks.
The secret is that damage-free is not one trick but a small toolkit of methods matched to your wall and your poster. Get the pairing right and a print can hang securely for years and still peel away without a trace. This guide covers the key considerations, the full step-by-step, which method suits which wall, and how to protect the poster itself so it survives being hung and removed more than once.
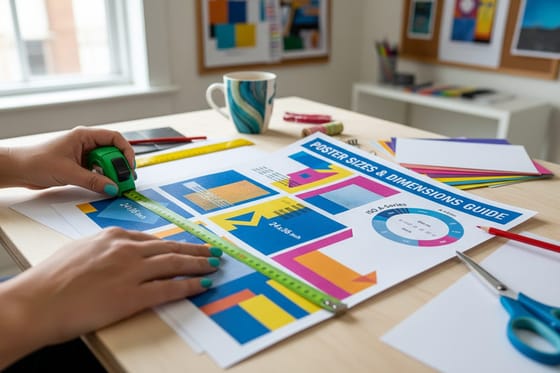
It also helps to start with a print built to last. A fresh, flat poster hangs better than a creased one, and a mounted poster stays rigid so it never curls at the corners. If you are still choosing a size for your wall, our poster sizes guide helps you pick before you hang.
Key considerations before you hang

Three variables decide whether a damage-free hang holds and removes cleanly. The first is the wall surface. Smooth painted drywall grips removable strips well, while textured walls, brick, tile, and glass each behave differently, and matte or freshly painted walls are the most likely to lift paint if you use anything too aggressive. The second is the poster's size and weight, since a large or heavy print needs more anchor points than a small one.
The third is your removal plan, which you should decide before you stick anything up. Choosing a method rated for clean removal from the start, rather than reaching for whatever tape is in the drawer, is what separates a clean takedown from a patched-and-repainted wall. Humidity matters too: bathrooms and kitchens can weaken some adhesives over time, so lean on stronger strips or a rail there.
One rule covers all three: when in doubt, test. Press a small piece of your chosen adhesive onto an inconspicuous patch of wall, leave it a day, and check that it holds and releases cleanly before committing your poster to it.
The damage-free hanging toolkit
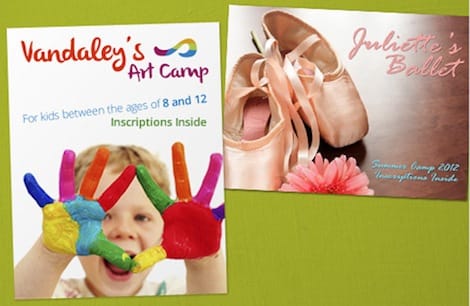
There are five reliable ways to hang a poster without hurting the wall, each suited to a different situation. Removable adhesive strips with a pull tab are the workhorse: they hold real weight on painted drywall and peel off clean when you pull the tab straight down. Poster putty, a reusable tacky compound, is perfect for lightweight prints and for repositioning, since you can lift and move a corner without redoing everything.
Low-tack washi or gaffer tape handles very light, short-term displays and removes without residue, though it holds less weight for less time. For posters you swap often, magnetic strips or a dedicated poster rail let you change prints with no fresh adhesive each time. And for true no-contact hanging, tension rods, clips, or a hanging display suspend the poster without touching the wall at all.
The reference table further down pairs each method with the walls and posters it suits best, so you can pick with confidence. For frameless approaches specifically, our guide on hanging posters without a frame goes deeper.
Step by step: a clean, straight hang

Whatever adhesive you choose, the sequence is the same, and following it is what gets you a poster that is straight, secure, and removable. Start by prepping the wall, because every adhesive grips better on a clean, dry, dust-free surface. A quick wipe and a full dry is enough, and it prevents most of the fall-downs people blame on the product.
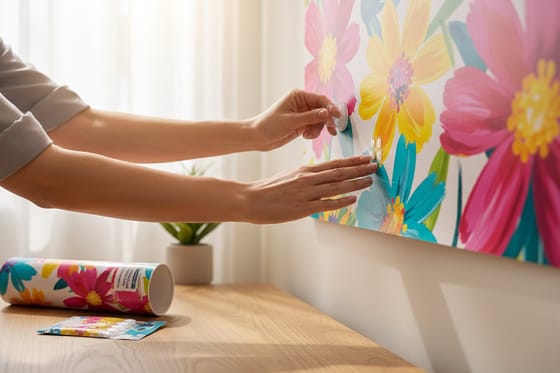
Next, measure and mark lightly with a level so the poster hangs straight the first time and you are not repositioning adhesive. Apply your strips or putty to the back of the poster at all four corners, adding midpoints for larger prints so the weight is shared. Then line the top up to your marks, set it on the wall, and press firmly from the center outward to push out air and give every point full contact.
The step-by-step band below lays this out in order. Do it once, carefully, and the poster stays put. Rush the prep and you will be re-hanging it within a week. When the time comes to take it down, patience on removal is what keeps the wall perfect.
Which method for which wall

Matching method to surface is where most damage happens or is avoided. On smooth painted drywall, removable strips are the safe default, with putty as a lighter option. On freshly painted or delicate matte walls, go gentler: putty or a rail, and always test first, since new paint bonds weakly and lifts easily. On brick, concrete, or textured walls, adhesives struggle to make full contact, so a tension system or a rail that anchors elsewhere often works better than sticking to the surface.
On tile, glass, and other non-porous surfaces, strong removable strips and suction-based hangers grip well and release cleanly. In humid rooms, favor stronger strips or a rail because moisture weakens weaker adhesives over time. And for any heavy or oversized poster, do not rely on a single method; spread the load or switch to a rigid mounted print that hangs from one point.
That last case is worth planning for. A large paper poster is floppy and hard to hang flat, whereas a mounted poster or framed poster stays rigid and hangs from a single removable hook, which is both easier and gentler on the wall.
Protect the poster, not just the wall

Damage-free is a two-way promise: protect the wall, and protect the poster so it survives being handled, hung, and taken down. A bare paper poster curls at the corners, creases if bent, and tears if an adhesive grips it too hard on removal. A little upfront protection makes a print far more forgiving to hang and re-hang.
Lamination adds a thin protective layer that resists moisture, fingerprints, and curling, and it lets you wipe the surface clean. Mounting bonds the poster to a rigid backing so it stays perfectly flat and hangs from a single point without any adhesive touching its face. Framing does both while adding a finished edge. Any of these turns a delicate sheet into a durable display you can move around without worry.
If you plan to reposition your art often, order a mounted poster or a laminated print rather than a bare sheet. Use the live specs panel below to add lamination or mounting and see how it changes the price before you order.
Start with a poster worth hanging

The best damage-free hang starts with a great print. A crisp, flat, vivid poster hangs cleaner and reads better than a curled or faded one, and ordering fresh lets you choose the size, stock, and finish that suit your wall and your hanging method from the start. Matte hides glare in bright rooms, gloss makes colors pop, and a laminated or mounted finish adds durability for frequent moves.
Whether you are refreshing a gallery wall, outfitting a dorm, or dressing a storefront window, printing new gives you control over every variable that affects the hang. Order posters in your exact size, add a mounted or framed option for long-term display, and browse the full poster printing collection for every finish.
Once your print arrives, come back to the step-by-step above, pair it with the right method for your wall, and hang it knowing it will come down just as cleanly whenever you are ready for a change.
Wally hangs it clean, takes it down cleaner
No holes, no torn paint, no lost deposit
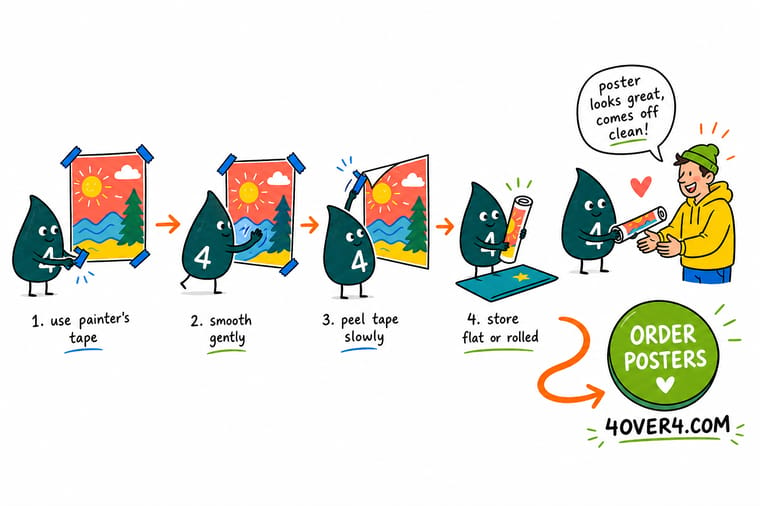
Wally wipes the wall, marks the corners with a level, sticks removable strips or putty at every corner, and presses from the center out. When it is time for a change, the tabs pull straight down and the wall stays perfect. Start with a flat, fresh poster, or a mounted one for long-term display, and hang without a single worry about damage.
Order your posters →Quick reference
Damage-free methods, matched to your wall
Pick the method that fits your wall surface and poster weight. All of these are chosen for clean removal.
| Method | Best for | Why it works |
|---|---|---|
| Removable strips | Painted drywall, most posters | Hold firmly and peel away clean if you pull the tab straight down. The go-to for renters. |
| Poster putty | Corners on light posters | Reusable, leaves no hole, easy to reposition. Can leave an oil mark on some paint over time. |
| Washi or gaffer tape | Lightweight, temporary displays | Low-tack and removes cleanly, though it holds less weight and less long than strips. |
| Magnetic strips or rails | Frequently swapped posters | A rail or magnet system lets you change prints often with zero fresh adhesive each time. |
| Tension rods or clips | Renters wanting no wall contact | Suspend a poster in a nook or window with no adhesive on the wall at all. |
| Mounted or framed poster | Long-term display | A rigid mount hangs from a single removable hook and protects the print from curling. |
Step by step
Hang a poster damage-free in 6 steps
The short version, in order: wipe the wall and let it dry, mark the top corners with a level, put a removable strip or a pea of putty at all four corners plus the midpoints on anything larger than 18x24, set the top edge to your marks, press from the center out, and pull the tabs slowly straight down along the wall when the poster comes off. Each step is spelled out below.
-
Prep the wall and your hands
Wipe the wall with a dry or barely damp cloth to remove dust and oils, let it dry fully, and make sure your hands are clean so nothing transfers to the adhesive. -
Measure and mark the top corners lightly with a level
Decide the position, use a level, and mark the top corners with a tiny pencil dot or a piece of low-tack tape so the poster hangs straight the first time. Measure up from the floor rather than down from the ceiling, since ceilings are rarely level, and put the center of the print near eye height for the way the room is used, standing height in a hallway and lower for a seated room. -
Attach adhesive to the poster at the corners and midpoints
Press removable strips or a pea of poster putty onto the back of the poster at all four corners, adding midpoints for larger prints, so the load is spread evenly. Four points carry a small print such as an 18x24; step up to six or eight on a 24x36 or larger by adding a pair at the midpoints of the long edges, which is also what stops the middle of a wide poster from bowing off the wall. -
Hang and align to your marks
Line the top corners up with your marks, then set the poster onto the wall and adjust before pressing it home. Commit the two top points first, step back and check the level from a few feet away, and only then press the rest, because a poster that is a degree off reads crooked from across the room. -
Press firmly from the center out
Smooth from the middle toward the edges to push out air and give every adhesive point full contact, then hold each corner for a few seconds. Firm, steady pressure matters more than time, and it is worth leaving the poster alone for an hour before you judge it, since adhesive bonds keep building after the poster is up. -
Remove cleanly when the time comes
For strips, pull the tab slowly straight down along the wall rather than out, and for putty, roll it off gently so nothing tears the paint. Stretch the tab a few inches at a time instead of yanking it, and if a corner of the print wants to lift with the adhesive, peel the poster back on itself at a shallow angle so the paper does not tear.
Specs and pricing
Poster specs and live pricing
Order a fresh, flat poster that hangs clean. Here are the live specs and price-per-unit for posters at 4OVER4.COM, including lamination and mounting options, straight from the configurator. Size drives how you hang it: a small print holds on four corner points, while a large one wants midpoints on the long edges too, and a laminated or mounted poster is rigid enough to hang from a single removable hook.

| Quantity | Price Per Unit | Total |
|---|---|---|
| 50 | $2.18 | $108.75 |
| 100 | $1.64 | $163.67 |
| 200 | $1.01 | $202.11 |
| 300 | 80.2¢ | $240.55 |
| 400 | 69.7¢ | $278.99 |
| 500 | 63.5¢ | $317.44 |
| 600 | 55.8¢ | $335.02 |
| 700 | 50.4¢ | $352.59 |
Print it
Order posters built to hang and re-hang

See it in use
Real posters, printed in-house






Explore more
Where to go next


By the numbers
Poster printing you can count on at 4OVER4
Common Questions
Common questions about hanging posters damage-free
What are the key considerations for hanging posters damage-free?
Three things decide success: the wall surface, the poster size and weight, and the removal plan. Painted drywall, brick, tile, and glass each grip differently, so the adhesive has to match the surface or it will either fail or pull paint. Larger and heavier posters need more anchor points spread across corners and midpoints. And you should choose a method rated for clean removal from the start, like pull-tab strips or reusable putty, so taking the poster down later does not leave holes or marks.
How do I hang a poster damage-free, step by step?
Start by wiping the wall clean and letting it dry, since adhesives only grip a dust-free, oil-free surface. Mark the top corners lightly with a pencil or low-tack tape using a level. Press removable strips or small pieces of poster putty onto the back of the poster at all four corners, adding midpoints for big prints. Line the top up to your marks, set it on the wall, then press firmly from the center outward so every point makes full contact. To remove, pull strip tabs slowly straight down or roll putty off gently.
What is the best way to hang posters without damaging the wall in a rental?
For rentals, favor methods rated for clean removal and test a small spot first. Pull-tab removable strips are the most reliable for painted drywall because they hold real weight and peel off without residue when you pull the tab straight down. Reusable poster putty is great for lightweight prints and repositioning. If you want zero wall contact, suspend the poster with tension rods, clips, or a poster rail. Avoid nails, tacks, and heavy-duty permanent tape, which are the usual causes of lost deposits.
Which method for which wall?
The safest default is a set of pull-tab removable strips on clean, dry, painted drywall, four of them on a small print and six to eight once you pass 24x36. From there, work off the surface. Textured drywall with orange peel or knockdown: reusable putty, because a flat strip only touches the high spots. Wallpaper: washi tape, and keep the print light. Brick and concrete: nothing sticks reliably to that rough, dusty face, so use a clip on the mortar line or hang the print from a rail. Tile and glass: wipe with alcohol first, then clear removable strips, since those surfaces are non-porous and grip well once the oil is gone. Freshly painted wall: wait for the paint to cure before any adhesive touches it, otherwise the strip takes the paint with it.
How do I choose the right hanging method for my poster and wall?
Match the method to the surface and the weight. Removable strips suit most posters on painted drywall. Poster putty works for light prints and easy repositioning. Washi or gaffer tape handles very light, temporary displays. Magnetic strips or a poster rail are best if you swap prints often, since you reuse the same hardware. For a heavy, long-term display, a rigid mounted or framed poster on one removable hook spreads the load and protects the print. When in doubt, test any adhesive on an inconspicuous patch of wall first, and give that test patch a day before you trust it with the real print.
What does it cost to order new posters, and how are prices set?
Poster pricing scales with a few levers: size, quantity, paper stock, and finishes like lamination or mounting. Larger sizes and premium substrates cost more, while ordering more than one lowers the per-unit price. You set each option in the configurator and the price updates live as you go, so you can see exactly how a bigger size or a laminated finish changes the total before you commit. A mounted or laminated poster costs a little more but survives repeated hanging and removal far better than a bare sheet.
Get Started
Ready to hang something new, damage-free?
Order fresh posters from 4OVER4.COM in your exact size and finish, then hang them with the right method for your wall. Adjust every option and watch your price update live.
Legal Disclaimer
Gold Standard guarantees apply to all standard orders placed through 4over4.com. Price match requires verifiable proof of a competitor's published price for an equivalent product with matching specifications and turnaround time. Satisfaction guarantee covers manufacturing defects and print quality issues. Contact support with order number and documentation. On-time delivery rate based on tracked orders 1999 to 2026. Individual results may vary based on shipping carrier performance.
