
How to Hang Acrylic Prints in 5 Simple Ways


Tobias is our voice for cutting, binding and large format, built from the knowledge of our production team, with over 20 years in printing.
Standoffs, wire, hooks, a french cleat, or adhesive strips. Panel weight and whether you can drill settle it in about ten seconds.
To hang an acrylic print, pick one of five mounts to match the panel: metal standoffs for a floating gallery look, hanging wire on a backer for easy adjusting, sawtooth or keyhole hooks for lighter panels, an aluminum french cleat for a flush heavyweight hold, or adhesive strips for a no-drill install. Anchor into a stud or a rated plug, mark your center near eye level, check it with a level, and the print sits crisp and straight.
The short version
The 5 methods at a glance
Every acrylic print hangs one of five ways. Match the method to the panel's weight and whether you can drill, and the rest is measuring and leveling.
- 1Standoffs. Drive barrel standoffs into a stud or anchor, seat the acrylic panel over the posts through pre-drilled corner holes, and cap them for a floating gallery look.
- 2Hanging wire. Fit two D-rings to a backer or subframe about a third down from the top, run picture wire between them, and rest the loop on a rated wall hook.
- 3Sawtooth and keyhole hooks. For a lighter panel with a backer, press a sawtooth bar or keyhole plate onto a nail or screw for a quick, flush hang.
- 4Aluminum french cleat. Screw one interlocking Z-bar to the wall and its mate to the panel, then drop the print so the bars meet flush for a hidden, heavyweight hold.
- 5Adhesive strips. Clean the wall, press pairs of mounting strips to the back of a small or mid-size acrylic, and set it in place for a no-drill, renter-friendly install.
Before you start: what you will need
Hanging an acrylic print is a fifteen-minute job when you gather the right kit first. Pull together a tape measure, a pencil, a small spirit level, a stud finder, and a drill with a bit sized for whatever anchor you are using. If your acrylic print arrived with a standoff kit or a french cleat, keep that hardware and its screws in one bag so nothing wanders off mid-project.
Two things decide your method before you touch a wall: the panel's weight and whether it has a backer. A slim, unbacked sheet of acrylic wants standoffs or a cleat that grip the panel itself. A piece with a wood or aluminum backer can also take wire or hooks fixed to that backing. If you ordered your art in the online designer, the size and thickness you picked there tell you roughly how heavy the finished panel will be.
Use the panel size to pick the method and the fixings before you mark a single hole:
| Print size | How it lifts | Method to use | Drywall vs. masonry | Fixings |
|---|---|---|---|---|
| Up to 12 x 12 in | One hand | Adhesive strips, or a single hook if it has a backer | Drywall: strips on clean, dry, painted paint. Masonry: a small plug and screw | 2 to 4 strips, or 1 hook |
| 16 x 20 in | One hand to carry, two to set it square | Wire on a rated hook, or standoffs | Drywall: a rated hook or a toggle. Masonry: masonry bit and plug | 1 hook, or 4 standoffs |
| 24 x 36 in | Two hands | Standoffs, or a french cleat | Drywall: catch a stud, most US framing puts them on 16 inch centers, or use toggles. Masonry: hammer drill into the brick, not the mortar face | 4 standoffs, or a cleat on 2 fixings |
| 30 x 40 in | Two hands, easier with a helper | French cleat, or 4 standoffs into studs | Drywall: at least one stud under the cleat. Masonry: sleeve anchors along the cleat | Cleat on 3 fixings |
| 40 x 60 in | Two people, one at each end | French cleat | Drywall: studs only, no bare-board anchors. Masonry: sleeve anchors spaced evenly along the cleat | Cleat on 4 fixings |
Weight tracks the acrylic thickness as much as the size, so read the panel weight for the exact size and thickness on the spec panel further down this page, then rate every hook and anchor above that number rather than at it.
New to the format and wondering how it is built? Our short explainer on metal and acrylic prints covers the material, the finish, and why the edges glow the way they do once the piece is on the wall.
Method 1: metal standoffs for the floating gallery look

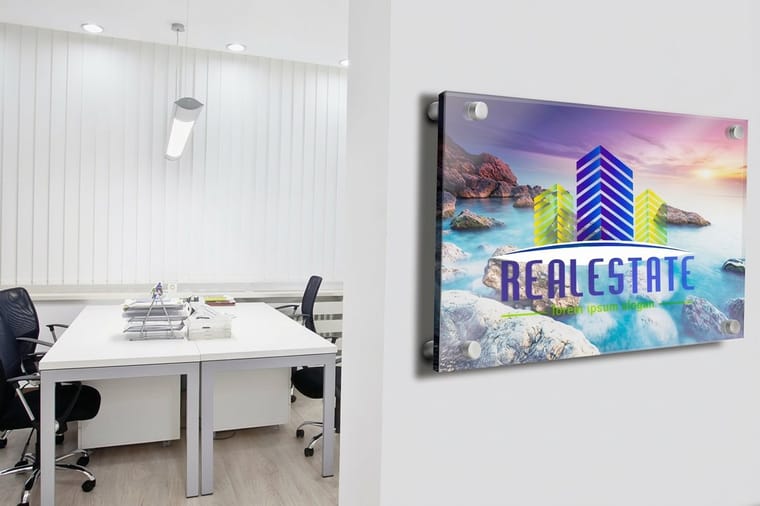
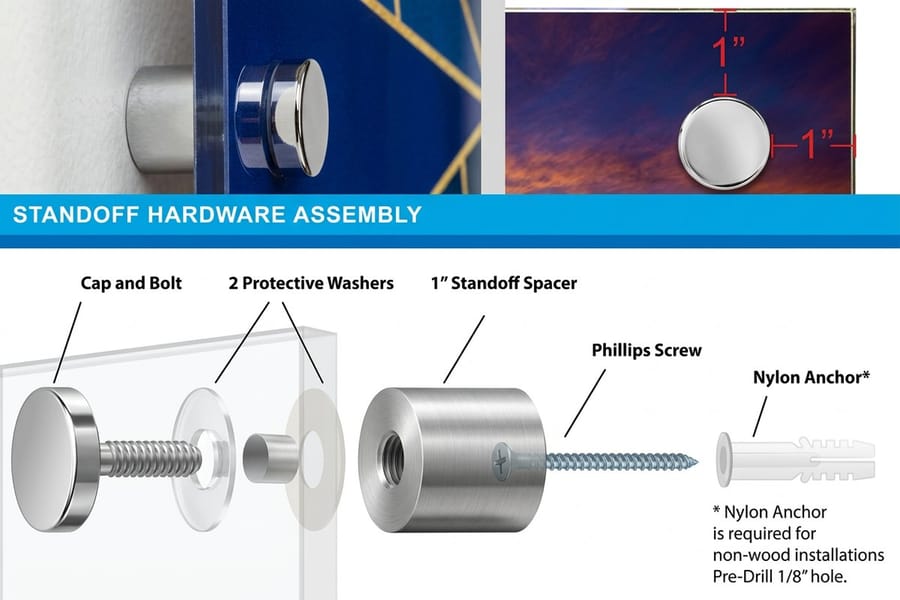
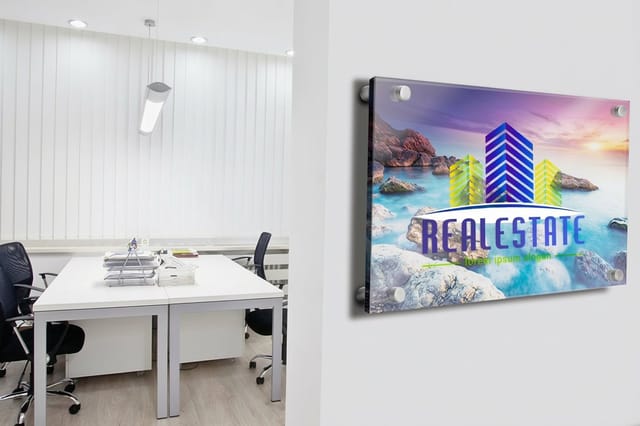
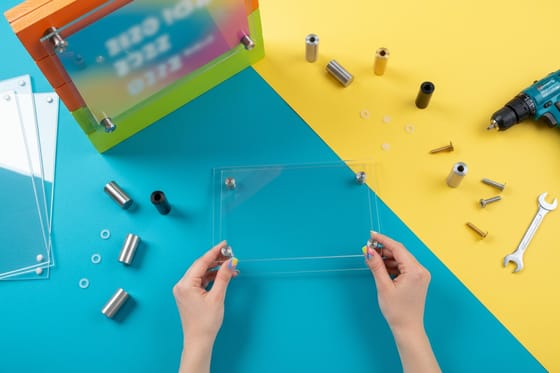
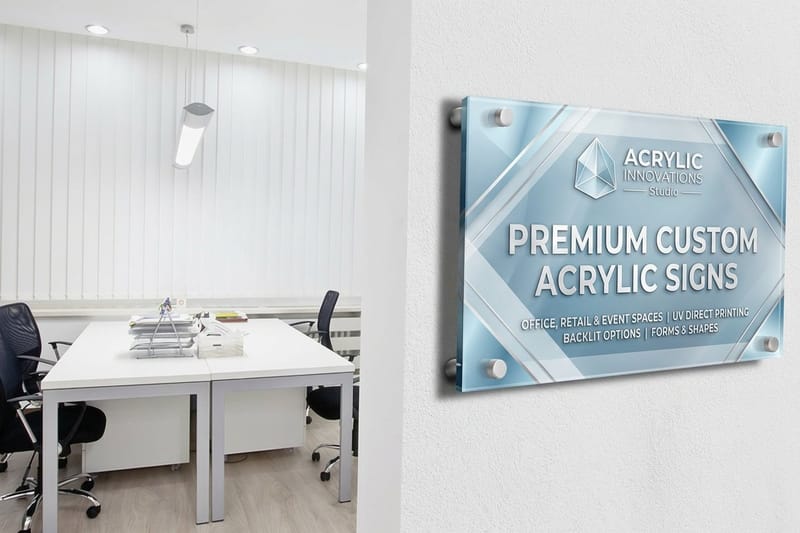
Standoffs are the reason acrylic prints look like they hover. Each one is a two-part barrel: a threaded base screws into the wall, the panel slides over it through a pre-drilled corner hole, and a cap locks it down. The barrel length sets the gap, usually about three-quarters of an inch, so daylight slips behind the panel and lights up the polished edges.
- Mark your four holes using the panel itself or the template as a stencil, then check the marks are level before you drill.
- Drill and set anchors into studs where you can, or rated wall plugs where you cannot, and thread the standoff bases in hand-tight.
- Seat the panel over the bases through its corner holes, then spin each cap down until the print sits snug without being crushed.
Standoffs suit medium and large panels and anything you want to feel premium. If you want the full breakdown of the hardware, our guide on how standoff screws work covers barrel lengths, cap types, and the right anchor for each wall.
Method 2: hanging wire and a single wall hook
Wire is the most forgiving method, and it is perfect when your acrylic print has a backer or subframe to screw into. Fit a D-ring to each side about a third of the way down from the top, run braided picture wire between them with a little slack, and rest the loop on a wall hook rated for the weight.
The advantage is adjustability. Once the print is on the hook you can slide it a few millimetres either way to line it up with a shelf or a neighbouring frame, then step back and check the top edge with a level. Because the load hangs from one point, use a hook and anchor rated well above the panel's weight, and hit a stud if the piece is large.
This is the same approach that works for framed art of every kind, so if you are mixing formats on a gallery wall, the technique in how to frame canvas prints pairs neatly with it.
Method 3: sawtooth and keyhole hooks
For a lighter acrylic panel with a solid backer, sawtooth and keyhole hooks give you a fast, flush hang with a single fixing. A sawtooth bar screws to the back near the top and drops onto a nail, letting you shift left or right along its little teeth. A keyhole plate is even cleaner: the wide part of the slot swallows the screw head, then the panel slides down so the narrow part grips it.
- Sawtooth works best on small to mid-size backed panels and needs only one nail set at the right height.
- Keyhole gives a dead-flush result but demands precise measuring, since the screw has to land exactly under the slot.
Both keep the panel tight to the wall rather than floating, which is the look you want for tidy grids of smaller pieces. If you like that flush style across your whole wall, framed prints hang the same way and mix well with acrylic. The framed prints video shows the frames up close.
Method 4: an aluminum french cleat for a flush, heavy hold
When a panel is large or heavy, a french cleat is the strongest and cleanest way to hang it. It is a pair of interlocking Z-shaped bars: one screws to the wall at a slight upward angle, its mate screws to the back of the panel, and gravity pulls the two together so the print sits flush and dead level.
Because the cleat runs across the width of the print, it spreads the load over many screws instead of one hook, which is exactly what a big acrylic panel needs. Level the wall bar carefully, since the panel inherits its angle, then simply lower the print until the bars meet. There is nothing visible from the front and no wobble.
Cleats are the go-to for statement pieces and for rigid signage too. The same mounting logic shows up on our acrylic signs, and you can see more large-format display options across posters and wall art.
Method 5: adhesive strips for a no-drill install
Renting, working around tile, or simply hate patching holes? Adhesive mounting strips carry small and mid-size acrylic panels with zero hardware. They come in interlocking pairs: one half sticks to the wall, the other to the back of the panel, and they click together so you can pull the print off later without tearing paint.
- Wipe the wall with rubbing alcohol and let it dry, since dust and residue are what make strips fail.
- Place matched pairs in each corner, and add a pair in the middle for anything wider than a couple of feet.
- Press firmly for thirty seconds, then let the bond set before you trust it with the full weight.
Keep this method to lighter panels and honest weight limits. Heavy acrylic still belongs on standoffs or a cleat. The same clean, damage-free thinking is covered in how to put a poster on a wall without damage and hanging posters without a frame.
Which method suits your wall and your print
The right method is a quick match between three things: the wall, the panel's weight, and whether you can drill.
- Drywall with studs: standoffs or a french cleat into the stud handle any size.
- Drywall, no stud in reach: use toggle or expansion anchors rated above the weight, and favour a cleat that spreads the load.
- Brick, tile, or plaster: drill with the correct masonry bit and plug, or step down to adhesive strips for lighter panels.
- Rental where drilling is off the table: adhesive strips for small and mid-size pieces, full stop.
Panel weight is the other half of the call. A slim panel under a couple of feet is happy on strips or a sawtooth. Anything large or thick wants standoffs or a cleat and a real anchor. If you are still choosing a format, compare acrylic against stretched canvas and square canvas prints (the square canvas prints story shows them in use), or read up on the material in what canvas prints are before you commit.
Placement, height, and mistakes to avoid
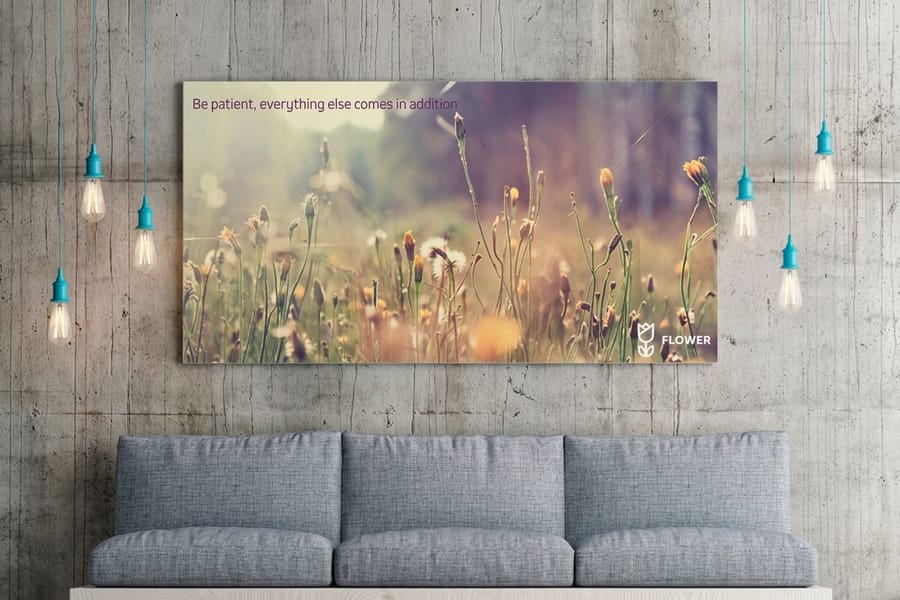
Even a perfectly mounted print looks off if it lands too high or crooked, so spend a minute on placement. Hang the center of a single piece around 57 to 60 inches from the floor, which is standard gallery eye level. Above furniture, leave roughly 6 to 10 inches of clear space between the top of the sofa or console and the bottom edge so the two read as a set.
A few small habits save you from the usual regrets:
- Measure to the hardware, not the top edge. Work out how far the hook or standoff sits below the top of the print, then transfer that number to the wall.
- Level every time. Acrylic shows a tilt more than a framed piece because of its clean edges, so check before the final tighten.
- Do not over-torque standoff caps. Snug is the goal. Cranking them risks stressing the panel around the holes.
- Keep it out of harsh direct sun and off heat sources. Acrylic loves indirect light, which is what makes the edges glow.
For a whole wall of art, plan the layout on the floor first, the same way you would with any large-format printing. The spacing and leveling logic in how to hang banners applies to a grid of prints too, and a fresh mounted print or two can fill the gaps between your acrylic pieces.
Wally explains acrylic mounting
Right hardware, one level line, and it floats
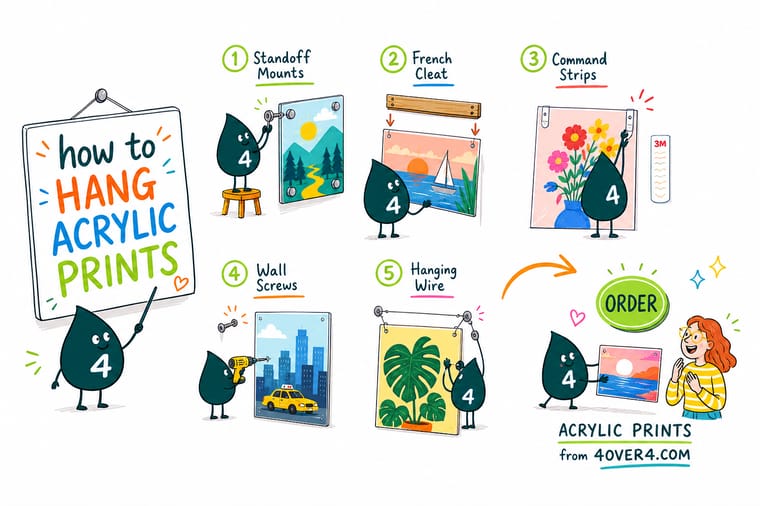
Wally thinks of an acrylic print like a pane of glass with a picture baked in: pick the mount that matches the panel, anchor into something solid, and let the standoffs lift it just off the wall so light rides the edges. Standoffs and cleats for the big statement pieces, wire and hooks for anything with a backer, adhesive strips when you cannot drill. Measure to the hardware, level once, and it hovers straight for years. Design yours in the browser and we print it crystal clear at 4OVER4.
Order acrylic prints →
Specs and pricing
Acrylic print specs and live pricing
Acrylic prints ship in 4 business days, with live specs and price-per-unit below, so you can size the panel and pick mounting hardware before checkout. Each one prints on 1/4 inch plexiglass with a clear gloss face and a white adhesive vinyl backing, at 16 x 24, 20 x 30 or 24 x 36 inches, from $152.72.
| Quantity | Price Per Unit | Total |
|---|---|---|
| 1 | $152.72 | $152.72 |
Print it
Acrylic prints and wall art at 4OVER4
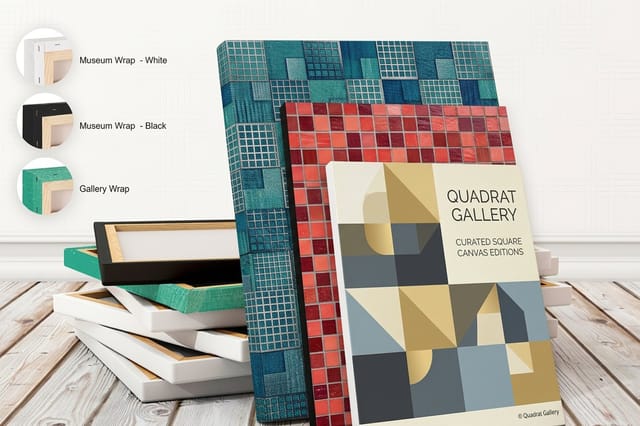
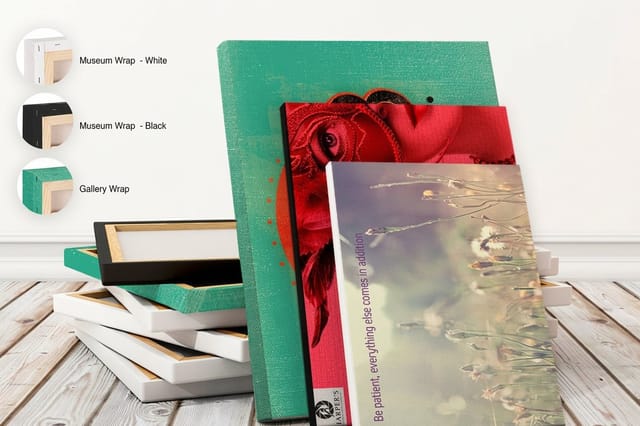
Acrylic prints start at $152.72 at 16 x 24 inches. Square and stretched canvas start at $59 in 12 sizes from 11 x 14 to 36 x 36, with a 1.5 inch gallery or museum wrap, and weigh less on a wall that only takes strips.

Explore more
Where to go next
Read how standoff screws work before you drill for a large panel, and the print quality guide if you are still choosing between acrylic and paper.


By the numbers
Materials and products behind an acrylic print
Common Questions
Common questions about hanging acrylic prints
What is the best way to hang an acrylic print?
For most rooms, metal standoffs are the best all-round choice. They hold the panel a short distance off the wall so light catches the polished edges and the image appears to float, and they anchor firmly into a stud or wall plug. If you cannot or do not want to drill, adhesive mounting strips are the next best option for small and mid-size panels on a smooth, clean wall.
Method #1: how do standoffs work on an acrylic print?
Standoffs are two-part barrels. The threaded base screws into the wall through a stud or anchor, the acrylic panel slides over it through a pre-drilled corner hole, and a cap screws down to lock the panel in place. The barrel length sets the gap, usually around three-quarters of an inch, which is what gives acrylic prints their signature hover. Our guide on how a standoff screw works walks through the hardware in detail.
Method #2: can I hang an acrylic print with wire?
Yes, as long as the piece has a backer or subframe to attach the D-rings to. Fit one ring to each side, about a third of the way down from the top, run braided picture wire between them with a little slack, and hang the loop on a wall hook rated for the weight. Wire is the most forgiving method because you can nudge the print left or right after it is up.
Do I need to drill into the wall to hang an acrylic print?
No. Adhesive mounting strips hold small and mid-size acrylic panels without a single hole, which is ideal for rentals and dorms. Wipe the wall clean, let it dry, press matched strips to the back of the panel in each corner, and set it against the wall. For anything large or heavy, though, drilling into a stud or a rated anchor is the safe call.
How high should I hang an acrylic print?
Aim for the center of the print at about 57 to 60 inches from the floor, which is standard gallery eye level. Above a sofa or console, leave roughly 6 to 10 inches of breathing room between the furniture and the bottom edge. Mark your center point first, measure up to where the hardware lands, and check the top edge with a level before you commit.
How much does an acrylic print cost and how is the price set?
Acrylic prints at 4OVER4.COM start at $152.72, and the live price is driven by the size, the acrylic thickness, and the mounting hardware you add. Bigger panels and thicker acrylic cost more, and standoff kits are a small add-on. The configurator updates the total as you change options, so you always see the real number before checkout.
Will a large acrylic print be too heavy for drywall?
Acrylic is dense, so a large panel has real heft. Bare drywall alone will not hold it, but a screw into a wood stud or a proper toggle or expansion anchor rated for the weight will. When you use standoffs or a french cleat, spread the load across two or more fixing points and you will have a hold that lasts for years.
What do I do when the wall will not take a fixing?
Four awkward walls, four answers. On a rented wall, adhesive mounting strips on clean, dry, painted plaster hold small and mid-size panels and peel off later without a patch, so keep the panel size down and skip standoffs. On bathroom or kitchen tile, drill the grout line rather than the tile face, using a tile bit at low speed with the hammer action switched off, since a chipped glaze cannot be undone and a grout hole fills in minutes. On a glass partition, do not drill at all: use standoffs made to clamp the glass edge, or hang the piece from a rail above the panel. On old plaster over brick, the plaster skin alone will crumble under load, so drill straight through it into the brick behind and set a masonry plug in the brick, never in the plaster.
Can I hang an acrylic print in a bathroom?
Yes, and this is where acrylic beats a paper print behind glass, because steam does not warp it and there is no mat board to grow damp. Keep the panel out of direct shower splash, fix into grout lines or a stud rather than bare tile, and choose stainless or anodized hardware so nothing rusts and streaks the wall. Clean the face with a soft damp cloth only, since abrasive sprays and paper towels scratch acrylic.
Get Started
Order an acrylic print, made in 4 business days
Upload your photo, choose your size and acrylic thickness, add standoff hardware if you want the float, and we print a crystal-clear panel built to last.
Legal Disclaimer
Gold Standard guarantees apply to all standard orders placed through 4over4.com. Price match requires verifiable proof of a competitor's published price for an equivalent product with matching specifications and turnaround time. Satisfaction guarantee covers manufacturing defects and print quality issues. Contact support with order number and documentation.
