
How to Work With Transparency in Illustrator for Printing


Shadows, blend modes and opacity masks all have to become opaque artwork before a press can print them. Here is who should do that conversion, and the settings that decide how good it looks.
In most cases, do not flatten at all: export PDF/X-4, keep the transparency live inside the PDF, and the press RIP flattens it at device resolution. Flatten by hand only when the job calls for PDF/X-1a, PDF 1.3 or EPS, and then work on a duplicate file, set the document to CMYK, use the High Resolution flattener preset, and set Document Raster Effects to 300 ppi first. That last setting, not the flattener, is why drop shadows print blocky.
Quick answer
Let the RIP flatten it, unless the spec says otherwise
Transparency has to become opaque artwork somewhere between your artboard and the plate. A PDF/X-4 export leaves that job to the press RIP, which does it at device resolution and keeps your file editable. Manual flattening belongs to the formats that cannot carry transparency at all: PDF/X-1a, PDF 1.3, EPS and Illustrator 8. When you do flatten, the High Resolution preset handles the vectors and 300 ppi Document Raster Effects handles the shadows. Skip the second one and no preset will save the job.
What Counts as Transparency, and Why Presses Cannot Print It
Transparency is not only the opacity slider. In an Illustrator file it covers every object below 100 percent opacity, every blending mode other than Normal, every opacity mask, and every live effect built on those: Drop Shadow, Inner Glow, Outer Glow, Feather and Gaussian Blur. A logo with a soft shadow is a transparent file even if nothing on the artboard looks see-through.
PostScript, the language most imaging devices still speak, has no way to describe a partly transparent object. It knows shapes, flat colour and pixels. So somewhere between your artboard and the plate, every soft edge has to be rewritten as opaque artwork. That rewrite is flattening, and it happens whether you run it or not. The only real question is which machine does it and at what resolution.
Open Window > Flattener Preview and set Highlight to Transparent Objects, then press Refresh. Whatever lights up is what the flattener will work on. It is worth doing on any file you inherited, because designers regularly hand over artwork with a 98 percent opacity rectangle nobody remembers making. For the wider file handover, our guide to creating commercial print-ready files covers the rest of the checklist.
When You Need to Flatten, and When You Should Leave It Alone
The honest answer is that most jobs going to a modern press never need a manual flatten. The file format decides it for you, so pick the format the printer asked for and stop there.
| Route | PDF version | What happens to transparency | Use it when |
|---|---|---|---|
| PDF/X-4 | PDF 1.6 | Stays live in the file. The RIP flattens at device resolution. | Default for anything you upload to 4OVER4.COM. |
| PDF/X-1a | PDF 1.3 | Flattened during export, using the preset in the Advanced panel. | The spec sheet names X-1a, or the job runs on older equipment. |
| Save As PDF, Acrobat 4 | PDF 1.3 | Flattened silently, with no standard attached. | Rarely. Prefer X-1a so the export is at least documented. |
| EPS or Illustrator 8 | None | Flattened, live effects expanded, no transparency support at all. | Cutting plotters, embroidery digitising, some sign shops. |
| Object > Flatten Transparency | Not applicable | Flattened inside the .ai file, permanently. | You want to see and correct the result yourself before sending. |
Read the third column and the trade-off appears. Leaving transparency live gives the sharpest result because the RIP works at 2400 dpi or more, but it puts the outcome in someone else's hands. Flattening yourself gives certainty and lets you inspect every seam, at the cost of a file you can no longer edit. On a short run of standard flyers from $39.54 that certainty is rarely worth it. On a job with spot inks and heavy blending, it often is.
Setting Up the Transparency Flattener

Go to Edit > Transparency Flattener Presets. Illustrator ships three: High Resolution, Medium Resolution and Low Resolution. For anything that goes on paper, use High Resolution and leave the others for screen proofs.
High Resolution sets the raster and vector balance to 100, line art and text resolution to 1200 ppi, and gradient and mesh resolution to 300 ppi. Medium drops those to 300 and 150, which is a desktop proof setting, and Low sits at 288 and 144 for the web. The two resolution fields only apply to the parts the flattener has to rasterize, which is why line art can be set so much higher than gradients without exploding the file size.
The balance slider is the setting people misread. At 100 the flattener keeps as much artwork in vector as it possibly can and rasterizes only the regions where it has no choice. Lower it and more of the page is converted to pixels, which produces a simpler file that some old RIPs digest more happily, at the cost of softer type. Keep it at 100. The one exception is a genuinely complex page, a poster with dozens of blended objects stacked on a gradient mesh, where 100 can generate hundreds of atomic regions and a PDF that stalls the RIP. That is the moment to try 75, and only then.
Now the setting that causes more reprints than the flattener itself. Effect > Document Raster Effects Settings controls the resolution of every drop shadow, glow, feather and blur in the document. It is not part of the flattener and the flattener cannot rescue it. Many documents start life at 72 ppi. A shadow rendered at 72 ppi prints as visible squares no matter which preset you flatten with. Set it to 300 ppi at the start of the job, because raising it later re-renders existing effects and can change how heavy a glow looks. If you are already thinking about output resolution, our note on the best resolution for printing covers what each element on a page actually needs.
Flatten and Save for Print, Step by Step
This is the order that avoids the usual surprises. It takes about five minutes on a normal layout.
- Save a copy first. File > Save As, add -flat to the name. Flattening is permanent once the file is saved and closed, so the master with live effects has to survive somewhere else.
- Set the document to CMYK. File > Document Color Mode > CMYK Color, and Edit > Transparency Blend Space > Document CMYK. Blending is calculated in that space, so flattening in RGB and converting afterwards gives different numbers in every overlap.
- Turn on View > Overprint Preview. It shows overprints and blends the way the press will resolve them rather than the way the artboard draws them.
- Run Flattener Preview. Window > Flattener Preview, click Refresh, set Highlight to All Affected Objects. Everything in red is going to change. If a headline you did not expect turns red, a transparent object is sitting over it.
- Outline the type yourself. Select All, then Type > Create Outlines, before flattening. The flattener has its own Convert All Text to Outlines checkbox, but it outlines only what it needs to, which can leave the same font live in one place and outlined in another and looking very slightly different. Our walkthrough on creating outlines has the details.
- Flatten. Select the affected artwork, Object > Flatten Transparency, choose High Resolution, tick Clip Complex Regions, and apply.
- Inspect the seams. Zoom to 400 percent along the edges of the old transparent objects. You are looking for colour steps between a vector region and a rasterized one.
- Save the PDF to the standard the job needs, with bleed included. Start from a correctly sized artboard in the blank template library so the bleed is already built in.
Checking Effects, Shadows, Gradients and Spot Colors
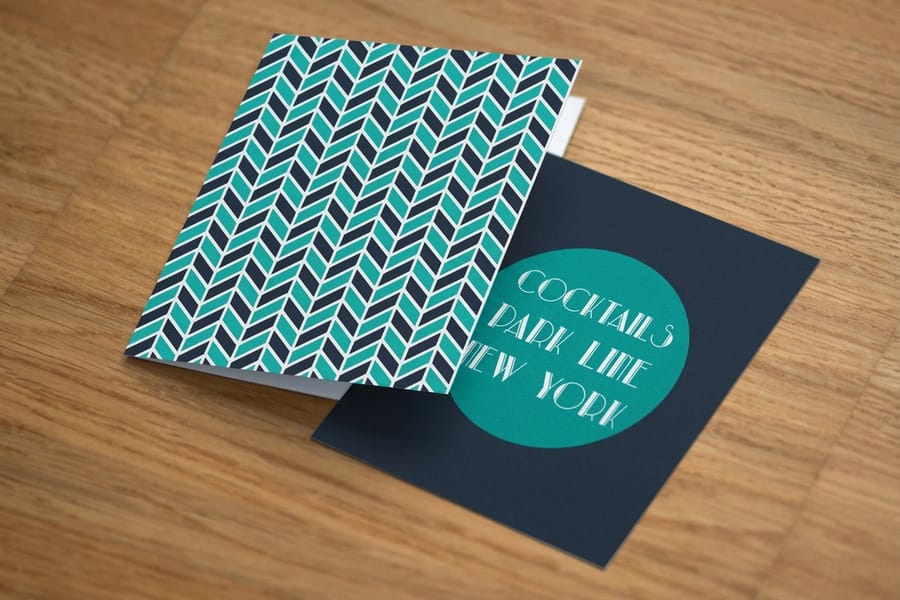
Four things account for nearly every transparency problem that reaches our preflight desk, and all four are visible before you send the file.
White set to Multiply disappears. Multiply keeps the darker value and white has none to give, so the object vanishes against whatever sits behind it. Black set to Screen does the same in reverse. It is not a flattener fault, but flattening makes it permanent, so check the Transparency panel on any object that looks wrong.
Drop shadows over gradients build a visible box. When a shadow with a soft edge is rasterized against a smooth background, the rasterized rectangle can show as a faint square, especially in light tints. Widening the shadow blur or moving the object onto a flat background fixes it faster than any preset change.
Blend modes over spot colors split the separation. A Multiply object crossing a Pantone forces that overlap area into process ink, so part of your spot separation quietly becomes CMYK and the colour shifts at the boundary. If the job runs a spot ink, keep transparency off it, or accept the conversion deliberately. The Pantone to CMYK conversion guide explains what the numbers do when you make that call.
Hairlines between regions are usually a screen artifact. Thin white lines across a flattened area in Acrobat are almost always anti-aliasing in the viewer. Turn off Smooth Line Art in Acrobat preferences and they normally vanish. If they persist in Illustrator's own Flattener Preview at high zoom, the region boundary is real and the artwork needs simplifying. Getting your colour build right in the first place helps here too, which is what the colour profile guide and the CMYK and RGB conversion guide are for.
Exporting the Print-Ready PDF

File > Save As > Adobe PDF. In the Adobe PDF Preset menu pick PDF/X-4:2008 for everyday work and PDF/X-1a:2001 when a spec sheet names it. Those two choices carry almost every other setting with them.
In Marks and Bleeds, set the bleed to 0.125 inch on all four sides, or use the document bleed if you built the artboard from a template. In Compression, leave colour and greyscale images at 300 ppi bicubic downsampling and do not push below it, because the flattener writes its rasterized regions as images and compression applies to them as well. In Output, choose Convert to Destination (Preserve Numbers) with a CMYK profile so black type stays as pure K.
If you picked X-1a, open the Advanced panel and confirm the Overprint and Transparency Flattener Options are set to High Resolution. That panel only appears for PDF 1.3 standards, which is a useful reminder of what the format is doing. Then reopen the exported PDF and inspect it, because the export dialog cannot tell you what the file looks like. Our PDF export guide goes through each panel, and the bleed, cut line and safety checklist covers the geometry.
Upload the finished file with the job. Every order through 4OVER4.COM runs preflight before it reaches a press, so a transparency problem gets flagged rather than printed, whether you are ordering standard brochures from $57.11 or standard posters from $108.75. If you would rather skip file prep entirely, the online design tool builds artwork that is already print-ready, with no flattener decisions to make.
Common Transparency Mistakes

Seven failures repeat, and six of them cost nothing to avoid.
- Flattening the master file. The live version is gone the moment you save and close. Always flatten a duplicate.
- Leaving raster effects at 72 ppi. The shadow prints blocky and the flattener preset makes no difference at all.
- Blending in RGB, converting later. Every overlap resolves to different CMYK values than you approved on screen.
- White objects left on Multiply. They look present on the artboard and print as nothing.
- Transparency crossing a spot ink. The overlap converts to process and the spot separation splits in two.
- A drop shadow that stops at the trim line. Extend it into the bleed, or the cut exposes a hard edge where the shadow should fade off the sheet.
- Sending a flattened and an unflattened file together with no note about which is current. The plant will pick one, and it may not be yours.
Before you upload anything, run a last look with fresh eyes. Preflight catches most of this automatically, and choosing the right file type prevents the rest by never putting the artwork in a format that has to be flattened in the first place. If a card job is what you are prepping, standard business cards start at $17.57 and print from the same PDF you just built.
Wally explains flattening
Soft edges in, opaque shapes out
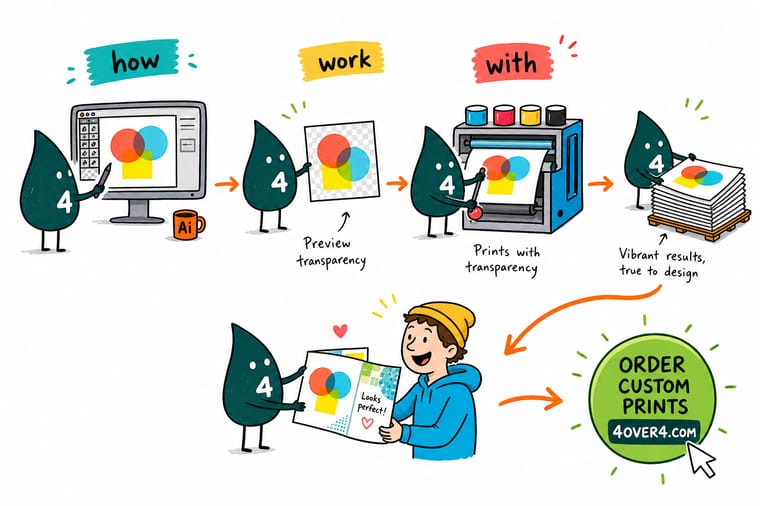
Wally cannot hand a press a shadow. The plate only knows solid shapes and dots, so every soft edge gets rebuilt as opaque artwork first. Send a PDF/X-4 and the press machine does that rebuild at its own resolution, which is finer than anything a laptop manages. Send an X-1a and Illustrator does it before the file leaves your desk. Either way, set Document Raster Effects to 300 ppi before you draw the shadow, because that number is baked in long before the flattener gets involved.
Print your brochures →Specs and pricing
Sizes, stocks and starting prices for the files you are prepping
Live configuration options and starting prices straight from the 4OVER4.COM configurator, so you know the trim size before you set up the artboard.


Print it
Send the file and we handle the rest
Explore more
Where to go next




By the numbers
Files checked before they ever reach a press
Common Questions
Your transparency questions, answered
Should I flatten transparency before I send artwork to a printer?
Usually no. Save a PDF/X-4 file and the transparency travels live inside it, then the press RIP flattens it at the resolution of the imaging device. That is sharper than flattening on your own machine, and it keeps the file editable. Flatten by hand only when the print spec asks for PDF/X-1a, PDF 1.3, EPS or an old Illustrator format, since those formats cannot carry live transparency at all. If you are unsure which one a job needs, send the PDF/X-4 and let preflight tell you.
Where is the transparency flattener in Illustrator?
Three places, and they do different things. Edit > Transparency Flattener Presets is where you edit or add a preset. Window > Flattener Preview shows you which objects a flatten would touch, with a Highlight menu for transparent objects, affected objects, outlined text and rasterized regions. Object > Flatten Transparency applies the flatten to whatever is selected, permanently. The same preset list also appears in the Advanced panel of the Save As Adobe PDF dialog when you pick a PDF 1.3 based standard.
Why does my drop shadow print pixelated when the rest of the art is sharp?
Because a drop shadow is a raster effect, and its resolution comes from Effect > Document Raster Effects Settings, not from the flattener. Many documents start at 72 ppi, which looks fine on screen and turns into visible squares on paper. Set it to 300 ppi, then reapply or refresh the effect, because raising the setting re-renders existing effects and can slightly change how thick a glow or feather looks. Do this before you finalise the layout, not after.
Does flattening change my colors?
It can, in the areas where objects overlap. Blending is calculated in the document blend space set under Edit > Transparency Blend Space, so a file blended in RGB and converted to CMYK afterwards gives different numbers than a file that was CMYK from the start. Flattening also drops overprint instructions inside a transparent region and simulates the result instead. Set the document to CMYK first, view the file in Overprint Preview, and compare before and after at 400 percent zoom.
Why did my white shape disappear after flattening?
It was almost certainly set to Multiply. Multiply keeps the darker of the two values, and white contributes nothing, so a white object in Multiply vanishes against anything under it. Screen does the same thing to black. Neither is a bug in the flattener, it is just the blend mode doing exactly what it says, but flattening is the moment it becomes permanent. Select the object, open the Transparency panel, and set the mode back to Normal.
Can I edit a file after I have flattened it?
Only in a limited way. Live effects are gone, opacity masks are expanded, and the overlap areas have been cut into separate shapes that no longer relate to the objects you drew. You can still move and recolour those shapes, but you cannot recover the original drop shadow or the original blend. This is why the working method is to keep a master file with live transparency and export a flattened copy under a second name.
Get Started
File ready? Let us print it.
Upload your PDF, pick the stock and quantity, and our preflight team checks the transparency, the bleed and the resolution before anything goes on press.
Legal Disclaimer
Gold Standard guarantees apply to all standard orders placed through 4over4.com. Price match requires verifiable proof of a competitor's published price for an equivalent product with matching specifications and turnaround time. Satisfaction guarantee covers manufacturing defects and print quality issues. Contact support with order number and documentation. On-time delivery rate based on tracked orders 1999 to 2026. Individual results may vary based on shipping carrier performance.
