
How to Save a Photoshop File as a Print-Ready PDF

Emma is our prepress and print production voice, built from the knowledge of our production team, with over 20 years in printing.
A good Photoshop file is only half the job. Save As no longer lists PDF, and the command that still works is the one nobody looks for.
To save a Photoshop file as a print-ready PDF, prep the file first, then export it as PDF/X-1a. Convert to CMYK, confirm 300 PPI, add a 0.125 inch bleed, and flatten the layers. Then choose File, Save As, Photoshop PDF, start from the Press Quality preset, set the standard to PDF/X-1a:2001, turn on trim marks and bleeds, and save. That gives the press one flattened file with the color, detail, and cut information it needs.
Start here
The short version
A print-ready PDF is a Photoshop file that has been prepped for a press and then exported to the PDF/X-1a standard. Convert the document to CMYK, set 300 PPI, add a 0.125 inch bleed, and flatten it. Then save as a Photoshop PDF using the Press Quality preset, switch the standard to PDF/X-1a:2001, and turn on trim marks. The steps and the exact settings are below, with a one-glance checklist diagram to keep by your screen. For the bleed step in detail, read how to add bleed and crop marks in photoshop.
Why a print-ready PDF is the file your printer actually wants

Your Photoshop file looks perfect on the monitor. Then it prints, and the RGB greens have gone flat in CMYK, type set in an image below 300 PPI is a touch soft, and with no 0.125 inch bleed a white line has crept along one edge. Nothing went wrong at the press. The file simply was not built for paper, and the gap between a bright screen and a physical sheet of ink is where good designs quietly fall apart.
A PDF is the handshake between your design and the printer. Done right, it flattens everything into one page, carries your fonts and images inside it, and tells the press exactly how to reproduce your color, at what resolution, and where to cut. Every printer, including 4OVER4.COM, would rather receive a clean PDF than a layered PSD, because a PDF removes the guesswork.
This guide covers the export itself and the preparation underneath it, because the save dialog only preserves what is already in the file. If you want the wider picture first, our file setup guides and the primer on choosing the right file type for printing set the stage.
What does it mean to save as a PDF in Photoshop?

Photoshop is a pixel editor, so saving as a PDF is really an act of packaging. The Photoshop PDF format takes your layered document and wraps it into a single portable page that any press or proofing station can open without your original file, your fonts, or your version of Photoshop. It can hold CMYK color, a bleed, and trim marks, which a flat image like a JPEG cannot.
There are two very different PDFs you can make. A screen PDF is small, usually RGB, and built to look fine on a phone. A print PDF is a heavier, CMYK, high-resolution file made to a press standard. Reach for File, Save As, Photoshop PDF for the print version, and start from the Press Quality preset rather than the Smallest File Size one. That single choice is the difference between a proof and a paperweight.
A save the date is a good example, because so many people design theirs in Photoshop and then need it printed sharp. Lay it out, export a print-ready PDF, and upload it for save the date card printing. If you would rather not build the file from a blank canvas, our design templates arrive pre-sized with the bleed already set, so most of the print setup is handled before you place a single word.
Save As, Export As and Save a Copy in current Photoshop
Adobe moved the commands around, which is why so many people open Save As, find no PDF in the list, and assume the feature is gone. It is not. One command still makes a print PDF and the other never will.
- Save a Copy makes the PDF. On current Photoshop versions, File, Save a Copy is where Photoshop PDF sits in the format list. It writes the PDF and leaves your layered working file open and unchanged, which is exactly what you want the day before a run.
- Save As still works if you switch the legacy option back on. If Photoshop PDF is missing from File, Save As, turn on Enable legacy Save As in Preferences, File Handling. The full format list comes back and the Save Adobe PDF window that follows is identical either way.
- Export As never makes a PDF. Export As and Quick Export produce screen formats only, PNG, JPG, GIF, and SVG, in RGB, with no bleed, no trim marks, and no output intent. A JPEG exported at 300 PPI is still not a press file.
- Print is not an export. File, Print sends the job to a desktop printer or a system-generated PDF, which re-tags your color and throws the bleed away. Use Save a Copy, then Photoshop PDF.
Whichever route you take, the window that opens next is the same, and the settings inside it are the ones that decide whether the job prints. The next two sections walk through them.
What does preflight mean in printing?
Preflight is a borrowed word. A pilot runs a checklist before takeoff, and pre-press runs one before ink. In practice, preflighting a file means confirming a short list of things before it goes to the press: the color mode is CMYK, images sit at 300 PPI at the final print size, the bleed runs 0.125 inch past the trim on all four sides, every font is embedded, the standard reads PDF/X-1a:2001, and no stray overprint or transparency is lurking. It is the last gate between a design and a printed run.
The reason preflight matters is money and time. A problem caught at this stage costs nothing to fix. The same problem caught after a thousand pieces are printed costs a reprint and a missed deadline. When you hand a printer a clean, preflighted PDF, you also open the fast lanes: services like same-day printing only stay on schedule when the file needs no back-and-forth, and larger orders that qualify for bulk discounts are worth getting right the first time.
If a term in your preflight trips you up, our printing terms glossary defines the pre-press vocabulary in plain language, from bleed to overprint to output intent.
Get the file print-ready before you open the save dialog
The export step is quick. The preparation is where the quality lives. Fix these four things in the PSD first, and the PDF will simply carry them through:
- Color mode. Convert to CMYK with Image, Mode, CMYK Color so the vivid RGB values you see on screen are translated to press color while you can still adjust them. Our guide on converting RGB to CMYK walks through the shift and how to soften the surprises.
- Resolution. Check Image, Image Size and confirm 300 PPI at the final print dimensions. Blowing up a small image to hit that number does not add real detail. The 300 DPI setup guide shows how to start large enough.
- Bleed and trim. If any color runs to the edge, extend it 0.125 inch past the cut on all four sides. Our explainer on bleed and trim covers why that margin exists and how to build it into your canvas.
- Flatten and type. Merge your layers with Layer, Flatten Image, and keep text crisp so it does not soften on export. For exact document dimensions, the business card dimensions in Photoshop guide is a useful model even when you are printing something else.
Do this once and the whole export becomes routine. Skip it and no PDF setting can rescue the file.
How to preflight and save a Photoshop file as a print-ready PDF, step by step

With the file prepped, the export is a short, repeatable sequence. Follow it in order and you will land a clean PDF/X-1a every time. Nine steps, about a minute once you have done it once.
- Confirm the size and bleed. Check that your canvas matches the finished piece plus the 0.125 inch bleed on each side, so a 3.5 by 2 inch business card is built at 3.75 by 2.25 inches with the artwork running off all four edges.
- Convert to CMYK. Image, Mode, CMYK Color, then eyeball the color and fix anything that dulled. Saturated blues and neon accents are where the shift shows first.
- Verify 300 PPI. Image, Image Size, resolution set to 300 pixels per inch at print size, with Resample switched off so you are reading the resolution you actually have rather than inventing pixels.
- Flatten the artwork. Layer, Flatten Image so transparency and blend modes are baked in cleanly. Save the layered PSD under its own name first, because flattening is the one step you cannot undo tomorrow.
- Open the save dialog. File, Save As, and choose Photoshop PDF as the format, then click Save. On current Photoshop versions the command sits under File, Save a Copy instead.
- Pick the preset. In the Save Adobe PDF window, set Adobe PDF Preset to Press Quality.
- Set the standard. Change Standard to PDF/X-1a:2001, which flattens transparency and enforces CMYK.
- Add marks and bleed. On the Marks and Bleeds tab, turn on trim marks and enter 0.125 inch of bleed on all sides. Leave registration marks and color bars off unless your printer asks for them.
- Save the PDF. Click Save PDF, then open the file once to confirm it looks right before you upload it. View it at 100 percent, and check the four edges for bleed and trim marks.
The whole thing takes under a minute after the first run. The diagram further down turns this list into a one-glance checklist you can keep by your screen.
The PDF export settings that actually matter
The Save Adobe PDF window has a lot of tabs, but only a handful of choices change the printed result. Here they are in the order you meet them, from the menu command to the button that writes the file.
- File, then Save a Copy. On current Photoshop versions this is the command that offers Photoshop PDF, and it leaves your layered working file open and untouched. On older versions the same route is File, then Save As.
- Set Format to Photoshop PDF. Choose it from the format list, leave Layers unchecked, give the file a name a stranger at the press could identify, and click Save to open the Save Adobe PDF window.
- Set Adobe PDF Preset to PDF/X-1a:2001. This is the standard for CMYK sheet printing. It flattens transparency, embeds fonts, and rejects anything that would trip a press, which is why most printers ask for it by name. If the PDF/X preset is not listed, start from Press Quality and set Standard to PDF/X-1a:2001 yourself.
- Compression tab: hold 300 PPI. The Press Quality preset keeps images at 300 PPI and uses JPEG at maximum quality. Leave it alone. Downsampling below 300 is the fastest way to soften a photo.
- Marks and Bleeds tab: trim marks and 0.125 inch. Turn on trim marks and type 0.125 inch into all four bleed boxes. Leave registration marks and color bars off unless your printer asks for them.
- Output tab: color conversion and output intent. Set Color Conversion to Convert to Destination, then set the destination and the output intent to the profile the job prints on. A CMYK profile such as U.S. Web Coated SWOP tells the press how to interpret your color. If your printer publishes a profile, match it.
- Confirm every font is embedded. Non-negotiable for type that stays live. Embedding travels the exact typeface with the file so a font swap never happens on the printer's end. PDF/X-1a refuses to write the file when a font cannot be embedded, which is a warning worth reading instead of clicking past.
- Click Save PDF, then open the file. Look at it once at 100 percent, check the four edges for bleed and trim marks, and only then upload it.
Save it once as a preset and you never set it again. With those settings on screen, click Save Preset at the bottom of the Save Adobe PDF window and name it something like 4OVER4 press PDF. Photoshop writes a small .joboptions file and it appears in the preset list of every Adobe application on that machine, so Illustrator and InDesign export to the same spec without a second thought. Those presets live on macOS in Library, then Application Support, then Adobe, then Adobe PDF, then Settings, and on Windows in ProgramData, then Adobe, then Adobe PDF, then Settings. Copy the same file into that folder on a colleague machine and the whole team ships identical PDFs.
Effects that lean on transparency, like the ones in our guide on filling text with images and creating duotones, are exactly why PDF/X-1a flattens the file. And when a format carries strict spec rules, such as the ones in the EDDM guidelines for file setup and size, these same export settings are what keep you inside them.
Common export mistakes, and how to dodge them
Nearly every rejected print file fails for one of the same few reasons. Run through this list before you upload and you will clear almost all of them:
- Still in RGB. The file was never converted, so bright screen colors dull unpredictably on press. Convert to CMYK and confirm it in the export.
- Images enlarged past 300 PPI. A small photo scaled up looks fine on screen and mushy on paper. Start with artwork sized for the final print.
- No bleed on edge-to-edge art. Without that 0.125 inch margin, a slight shift at the cutter leaves a white sliver. Extend the background and add trim marks.
- Live type left unflattened. Fancy layer effects can render differently downstream. Flatten so what you see is what prints.
- The wrong preset by habit. Saving with Smallest File Size or a screen preset strips resolution. Always start from Press Quality.
- A blurry PDF from a sharp file. If the PSD looks crisp and the exported PDF looks soft, the file is being downsampled on the way out, not damaged at the press. Open the Compression tab and set both color and grayscale images to Do Not Downsample, or 300 PPI at most, with JPEG quality at maximum. Then judge the PDF at 100 percent zoom rather than fit-to-window, which blurs everything on screen and has fooled a lot of people into re-exporting a file that was already fine.
When a design uses a lot of illustration or a crafted mark, the same care applies. Our notes on logo design best practices and making custom CD covers both come down to a clean, flattened, CMYK file at the end.
From print-ready PDF to printed piece
Once your PDF passes preflight, the hard part is behind you. Upload the file, choose your options, and the design you exported is the design that prints. For save the date cards that means one of three sizes, 4.25 by 5.5, 5 by 7 or 6 by 6 inches, one of 15 stocks from 14pt gloss cover to 24pt ultra thick gloss, premium white linen and metallic pearl among them, and an optional High Gloss UV coating, on a five business day standard turnaround. Build the PSD at the finished size plus 0.125 inch on each side, so a 5 by 7 card is 5.25 by 7.25 inches. Cost from here is easy to reason about: it scales with quantity, size, paper stock, and finish, and the per-unit price falls as the run grows. You can watch every number update live in the configurator as you adjust each choice.
Back to the save the date example, a run of save the date cards comes in a range of sizes and premium stocks, and your clean PDF drops straight in. If you would rather not start from a blank file, our design templates give you a finished layout to customize online.
Whichever route you take, the specs and live pricing below show exactly what your finished piece will cost, so the last decision is the easy one.
Wally explains print-ready PDFs
Do the work in the file, not in the save dialog
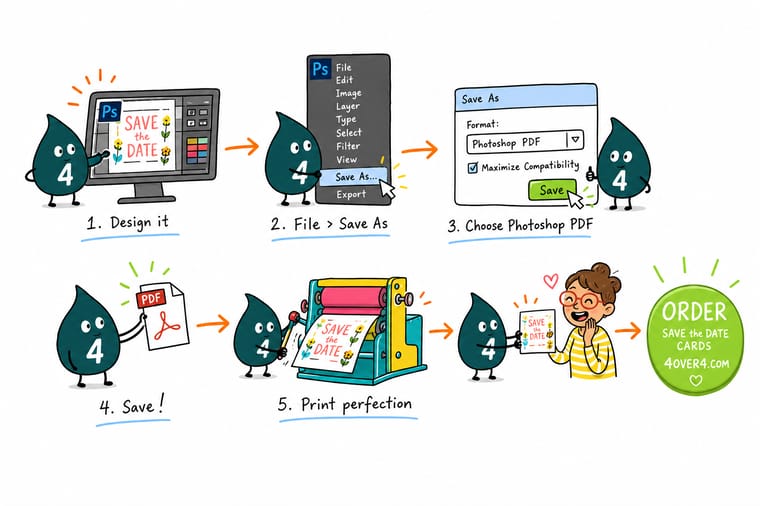
Wally treats the export like packing a suitcase: everything has to be in the file before you close it. Convert to CMYK, set 300 PPI, add the bleed, flatten, and only then save as PDF/X-1a with Press Quality. Get that order right and the PDF you upload is the exact piece 4OVER4 prints, sharp and on time.
Print your design →%22%2F%3E%3Ccircle%20cx%3D%2248%22%20cy%3D%2220%22%20r%3D%2223%22%20fill%3D%22%23334155%22%20opacity%3D%220.15%22%2F%3E%3Ccircle%20cx%3D%2254%22%20cy%3D%2227%22%20r%3D%22-3%22%20fill%3D%22%23334155%22%20opacity%3D%220.1%22%2F%3E%3Crect%20x%3D%2278%22%20y%3D%22-9%22%20width%3D%2233%22%20height%3D%2220%22%20rx%3D%224%22%20fill%3D%22%23334155%22%20opacity%3D%220.08%22%20transform%3D%22rotate(43%2080%2030)%22%2F%3E%3C%2Fsvg%3E)
Diagram
The print-ready PDF checklist, at a glance
Seven moves take a Photoshop file from screen to press: set CMYK, confirm 300 PPI, add a 0.125 inch bleed, flatten, choose PDF/X-1a:2001, start from Press Quality, and preflight. Save this, keep it by your screen, and run it as a checklist before every export.
Prep first, export second. The four setup checks live in your PSD, the three export choices live in the Save Adobe PDF window, and a clean preflight is what makes the upload effortless.
Specs and pricing
Live specs and pricing for your printed piece
When your PDF is ready, size, stock and finish are what is left. Save the date cards run 25 for $19.77, which is $0.79 each, 100 for $42.84 and 500 for $77.99, in 4.25 by 5.5, 5 by 7 or 6 by 6 inches, with matching white wove envelopes as an option.
| Quantity | Price Per Unit | Total |
|---|---|---|
| 25 | 79.1¢ | $19.77 |
| 50 | 50.5¢ | $25.27 |
| 100 | 42.8¢ | $42.84 |
| 200 | 25.8¢ | $51.62 |
| 300 | 20.1¢ | $60.42 |
| 400 | 17.3¢ | $69.20 |
| 500 | 15.6¢ | $77.99 |
| 600 | 15.4¢ | $92.26 |
Print it
Turn your print-ready PDF into a printed piece
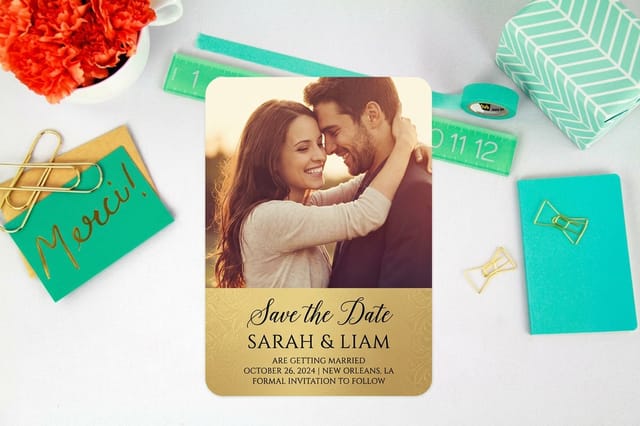
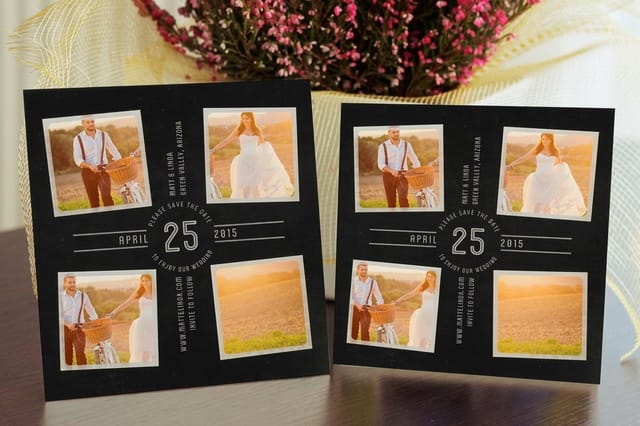
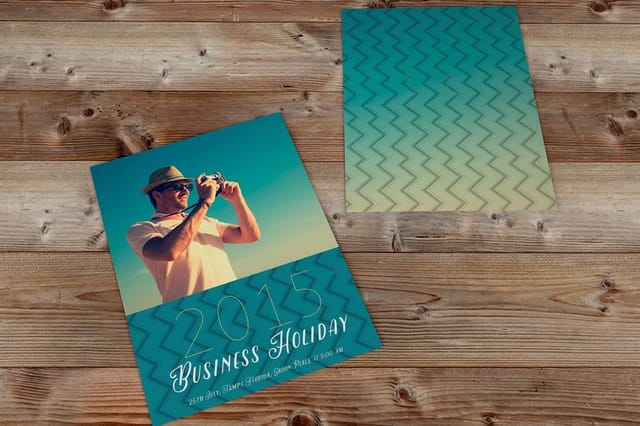
See it in print
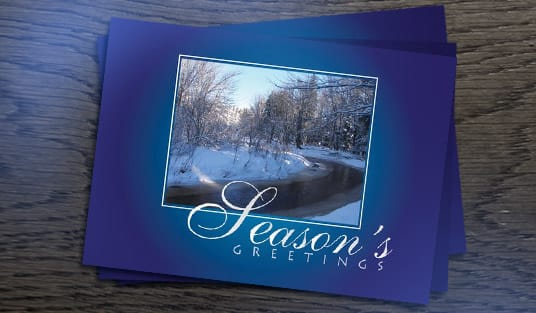
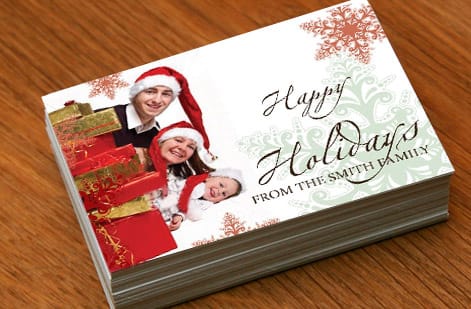
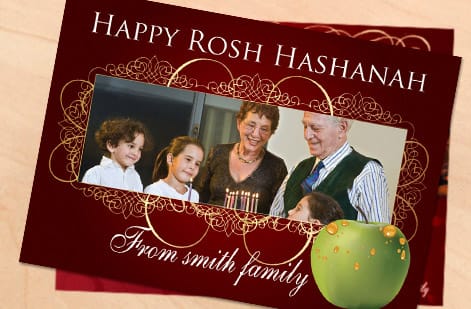
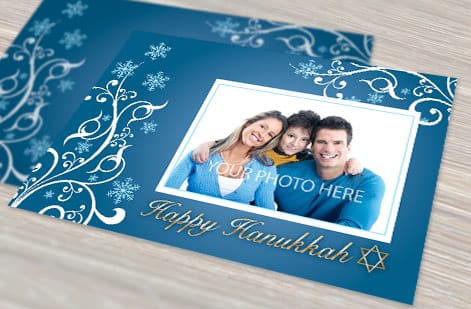
PDFs that went straight to press
Explore more
Where to go next

By the numbers
PDF/X-1a in, printed sheet out
Common Questions
Common questions about saving a print-ready PDF
How do I save a Photoshop file as a print-ready PDF?
Set your document to CMYK, confirm the resolution is 300 PPI, add a 0.125 inch bleed, and flatten the layers. Then go to File, Save As, and pick Photoshop PDF. In the export dialog choose the Press Quality preset, change the standard to PDF/X-1a:2001, turn on trim marks and bleeds, and save. That sequence gives the press a single flattened file with the color, resolution, and cut information it needs.
What is the best PDF setting for printing in Photoshop?
Start from the built-in Press Quality preset and then set the standard to PDF/X-1a:2001. Press Quality keeps images at 300 PPI and embeds fonts, while PDF/X-1a flattens transparency and enforces CMYK so nothing shifts on press. Those two choices together handle almost every commercial print job.
Do I need to convert to CMYK before saving as PDF?
Yes. Screens display in RGB, but presses print in CMYK, and colors that glow on a monitor can dull down once they are converted at the printer. Convert the file yourself with Image, Mode, CMYK Color so you see the real result and can adjust it, rather than leaving that conversion to chance.
What resolution should a print-ready PDF be?
Aim for 300 PPI at the final print size. That is enough detail for crisp text and photos at normal reading distance. Enlarging a smaller image up to 300 PPI does not add real detail, so start with artwork that is already large enough.
Does my PDF need bleed?
If any color, photo, or background runs to the edge of the piece, yes. Extend that artwork 0.125 inch past the trim on every side and turn on trim marks when you export. The bleed gives the cutter a margin of error so you never end up with a thin white sliver along an edge.
What does preflight mean in printing?
Preflight is the pre-press checklist, borrowed from the checks a pilot runs before takeoff. Before a file goes to press you confirm the color mode, resolution, bleed, embedded fonts, and overprint settings. Catching a problem at preflight costs nothing. Catching it after the run is printed costs a reprint.
How much does it cost to print, and how are prices set?
Print cost scales with a few simple levers: quantity, size, paper stock, and finish. Larger runs lower the unit price, heavier stocks and special coatings add to it. At 4OVER4.COM you set each option in the configurator and the price updates live as you go, so you can see the trade-offs before you order.
Get Started
Your PDF is ready. Print it.
Upload your print-ready file to 4OVER4.COM and pick the size, stock, and finish that suits it.
Legal Disclaimer
Gold Standard guarantees apply to all standard orders placed through 4over4.com. Price match requires verifiable proof of a competitor's published price for an equivalent product with matching specifications and turnaround time. Satisfaction guarantee covers manufacturing defects and print quality issues. Contact support with order number and documentation.
