
How to Create a Custom Envelope in Illustrator and Mock It Up in Photoshop


The Adobe workflow end to end: document settings, the flat blank and its flaps, cut versus fold, the glue zones you have to keep clear, a Photoshop mockup that keeps the paper, and the export settings that survive prepress.
Draw a custom envelope in Illustrator as a flat blank: one body panel at finished size, with a side flap, a bottom flap and a seal flap built off its edges, the outer contour united into a single closed cut path and every fold on a separate layer as a dashed spot color line. Add 0.125 inch of bleed past the cut, keep the glue bands and the barcode clear zone free of heavy ink, then place that file into Photoshop as a Smart Object over a photographed envelope and let the photograph supply the shadows. Export as PDF/X-4 with trim marks and document bleed.
Quick answer
One panel, three flaps, and a cut path kept apart from the folds
A custom envelope is drawn open and flat, never closed. Build the body panel at finished size, hang a side flap, bottom flap and seal flap off its edges with Smart Guides on, unite the outer contour into one closed path for the cut, and put every crease on a separate layer as a dashed line in a spot swatch you name DIELINE. Run bleed 0.125 inch past the cut, hold text 0.25 inch inside the folds, and keep ink off the gum strip so the glue still bonds. The Photoshop mockup then places that same file as a Smart Object over a real envelope photograph, with the shading borrowed from the photo rather than painted in.
Set Up the Illustrator Document Before You Draw Anything

Five settings decide whether the file is usable, and all five live in the New Document dialog. Get them wrong and you find out at the proof stage, which is the expensive place to find out.
Set Units to Inches so every number you type matches what the die maker uses. Set Color Mode to CMYK, because starting in RGB and converting later shifts your saturated blues and greens noticeably. Set Raster Effects to High, 300 ppi, which controls how drop shadows and glows rasterise on output. Under Advanced, leave the preview mode on Default. Then open File, Document Setup and set Bleed to 0.125 inch on all four sides.
Size the artboard to the flat blank plus a little breathing room, never to the finished envelope. Turn on Smart Guides with Cmd or Ctrl plus U before you draw the first rectangle, because flap edges have to meet panel edges exactly, and a flap that overshoots by a hundredth of an inch produces a fold line the folder cannot follow.
One more habit worth building now: work in layers from the start. Artwork on one, die line on another, notes on a third. If you are still deciding how the color will be built, our guide to converting RGB to CMYK in Photoshop and Illustrator covers where in the chain to make that switch.
Draw the Die Line: Panel, Flaps, Cut and Fold
An envelope blank is one rectangle with three kinds of flap attached, and you draw it in that order. Start with the body panel, the rectangle that becomes the front and back of the finished envelope, typed into the Transform panel at exact width and height. That panel is roughly a quarter inch larger than whatever goes inside it in both directions, so the card slides in without the corners catching.
| Envelope | Finished size | What it holds | Typical use |
|---|---|---|---|
| A2 | 4.375 by 5.75 in | 4.25 by 5.5 in card | Thank you notes, RSVP cards, small announcements |
| A6 | 4.75 by 6.5 in | 4.5 by 6.25 in card | Invitations and folded note cards |
| A7 | 5.25 by 7.25 in | 5 by 7 in card | Wedding invitations, the most requested size |
| No. 10 | 4.125 by 9.5 in | 8.5 by 11 in sheet folded in thirds | Letterhead, invoices, business mail |
| 6 by 9 booklet | 6 by 9 in | 8.5 by 11 in sheet folded in half | Reports and unfolded marketing pieces |
Now hang the flaps off that panel. The two side flaps run about an inch wide and taper at the outer corners so they tuck without bunching. The bottom flap folds up over both side flaps and usually sits near half the panel height. The seal flap is the one people notice, 1.75 to 2.25 inches deep, and its shape is where a custom envelope earns its name: square, pointed, or a curve drawn with the arc segment tool.
Then split the geometry in two. Select the outer contour of the whole blank and unite it in the Pathfinder panel into a single closed path, which is the cut. Every crease between a flap and the panel is a separate straight segment on a layer of its own, dashed, stroked in a spot swatch named DIELINE with Overprint Stroke ticked in the Attributes panel. Round the corners with the live corner widgets rather than by hand, then Object, Expand Appearance so the shape is real geometry when it reaches us.
The same discipline applies to anything cut to a shape rather than a rectangle, which is most of what sits in the custom shape and die cut collection. If your seal flap carries a logo, build it properly as vector art first: our step by step logo guide covers the construction, and a quick paper prototype from the hand folded envelope tutorial will tell you within five minutes whether your flap proportions actually close.
Bleed, Glue Zones, and the Places You Must Leave Alone

Three areas on an envelope blank behave differently from the rest of the sheet, and every one of them has cost somebody a reprint.
Bleed. Any color that touches a cut edge extends 0.125 inch past it. Not to the artboard, to the bleed box. Die cutting has a small amount of movement in it, and a background that stops exactly on the cut line will show a white sliver on one edge of some sheets. Pull anything you need to read, addresses, logos, legal text, at least 0.125 inch inside the cut, and 0.25 inch inside a fold, because a crease that lands through a word is far more obvious than one through a flat color.
Glue zones. This is the one people miss. Adhesive grabs paper fiber, and a cured ink film is not paper fiber. Heavy coverage on the gum strip along the seal flap, or on the strip where the side flaps overlap the bottom flap, can leave you with envelopes that will not stay shut or that pull apart in the sorter. Keep those bands clear, or drop the coverage there to a light tint. Aqueous coating causes the same problem for the same reason, so a full coating pass has to be knocked out over the glue.
The address side. Keep the bottom right corner of the address panel light. The USPS barcode clear zone runs roughly 4.75 inches in from the right edge and 0.625 inch up from the bottom, and a dark photograph running through it makes the sorter work harder than it should. Stay inside the letter dimensions too: 3.5 by 5 inches minimum, 6.125 by 11.5 inches maximum, at least 0.007 inch thick, aspect ratio between 1.3 and 2.5. Square envelopes fail that last test every time, which is why they carry a nonmachinable surcharge, and it is worth knowing before you fall in love with the shape.
Two shortcuts are worth naming. If all you want is a printed return address or a seal on plain stock envelopes, a custom label at $23.88 does the job without a die at all, and shaped custom labels from $25.00 make a decent wafer seal for the flap. If you are drawing die lines for the first time, the folding logic behind custom box printing is the same idea with more panels, and the shapes in 20 creative custom shaped card ideas show how far a contour can go before it stops being practical.
Mock It Up in Photoshop Without Killing the Paper
The die line file is a flat sheet with dashed lines on it, which sells nothing to a client. The mockup exists to answer one question: what does this look like closed, in a hand, under real light.
Start from a photograph of a blank envelope in the shape you drew, lit from one side so the seal flap casts a visible shadow. In Photoshop, use File, Place Embedded and choose your Illustrator file so it lands as a Smart Object. That matters: a Smart Object keeps the vector data, so you can double click it, fix a color in Illustrator, save, and watch the mockup update rather than rebuilding it.
Now the part that separates a convincing mockup from a sticker. Do not set the artwork layer to Multiply. It is the standard advice and it is half wrong: Multiply does let the paper texture show through, but it also turns every white pixel in your design transparent, so white type on a colored flap vanishes. Leave the artwork on Normal and borrow the shading instead. Duplicate the original photograph, put the copy above the artwork, clip it to the artwork layer with Cmd or Ctrl plus Alt plus G, and set that layer to Multiply. Then desaturate it. The paper grain and fold shadows come through, your whites survive.
Make the artwork follow the paper with a displacement map. Duplicate the envelope photograph, desaturate, apply a small Gaussian blur, flatten it, and save it as its own PSD. Then select the artwork layer, run Filter, Distort, Displace at around 5 horizontal and 5 vertical, and point it at that file. Creases and the slight curve of the flap now bend the design the way ink on paper actually would. Finish with Edit, Transform, Warp to sit the artwork on the flap perspective.
Every part of this transfers to other folded pieces, which is why the workflow in our Photoshop brochure guide reads so similarly. If you want a real sample in your hand rather than a render, print the insert first: custom thank you cards start at $19.77 and tell you more about how a color behaves on stock than any monitor will.
Export a File the Press Can Actually Use
The export is where a good file gets ruined, and it takes about ninety seconds to get right.
Before you save anything: select all type and run Type, Create Outlines, or embed the fonts on export. Open the Links panel and confirm every image is embedded or supplied, and that the effective PPI reads 300 or better after scaling. Delete stray empty paths and hidden layers, because anything hidden in the file is something a prepress operator has to make a judgement call about.
Then File, Save As, Adobe PDF. Choose the PDF/X-4:2008 preset, or Press Quality if your workflow prefers it. In the Marks and Bleeds tab, tick Trim Marks, set the offset to 0.125 inch, and tick Use Document Bleed Settings. Under Output, leave the color conversion set to No Conversion so your CMYK builds pass through untouched. Keep the DIELINE spot layer visible and named, and say in the order notes that it is a guide rather than printed artwork.
One last look at the exported PDF in Acrobat, at 400 percent, along the cut contour. You are checking that color actually runs past the line and that the die line is still a spot color after the round trip. Under Print Production, Output Preview will show you the separations, and DIELINE should appear as its own plate.
When the file is ready, send it over and we handle the die, the fold and the glue. If you want to see how a finished contour holds up before committing to a whole envelope run, the custom printing collection lists everything we cut and fold, and a small run of custom business cards from $17.57 is the cheapest way to check that your color build and your black look right on real stock.
Wally explains the envelope blank
Draw it open, cut solid, fold dashed
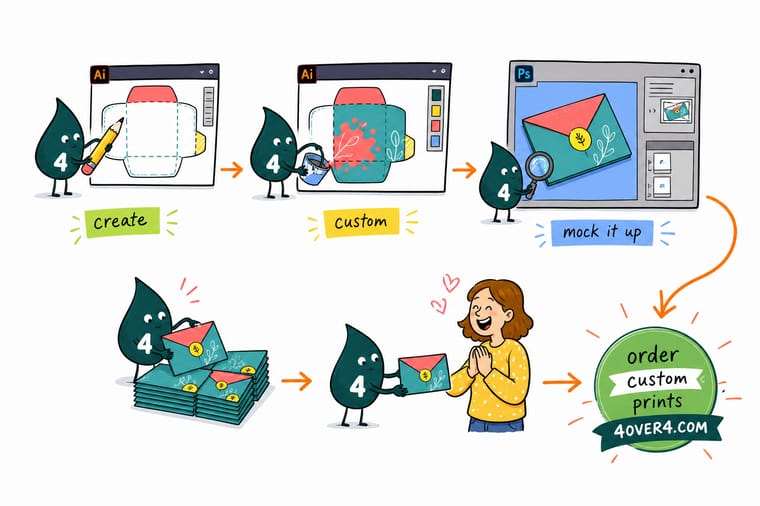
Wally never draws a closed envelope. He draws the panel first, at the size of the card plus a quarter inch, then hangs a flap off each edge. The outline around the whole thing is one closed path, and that is the cut. Every crease is a dashed line on its own layer in a spot color called DIELINE, and that is the fold. He runs the background a sixteenth past the cut so the die has somewhere to land, and he keeps the ink off the gum strip, because glue sticks to paper and not to ink.
Print the cards that go inside →Specs and pricing
The pieces that go with a custom envelope
The insert, the seal and the card that gets tucked in with it, with live configuration choices and starting prices straight from the 4OVER4.COM configurator.
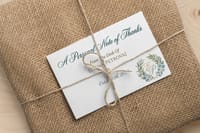
Print it
Order the printed pieces your envelope carries
Explore more
Where to go next

By the numbers
Who cuts and prints your custom envelope
Common Questions
Your custom envelope questions, answered
How big should the Illustrator artboard be for a custom envelope?
Size the artboard to the flat blank, not the finished envelope, then add bleed. Take the body panel at finished size, add roughly an inch for each side flap, about half the panel height for the bottom flap, and 1.75 to 2.25 inches for the seal flap. For an A7 envelope that is 5.25 by 7.25 inches closed, you land near 7.25 by 10.75 inches flat, so a 8 by 11.5 inch artboard with 0.125 inch bleed set in Document Setup gives the blank room to sit without touching the edges. Draw the blank centred on the artboard and let the bleed box, not the artboard edge, be the line your background art runs past.
Do I draw the envelope open or closed?
Open and flat, always. The press prints a sheet, the die cuts the outline, and a folder glues it into an envelope afterwards, so the file has to describe the sheet as it enters the die. Drawing a closed envelope leaves the printer guessing where the flaps go and where the artwork continues around a fold. The only time you draw a closed envelope is for the Photoshop mockup, and even then it is the flat file being warped into a photograph of a closed one.
How do I make fold lines that will not print?
Create a new swatch, set Color Type to Spot Color, name it something unmistakable like DIELINE, and give it a color nobody would use as a design element, usually 100 percent magenta. Stroke every fold line with that swatch, dash it, then open the Attributes panel and tick Overprint Stroke so it does not knock a white gap through the art underneath. Put all of it on a layer named DIELINE and tell us in the order notes that the layer is a guide. Spot channels separate out cleanly, and a die line drawn in a process build gets treated as artwork more often than you would like.
Can I bleed artwork to the edge of an envelope?
On a converted envelope, yes. It prints flat, so color runs 0.125 inch past the cut contour and trims off with the die, exactly like any other die cut job. On a pre-made envelope you cannot, because the press has to run over folded seams and a gummed flap, so most pre-made envelope printing leaves an unprinted margin of about a quarter inch around the printable area and avoids the seams entirely. If your design is a full bleed photograph, that decision is made for you: it has to be converted.
What resolution do images inside envelope artwork need?
300 ppi effective at final printed size, and effective is the word that matters. A 300 ppi photograph scaled to 200 percent in Illustrator is a 150 ppi photograph on press. Open the Links panel, expand a linked image, and read the PPI line: it reports the resolution after your scaling, which is the only number worth checking. Vector logos and type are resolution independent, so keep those as vectors rather than pasting a screenshot of a logo into the file.
Will an odd envelope size still mail at letter rates?
Only inside the USPS letter envelope, which is 3.5 by 5 inches at minimum, 6.125 by 11.5 inches at maximum, at least 0.007 inch thick, and rectangular with an aspect ratio between 1.3 and 2.5. Step outside any one of those and the piece takes a nonmachinable surcharge, which square envelopes hit constantly because a square has an aspect ratio of 1.0. Also keep the bottom right corner of the address side clean: the barcode clear zone runs about 4.75 inches in from the right edge and 0.625 inch up from the bottom, and dark artwork inside it interferes with the sorter.
How do I stop the Photoshop mockup from looking pasted on?
Two things do most of the work. Build a displacement map by duplicating the envelope photograph, desaturating it, blurring it slightly, flattening it and saving that as its own PSD, then run Filter, Distort, Displace on your artwork layer and point it at that file so the design follows the creases in the paper. Then take the shading from the photograph itself rather than painting it: put a Curves or Levels adjustment above the artwork, clip it, and mask in the same highlights and shadows the blank envelope already has. Artwork that ignores the fold shadow reads as a sticker.
Get Started
Got the die line drawn? Let us print it.
Send the flat blank with the cut path and the fold layer separated, and we handle the die, the fold and the glue. Not sure your color build is right yet? Check it on a small run first.
Legal Disclaimer
Gold Standard guarantees apply to all standard orders placed through 4over4.com. Price match requires verifiable proof of a competitor's published price for an equivalent product with matching specifications and turnaround time. Satisfaction guarantee covers manufacturing defects and print quality issues. Contact support with order number and documentation. On-time delivery rate based on tracked orders 1999 to 2026. Individual results may vary based on shipping carrier performance.
