
How to Design a Custom Rack Card in Canva From Blank Page to Print File


The exact canvas size, the bleed toggle nobody finds, the panel order a rack forces on you, and the download settings that produce a PDF a press can actually run.
In Canva, create a custom design at 3.5 by 8.5 inches with the units set to inches, turn on File, Settings, Show print bleed, run every background out to that dashed line, build the back as page 2, then download as PDF Print with crop marks and bleed ticked. The catch is that Canva sizes the canvas to the trim and only adds the 0.125 inch bleed at export, so artwork that stops at the canvas edge cuts with a white sliver. CMYK output is a paid setting, so a free export leaves in RGB and the brightest screen colors land a shade duller on paper.
Quick answer
Canvas at the trim, bleed at export, type inside the margin
Canva sizes your canvas to the trim, not to the bleed. Set 3.5 by 8.5 inches in inches, switch on Show print bleed so the dashed line is visible, and push every background past it. Keep words 0.25 inch inside the trim, load the front on page 1 and the back on page 2, then download PDF Print with crop marks and bleed. Only the top 2.5 inches of the finished card shows in a brochure rack, so that band has to carry the headline on its own.
Set the Canvas Before You Draw a Single Element
Open Canva, choose Create a design, then Custom size. The units dropdown opens on pixels, so switch it to inches first. Then enter 3.5 wide by 8.5 high and create the design.
Now go to File, then Settings, and tick Show print bleed. A dashed rectangle appears just outside your canvas. That gap is 0.125 inch on every side, and it is the only part of the process Canva does not do for you: it will happily let you design right up to the canvas edge and export a file that cuts badly. While you are in that menu, tick Show margins and Show rulers too. The margin guide sits 0.25 inch inside the trim, which is exactly where your text should stop.
The mental model worth carrying: the canvas is the trim, the dashed line is the bleed, and the margin is the safe area. Backgrounds go to the dashed line. Words stay inside the margin. Everything in between is a gamble on how accurately a guillotine lands, and the tolerance on a production cutter is real, not theoretical.
If you are still deciding whether a rack card is the right format at all, our guide to what a rack card is and how to get it picked up covers where the format wins before you commit an afternoon to the layout.
The Front, the Back, and the Only 2.5 Inches Anyone Sees
A rack card is 8.5 inches tall and a brochure pocket hides most of it. What faces the room is roughly the top 2.5 inches. Anything below that is only read once someone has already reached out and pulled the card.
So the top band carries three things and nothing else: who you are, what you do, and the one line that makes a stranger reach. A centered logo halfway down a beautifully balanced layout is invisible in a rack, which is the single most common mistake in a Canva rack card. If the card will only ever be handed over or left on a counter, ignore the rule and balance the page properly. Design for where it actually sits.
Build the back as page 2 of the same Canva design, not a second file. Duplicate page 1 with the plus icon under it, strip it back, and put the detail there: the list, the map, the hours, the code. The PDF Print export writes both pages into one file and the printer reads page 1 as the front. Keep the same bleed discipline on page 2, because both sides are cut by the same blade at the same time.
For the content itself rather than the setup, our rack card design breakdown and the captivating rack card design guide both work through what to put in that top band.
Exporting a PDF a Printer Will Accept
Share, then Download, then set File type to PDF Print. Tick Crop marks and bleed. If you are on Canva Pro, also tick Flatten PDF and set the color profile to CMYK. Then download and open the file before you upload it anywhere.
Checking the PDF takes two minutes and catches almost everything. Zoom to 400 percent and look at the corners: your background should run past the crop marks, not stop short of them. Look at the smallest type and check it is crisp rather than soft, which is the tell for an upscaled image or a rasterized effect. Count the pages: two, front then back.
Three limits are worth naming because no Canva tutorial mentions them. Canva has no effective resolution warning, so a 600 pixel logo stretched across a 3.5 inch panel exports without complaint and prints fuzzy. Canva cannot build a spot channel, so foil, spot gloss and a die line have to be ordered as print options rather than drawn in the file, which is why a shaped card belongs in our custom shape and die cut range rather than in a Canva rectangle. And Canva has no rich black, only hex values, so a large black panel prints flatter than a designer would build it. On a rack card that is usually acceptable. On custom box printing, where the flat layout has to line up with a supplied dieline, Canva stops being the right tool altogether.
If a shape rather than a rectangle is what you are actually after, these 20 custom shaped card ideas show what a cutting die makes possible.
The Same Canva Setup on Everything Else You Hand Out
Nothing above is specific to rack cards. Canvas at trim, bleed at export, type inside the margin: that is the whole method, and only the numbers change. A rack card rarely travels alone, so here is what usually goes with it.
| Piece | Trim size | What it does next to a rack card | Starts at |
|---|---|---|---|
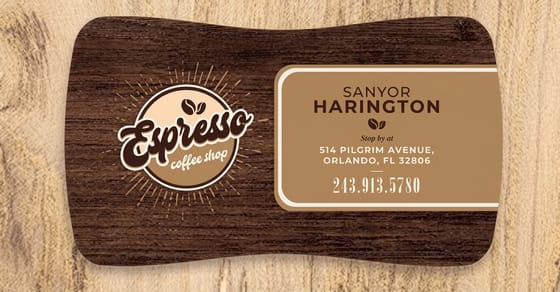
| Custom business cards | 3.5 x 2 in | The handoff piece. Same bleed rules on a quarter of the canvas, so 0.125 inch matters four times as much. | $17.57 |
| Business card stickers | 3.5 x 2 in | Puts the same offer on a bag, a folder or the rack itself, where a card cannot stay put. | $10.76 |
| Business card magnets | 3.5 x 2 in | Outlives the rack card. It ends up on a fridge instead of a recycling bin. | $19.68 |
| Blank envelopes | #10, 9.5 x 4.125 in | A 3.5 by 8.5 rack card slides in flat with no fold, which is half the reason the size exists. | $13.17 |
The one adjustment when you scale down: on a 3.5 by 2 inch card, 0.125 inch of bleed is a much bigger share of the surface than it is on a rack card, and a cut that drifts is far more obvious. Keep type 0.125 inch off the trim as an absolute floor and 0.25 inch if the layout allows it. A niche variant such as interior design business cards uses the same 3.5 by 2 canvas and the same margins.
Browse the wider custom printing collection if you want to see which pieces take your own trim size, and the rest of the design process guides if the file handoff is the part you want to get right.
Wally sets up the canvas
3.5 by 8.5, bleed on, words off the edge
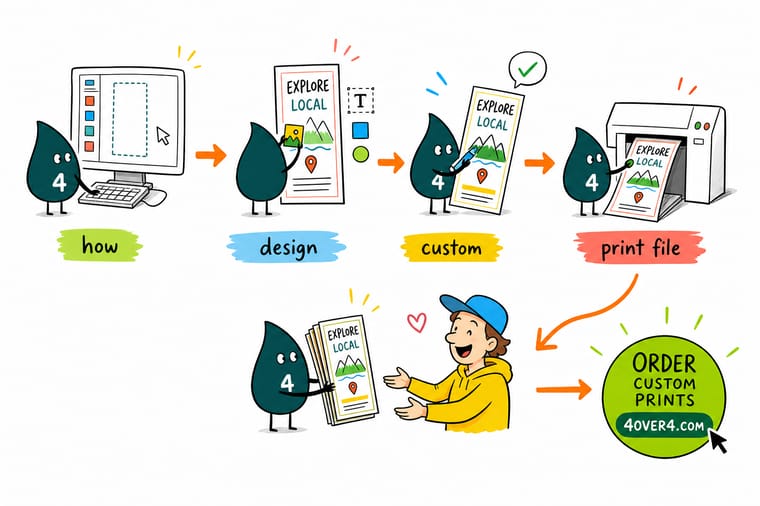
Wally opens a custom canvas at 3.5 by 8.5 inches with the units switched to inches, then ticks Show print bleed so the dashed line appears. He drags the photo past that line, pulls every word back 0.25 inch inside the solid one, builds the back as page 2, and downloads a PDF Print with crop marks and bleed. He knows the rack will only show the top 2.5 inches, so the headline goes up there and the detail goes on the back.
Print the cards that go with it →Specs and pricing
Sizes, stocks and starting prices for the pieces that travel with it
Live configuration options and starting prices straight from the 4OVER4.COM configurator, so you can check the trim size before you set the canvas.


Print it
Order the print that carries the same artwork
Explore more
Where to go next
By the numbers
Print you can hand over with confidence
Common Questions
Canva rack card questions, answered
How can I create custom rack cards?
Open a custom size in Canva or any design app at 3.5 by 8.5 in, turn on the bleed guide, and keep the headline, the logo, and the one reason to pick the card up in the top 2.5 in, because a brochure rack hides the rest. Build the back as page 2, run every background past the bleed line, hold text 0.25 in inside the trim, and export a PDF Print with crop marks and bleed. Upload that file to the standard rack cards configurator, pick the stock and quantity, and the price updates as you go.
Is Canva good for making cards?
For a rack card, a flyer, or a business card in a plain rectangle, yes, as long as you set the canvas in inches, design past the bleed line, and export as PDF Print. Where it falls short is the print specific layer: Canva cannot build a spot channel for foil, spot gloss, or a die line, has no resolution warning when a photo is too small, and exports CMYK only on a paid plan. For a shaped card or a foil finish, supply a flat file and order the finish as a print option.
What size should a rack card be in Canva?
Set a custom canvas of 3.5 by 8.5 inches. That trim size exists for two reasons: it drops into a standard brochure rack pocket, and it slides flat into a #10 envelope, so the same piece works on a counter and in the mail. The other sizes you will see are 4 by 9 and 3.67 by 8.5. Both are fine, but check what your printer lists before you build, because Canva templates labeled "rack card" are not all the same size and resizing a finished layout is a Canva Pro feature.
Does Canva add bleed automatically?
No, and this is where most Canva print files fail. The canvas you set is the trim size. Canva only adds the 0.125 inch bleed margin when you download a PDF Print file with "Crop marks and bleed" ticked, and it pulls that extra area from whatever your artwork happens to be sitting on. If your background stops at the canvas edge, the bleed area is empty white, and after cutting you get a thin white sliver along one side. Turn on File, Settings, Show print bleed so the dashed line is visible while you work, and stretch every background element out to it.
Can Canva export a CMYK PDF?
Only on a paid plan. Canva Pro adds a color profile choice in the PDF Print download panel, where you can pick CMYK. Free accounts export RGB and the printer converts on receipt. The conversion is predictable rather than dangerous: saturated blues, bright greens and fluorescent oranges lose some punch, while blacks, grays, most reds and skin tones land close. If a specific brand color has to match, ask for a printed proof rather than trusting the screen.
What resolution do photos need for a rack card?
A photo that fills a 3.5 by 8.5 inch card needs roughly 1,050 by 2,550 pixels to hit 300 dpi, and about 1,125 by 2,625 to cover the bleed as well. Canva does not warn you when an image is too small for its frame, it simply scales it up and the softness only shows on paper. Upload the largest version of the file you have, and if a logo is only available as a small web PNG, ask for the vector or have it redrawn before printing rather than after.
Can I add spot gloss, foil or a die cut shape from Canva?
Not from Canva alone. Those finishes need a separate layer telling the machine where the varnish, foil or blade goes, and Canva has no way to build or export one. A drawn gold shape is just yellow ink on the sheet. If you want a real foil or a shaped card, either supply a plain flat file and order the finish as a print option, or move the layout into a design application that can output a second spot channel.
Why does my printed rack card look different from the Canva screen?
Three causes, in order of likelihood. Your monitor is backlit and paper is not, so everything reads about a step darker on stock. The file went out in RGB and was converted to CMYK on our side, which flattens the brightest colors. And a large black panel built from a plain hex black prints as a single flat black rather than the deeper mix a print designer would specify, which reads slightly washed next to rich photography. Order a printed sample of a stock you like before committing to a long run.
Get Started
Got the file ready? Let us cut it straight.
Upload the PDF, pick a stock, and we handle the bleed, the trim and the color conversion so the printed piece matches what you built.
Legal Disclaimer
Gold Standard guarantees apply to all standard orders placed through 4over4.com. Price match requires verifiable proof of a competitor's published price for an equivalent product with matching specifications and turnaround time. Satisfaction guarantee covers manufacturing defects and print quality issues. Contact support with order number and documentation. On-time delivery rate based on tracked orders 1999 to 2026. Individual results may vary based on shipping carrier performance.
