
Custom Sleeve Boxes and How to Size the Sleeve to Its Tray


A sleeve is the easiest packaging structure to design and the easiest to get wrong by a sixteenth of an inch. Here is what a sleeve box is, how it differs from a drawer box and a belly band, and the arithmetic that makes it fit.
A sleeve box is two pieces: a printed band of board with both ends open, sliding over a separate tray, drawer or plain box that holds the product. You size the sleeve from the tray's OUTSIDE dimensions, which means adding two board calipers to the quoted interior, then adding about 1/32 inch of clearance per side so it slides without scuffing. Run the sleeve roughly 3/8 inch shorter than the tray so a thumb has something to push against.
Quick answer
Two pieces, one tolerance, and the number everyone measures wrong
The sleeve holds nothing, so the tray decides the structure and the sleeve only has to clear it. Take the tray's quoted interior, add two board calipers to the width and the depth to get its real outside size, then add roughly 1/32 inch per side of clearance. Cut the sleeve height back about 3/8 inch so a thumb can push the tray out. Everything after that is finish, and finish is what decides whether the sleeve glides or grabs.
What a Sleeve Box Is, and the Three Shapes It Takes
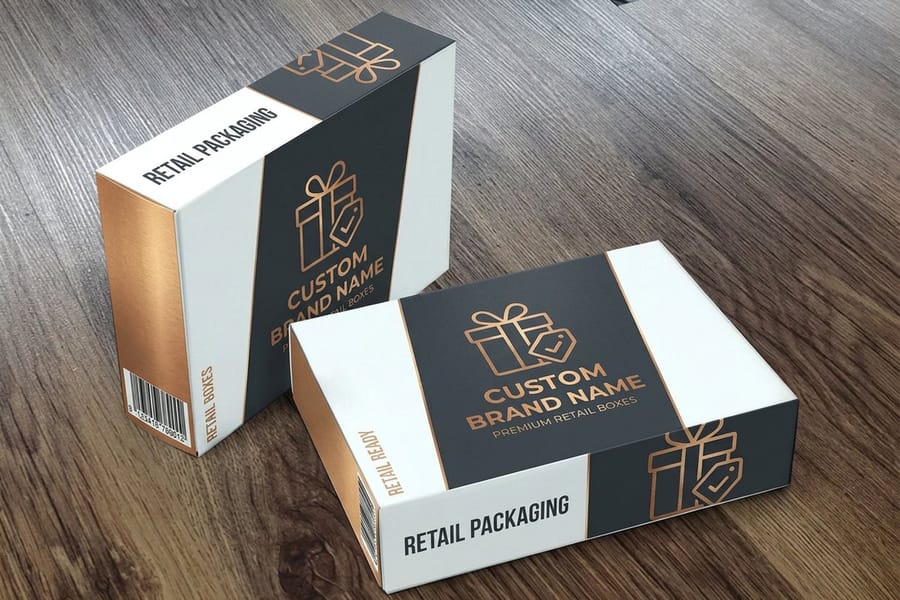
The sleeve does no structural work. It is a loop of board with both ends open, and everything it appears to hold is actually held by the tray inside it. Once that is clear, the rest of the decisions get easier, because you are specifying two products that have to meet at a tolerance rather than one box.
Three structures use the same idea, and they get muddled constantly in briefs.
| Structure | What it is | How it opens | Where it fits |
|---|---|---|---|
| Sleeve over a tray | A full width printed band that covers the sides and the top face of a separate tray. | The tray lifts out, or the sleeve lifts off, depending on which is held. | Cosmetics, tea, candles, subscription boxes and anything with variants that share one tray. |
| Drawer or matchbox | A rigid outer shell with an inner tray that only travels one way, usually with a ribbon or a thumb notch. | The tray slides out along its length like a matchbox. | Gifting, jewelry and electronics, where the slow reveal is the point. |
| Belly band | A narrow band, typically a third of the box height or less, wrapped around the middle. | Slides off the same way, but covers far less. | Adding a logo, a seasonal message or a batch panel to a box that is already printed. |
All three trade the same way. You spend more than you would on a single tuck box, because you are buying two pieces and two setups, and you get back a pack that opens like an object rather than a carton, plus the ability to change the artwork on the cheaper half. That is why brands with eight scents order one tray and eight packaging sleeves instead of eight boxes.
How to Size the Sleeve to the Tray Without Guessing

Every sleeve that arrives too tight, and most that arrive too loose, came from one error: the tray was measured on the inside. Quoted tray dimensions describe the space your product occupies. The sleeve wraps the exterior, and board has thickness.
- Start with the tray interior. Say 6 by 4 by 2 inches, written length by width by height, which is the order every packaging quote uses.
- Add two board calipers to the width and the depth. A 24pt board is 0.024 inch thick, so two walls add 0.048 inch. The tray now measures about 6.05 by 4.05 outside.
- Add the clearance. Roughly 1/32 inch per side, which is 1/16 inch on each of the two dimensions. The sleeve interior lands near 6 1/8 by 4 1/8 inches.
- Cut the height back for a reveal. Run the sleeve about 3/8 inch shorter than the tray, so a 2 inch tray takes a 1 5/8 inch sleeve and a thumb has an edge to push.
- Work out the flat length. The sleeve wraps two widths and two depths, so add those four numbers, then add a glue lap of 3/8 to 1/2 inch. Our guide to measuring a box walks the same arithmetic on other structures.
Two habits keep it honest. Write every dimension on your dieline as inside or outside, spelled out, because a number with no label is the thing that gets misread on press. And ask for a physical proof of both pieces together before the full run, since a fit tolerance this small cannot be judged on a flat PDF.
If the tray you are sizing to is one of ours, the outside dimensions come straight off the product page. Retail boxes and roll end tuck top boxes both list their board weight, which is the number you need for step two.
Friction Is What Actually Ruins a Sleeve

Two packs built to identical dimensions can behave completely differently, because clearance is only half the equation. The other half is what the two surfaces do when they rub.
Gloss laminate against gloss laminate is the easiest combination there is. The sleeve drops on with almost no pressure and comes off clean, which is why it is the default for anything a customer will open and close in store. Matte laminate is slightly grippier but still forgiving. Soft touch is the trap: it feels wonderful and it grabs, so a soft touch sleeve over a soft touch tray at minimum clearance binds, and the customer pulls harder, and the corner of the sleeve tears. Uncoated kraft against uncoated kraft grabs hardest of all and also transfers fibre, which shows as a dull scuff line on the tray after a few cycles. If you want the kraft look, run the sleeve at the loose end of the clearance range, or laminate one of the two pieces so there is a slick surface in the pair.
Grain direction matters for a different reason. Board folds cleanly along the grain and cracks across it, so the sleeve wants its grain running parallel to the four score lines. Get it wrong and the printed corners craze, which is most visible on dark solids and metallic inks. This is worth naming in your file notes rather than assuming, and it is the same rule that governs cardstock against corrugated when you pick the tray material.
One more limit worth knowing early. A sleeve adds no crush resistance whatsoever. If the tray collapses under a stack, the sleeve buckles with it, so board weight is decided by the tray and the sleeve simply follows it for a consistent look.
Artwork, Print Faces, and When a Sleeve Is the Wrong Call
A sleeve gives you a continuous wrap with no flaps interrupting it, which is the best surface in packaging for artwork that has to run around a corner. Build it as one flat panel with the four score positions marked, keep barcodes and legal text at least 1/4 inch off every score, and remember that the two ends are open, so anything you place near them is visible from the side rather than framed.
Printing the inside is the cheap upgrade most brands skip. The interior of the sleeve faces the customer for a second while the tray is being pulled out, so a message, a pattern or a thank you there costs one extra print pass and does real work. If the budget only stretches to one surface, spend it there rather than on a spot finish nobody sees.
There are jobs where a sleeve is the wrong answer, and it is worth saying so before the dieline exists. Anything that has to ship on its own needs a sealed structure, not two loose pieces. Anything sold hanging on a peg needs a header, which a sleeve cannot carry. Anything with a very low unit price rarely justifies two setups, and a printed insert inside a single carton usually delivers more perceived value per dollar. For those, browse the full range on custom box printing and start from a structure that closes.
When you are ready to build the file, start from a correctly scored layout in the blank template library and follow our packaging file preparation guide for bleed, dieline layers and colour. Free proofs come with every packaging order at 4OVER4.COM, so the fit gets checked before the run, not after it.
Wally explains sleeve boxes
Measure the tray outside, then leave it room to slide
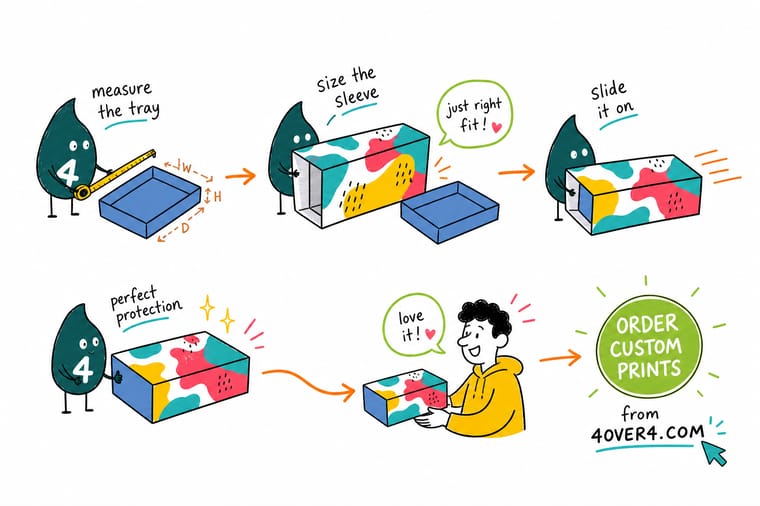
Wally builds the tray first, because the tray is the part that carries the product. Then he measures the tray on the OUTSIDE, adds two board thicknesses to the width and the depth, and leaves about a thirty-second of an inch of air on each side so the sleeve slides without dragging on the print. He cuts the sleeve a little shorter than the tray so there is an edge to push, and if both pieces are soft touch or bare kraft he opens the gap a touch more, because those surfaces grab. Then he checks it on a real proof, not on screen.
Order packaging sleeves →Specs and pricing
Sleeves, trays, and what each half costs
A sleeve program is two line items. Configure the sleeve and the tray side by side, with sizes, quantities and starting prices straight from the 4OVER4.COM configurator.

Print it
Order the sleeve and the tray that fits it
Explore more
Where to go next

By the numbers
Packaging you can count on at 4OVER4
Common Questions
Your sleeve box questions, answered
What is a custom sleeve box?
It is a two piece pack. A printed sleeve, which is a band of board glued into a loop with both ends open, slides over a separate tray, drawer or plain box that actually holds the product. Nothing about the sleeve holds anything in place, so the tray has to be structurally sound on its own. The sleeve is where the branding, the ingredient panel and the barcode usually live, which is why a lot of brands run one tray and swap sleeves per variant instead of tooling a new box for each flavor or scent.
How much clearance should there be between the sleeve and the tray?
About 1/32 inch per side, so roughly 1/16 inch added to both the width and the depth of the tray measured on the outside. That is the range where a sleeve slides with light thumb pressure and still holds position when the pack is tipped. Push it tighter and the sleeve drags on the printed tray and burnishes it, which shows up worst on dark solids. Open it beyond about 1/8 inch total and the sleeve travels inside a shipping carton and arrives half off.
Do I measure the tray inside or outside for the sleeve?
Outside, always, and this is the mistake that turns up on the majority of first sleeve orders. Tray dimensions on a quote describe the interior, because that is the space your product has to fit. The sleeve wraps the exterior, so add two board calipers to the width and to the depth first. A 24pt board is 0.024 inch thick, so a 6 by 4 inch interior becomes about 6.05 by 4.05 outside before you have added any clearance at all.
Sleeve or belly band, which one should I use?
A belly band is a narrower version of the same idea and it costs less because it uses less board, but it only covers a strip. If the panel has to carry a full ingredient list, a nutrition panel or artwork that wraps, use a full sleeve. If the tray is already printed and the band only has to add a logo, a batch number or a seasonal message, a band does the job and you can reprint it cheaply when the message changes. Bands also flex more in transit, so they want a tighter fit than a sleeve.
Can a sleeve box be shipped on its own?
Not safely. A sleeve and tray combination is retail packaging, not a shipper. There is nothing sealing the ends, so a courier belt will work the tray out of the sleeve, and the printed faces scuff against everything else in the truck. Pack it inside a corrugated mailer for ecommerce. Our guide on mailer boxes versus shipping boxes covers the outer choice, and if you want the outer to be part of the experience, a printed kraft mailer does both jobs.
What does a custom sleeve cost at 4OVER4.COM?
Packaging sleeves start at $438.25 and the tray is a separate line. Retail boxes start at $711.78, roll end tuck top boxes at $711.78, and custom kraft boxes at $711.78, so a full sleeve and tray program starts around the four figure mark for a first run. Packaging is a bulk product, so the per unit cost falls steeply with quantity, and the sleeve is the cheaper half to reprint later when only the artwork changes.
Get Started
Ready to spec a sleeve that fits first time?
Pick the tray, pick the board, and we cut the sleeve to clear it. Free proofs on every packaging order, so the fit is checked before the run.
Legal Disclaimer
Gold Standard guarantees apply to all standard orders placed through 4over4.com. Price match requires verifiable proof of a competitor's published price for an equivalent product with matching specifications and turnaround time. Satisfaction guarantee covers manufacturing defects and print quality issues. Contact support with order number and documentation. On-time delivery rate based on tracked orders 1999 to 2026. Individual results may vary based on shipping carrier performance.
