
How to Design Shirts That Print Sharp on Real Fabric


Artwork prep, placement measured in inches from the collar seam, and the limits each print method puts on your design before you commit to a run.
Design shirts at full print size in vector, on a canvas set to the exact garment color, and measure every placement down from the back collar seam. Three things then decide whether the artwork survives the fabric: line weight, the number of ink colors, and the print method you chose before the design was finished. Adult center chest art runs 10 to 12 inches wide starting about 3 inches below the collar seam, with roughly 12 by 16 inches as the platen ceiling.
Quick answer
Full size artwork, garment color canvas, collar seam as the datum
A shirt design succeeds or fails on four numbers, not on taste. Build the file at the exact printed dimensions, in vector where you can and at 300 DPI where you cannot. Set the canvas to the real garment color so nothing depends on white paper. Keep strokes at 1 point or heavier and text at 8 point or larger, because the weave swallows anything thinner. Then measure the placement down from the back collar seam, where 10 to 12 inches wide starting 3 inches down is the standard adult front, and 12 by 16 inches is as far as the platen reaches.
Pick the Shirt Before You Draw Anything
The garment is not a background. It is a surface with a color, a texture and a set of seams, and all three change what your artwork can do.
Color comes first. A design built on white paper and then dropped onto a navy shirt loses every element that quietly relied on white showing through. Open a swatch in the exact garment color and put your artwork on top of it while you work, not at the end. If the design has to work on more than one shirt color, build a version for each rather than hoping one file covers all of them, and our roundup of shirt and ink color pairings is a shortcut to combinations that already work on fabric.
Texture is next. A ringspun cotton tee has a finer surface than a heavy open weave, and fine halftone dots hold better on the smoother one. Silk T-Shirts and Premium T-Shirts both start at $21.96, and the difference between them shows up most in small type and delicate line work. Our breakdown of premium, silk and suede shirts covers how each one takes ink.
Then the seams. A printer needs the print area flat on a platen, so nothing can cross a side seam, a collar rib or a pocket edge. That is also why the neckline matters more than people expect: a wide scoop pushes the usable chest area down by an inch or more compared with a standard crew, which is worth checking in the neckline guide before you finalize a tall design.
Set the File Up the Way the Press Wants It
Most rejected shirt files fail for the same three reasons: wrong size, live fonts, and color specified as a screen value instead of an ink.
Size. Build the document at the printed dimensions. An 11 by 14 inch front graphic is an 11 by 14 inch artboard. If the art is vector, that is the end of the conversation. If it is a raster image, it needs to be 300 DPI at that size, which works out to about 3,300 by 4,200 pixels. A logo pulled off a website is typically 72 DPI and a few hundred pixels wide, and no amount of upscaling puts detail back that was never captured.
Fonts and effects. Convert all type to outlines and expand strokes, drop shadows and transparency before you send the file. A font that is not embedded gets substituted somewhere down the line, and a live drop shadow on a garment print usually separates into a muddy halftone nobody asked for.
Color. Screen printing mixes physical ink, so a Pantone number is a real instruction and a hex code is a guess. Give the ink colors you want by Pantone reference. Direct to garment printing is closer to a CMYK process, which is why bright RGB blues and neon greens land duller than they look on a backlit monitor; our note on CMYK versus RGB for print explains what shifts and why. If you are unsure which format to export, the file type guide is the short version, and correctly sized starting layouts live in the blank template library.
Placement, Measured From the Collar Seam

Placement is where good artwork most often goes wrong, and it is fixable with a tape measure. Every measurement below starts at the back collar seam, because that seam is in the same relative spot on every size while the shoulder and the hem are not.
| Placement | Typical width | Where it starts | What it suits |
|---|---|---|---|
| Center chest | 10 to 12 in | About 3 in below the collar seam | Event art, band and merch graphics, anything meant to be read across a room. |
| Left chest | 3.5 to 4 in | Top of the mark near the armpit line, 3 to 4 in off center | Company logos, uniforms, staff shirts, polite branding. |
| Upper back | 10 to 12 in | 2 to 3 in below the collar seam | Team names, sponsor blocks, tour dates. |
| Sleeve | 2.5 to 3.5 in | About 1 in above the cuff hem | Numbers, small marks, a second logo on a uniform. |
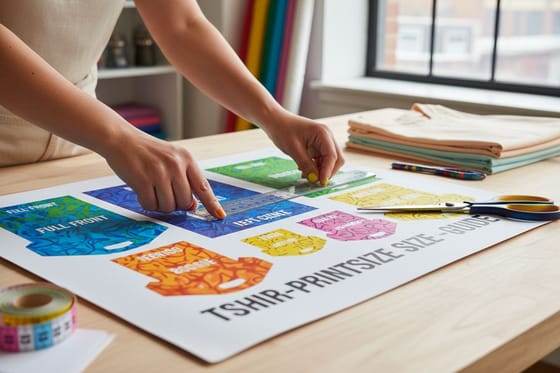
Two limits sit behind that table. The platen caps an adult print at roughly 12 by 16 inches, so a design taller than 16 inches has to be redrawn rather than shrunk at the last minute. And a single run shares one set of art across the whole adult size range, so a graphic sized for a 3XL looks oversized on a small. Size for a medium and the run reads consistently. For a placement by placement breakdown with more sizes, the t-shirt print size guide goes deeper, and design sizes for shirts covers the youth and womens cuts.
Design Inside the Limits of the Print Method
The method is chosen before the artwork is finished, or the artwork gets chosen for you. Each one holds a different kind of detail, and each one fails in a specific way.
| Method | Handles well | Where it breaks | Cost shape |
|---|---|---|---|
| Screen printing | Solid spot colors, bold type, heavy coverage, big runs. | Photographs and soft gradients, because halftones under about 25 percent coverage break up on the weave. | Setup per color, then cheap per shirt. Best value once the run gets long. |
| Direct to garment | Photographs, gradients, unlimited colors, one off prints. | Very fine white knockouts on dark shirts, where the underbase softens the edge. | Little setup, flatter per shirt price. Good for small quantities. |
| Cut vinyl | Crisp solid shapes, names and numbers, one or two colors. | Anything with gradients, small counters in letters, or more than a few colors, since each color is a separate cut layer. | Priced by color layer and area. Fine for a handful of shirts. |
The practical rule: count the colors in your design before you fall in love with it. Dropping from five inks to two on a screen printed run removes three screens from the setup, and it usually makes the design stronger. If your art is a photograph, stop trying to force it onto vinyl. Vinyl T-Shirts start at $21.96 and are the right call for names, numbers and clean logos, while a full color image belongs on a printed t-shirt run instead.
If you are weighing two methods against each other, we compare them directly in screen printing versus vinyl printing, in vinyl versus screen t-shirt printing, and against stitching in DTG versus embroidery.
Proof the Design Before You Order the Run
Three checks catch nearly everything, and all of them take about ten minutes.
- Print the art at 100 percent on plain paper and hold it against a real shirt on a table. A design that looked balanced at 30 percent zoom on a laptop is often two inches too small in the hand.
- Read the smallest element from arm length. If a phone number, a web address or a legal line is not comfortably readable, it will not survive the fabric either. Bump the weight or cut the element.
- View the mockup on the actual garment color at the size it prints. Light gray artwork on an ash shirt disappears in a way that never shows up on a white background.
Then order one before you order fifty. A single shirt tells you what the ink feels like, how the underbase sits, and whether your left chest logo reads as confident or as an afterthought. For a full walkthrough of the ordering steps, see how to make custom t-shirts, and for staff and uniform runs the work shirt buyer guide covers sizing across a team. Youth orders go through Kids T-Shirts as their own line, and the full range sits in t-shirt printing.
Wally explains shirt layout
Measure from the collar seam, then draw
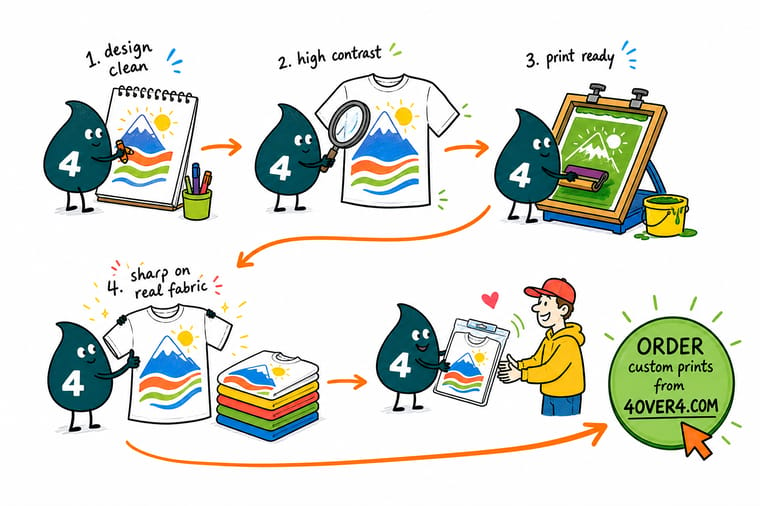
Wally lays the shirt flat, finds the back collar seam and drops 3 inches. That is where the top of the chest graphic goes, and it lands in the same spot on a small and on a 3XL. He sizes the art 10 to 12 inches wide, keeps every stroke at least 1 point, and puts the whole thing on a canvas the same color as the shirt so nothing secretly depends on white. Then he counts the ink colors, because every extra color is another screen on the setup.
Print your shirt design →Specs and pricing
Shirt options, sizes, and starting prices
Compare the shirt lines side by side, with live configuration choices and starting prices straight from the 4OVER4.COM configurator.



Print it
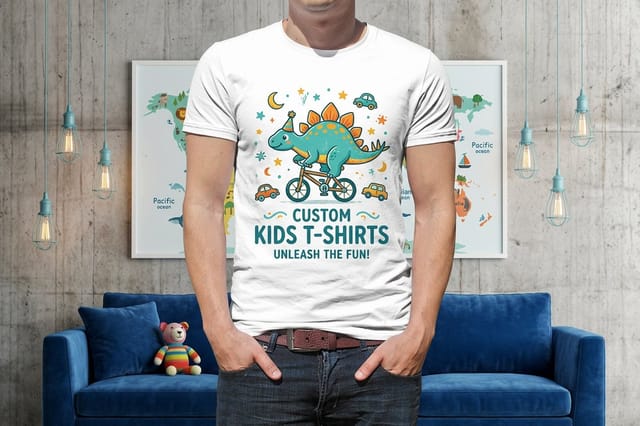
Put the design on a shirt
Explore more
Where to go next
By the numbers
Apparel printing you can count on at 4OVER4
Common Questions
Your shirt design questions, answered
What size should a t-shirt design be?
A full front graphic on an adult shirt is usually 10 to 12 inches wide, and 12 by 16 inches is the practical ceiling because that is about as far as the platen reaches. A left chest logo is 3.5 to 4 inches wide. Build the file at those exact dimensions rather than scaling later, because scaling a raster file up is what turns crisp edges into soft ones. If you are choosing between a bold 11 inch graphic and a cautious 8 inch one, the 11 inch version almost always looks more intentional on the body.
What file format should I send for shirt printing?
Vector is first choice: an AI, EPS, PDF or SVG with all fonts converted to outlines and all effects expanded. It cuts cleanly for vinyl and separates cleanly for screens. If the artwork is a photograph or a painted illustration, send a PNG with a transparent background at 300 DPI at final print size. Avoid JPEG for anything going on a garment, because JPEG has no transparency and you end up with a visible white box around the design.
Can I put a photograph on a shirt?
Yes, with direct to garment printing, which sprays ink much like an inkjet and handles gradients and skin tones. Screen printing can reproduce a photograph through halftone dots, but dots under roughly 25 percent coverage break up on a coarse cotton weave, so the soft parts of the image go patchy. Cut vinyl cannot do it at all: vinyl is solid color cut from a sheet, so every color is a separate layer and a photograph has thousands.
How do I design artwork for a dark shirt?
Set your canvas background to the actual garment color and design on top of it, then check that nothing in the artwork relies on white paper showing through. On dark garments the printer lays a white underbase under the colored inks so they do not sink into the fabric. That underbase makes colors pop but adds a layer, so very fine detail and thin knockout lines lose a little sharpness. Give small text a bit more weight than you would on a white shirt.
Where exactly does a left chest logo go?
On the wearer left, roughly 3.5 to 4 inches wide, with the top of the logo about level with the armpit and 3 to 4 inches in from the center of the chest. Check it against a real shirt rather than a flat mockup, because the pocket seam on a pocketed style and the ribbing on a heavier collar both eat into that area. A logo pushed too close to the collar looks like a mistake even when the measurement is technically fine.
Does the design change between a small and a 3XL?
Not unless you pay for it. A run uses one set of screens or one print file across the whole size range, so the same graphic prints at the same dimensions on every adult size. Size it to look right on a medium and it will read as slightly bolder on a small and slightly smaller on a 3XL, which nobody notices. Youth shirts are the exception and should be ordered as their own line with the art scaled down.
How much does a printed shirt cost to start?
Premium T-Shirts, Vinyl T-Shirts, Silk T-Shirts and Kids T-Shirts all start at $21.96 at 4OVER4.COM, and the per shirt price drops as quantity climbs because the setup cost spreads across the run. Design decisions move that number too: fewer ink colors means fewer screens, and a one color print on a light garment is the cheapest thing you can ask a shop to do.
Get Started
Ready to see your design on fabric?
Upload print ready art, pick your shirt line and colors, and we print a run that matches what you drew, down to the placement.
Legal Disclaimer
Gold Standard guarantees apply to all standard orders placed through 4over4.com. Price match requires verifiable proof of a competitor's published price for an equivalent product with matching specifications and turnaround time. Satisfaction guarantee covers manufacturing defects and print quality issues. Contact support with order number and documentation. On-time delivery rate based on tracked orders 1999 to 2026. Individual results may vary based on shipping carrier performance.
