
How to Set Up an Event Tent Safely (Step-by-Step Guide)


Tobias is our voice for cutting, binding and large format, built from the knowledge of our production team, with over 20 years in printing.
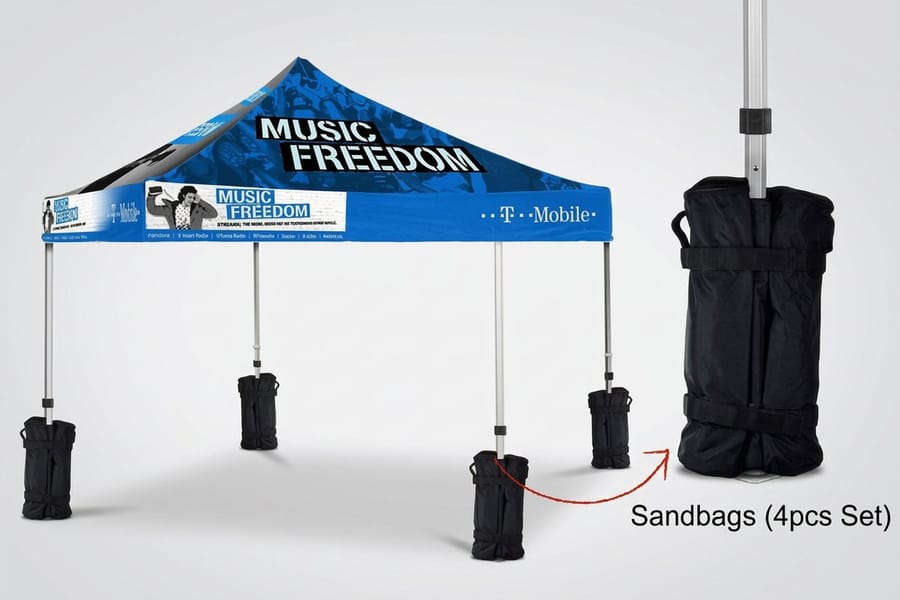
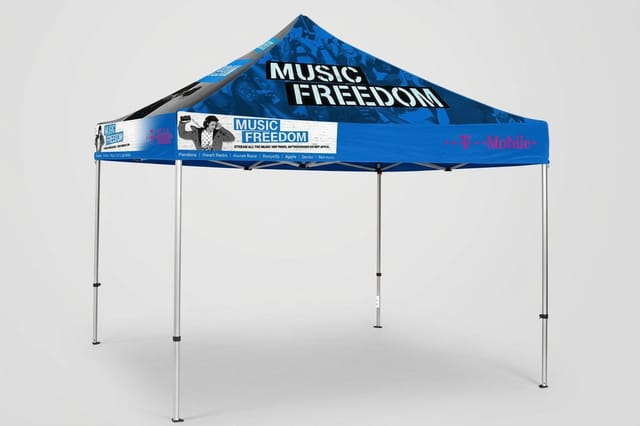
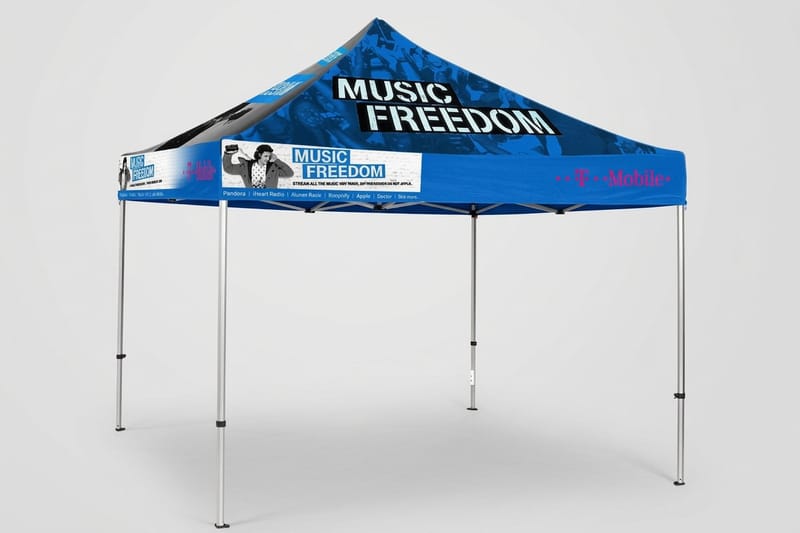
Pick stable ground, expand and lock the frame, dress it with the printed top, then anchor every leg. An unweighted canopy is the single most common cause of an event injury, so anchoring is not optional. Our 10 by 10 foot custom event tent prints on 6 oz tent fabric and can ship with a set of 4 sandbags, and the options table below helps you choose walls and bags before you order.
To set up an event tent safely: choose flat, firm ground clear of power lines, then expand the frame with a partner to about two-thirds open. Attach the printed canopy top while the frame is still low, push every joint to a full click, raise each leg one notch at a time, and anchor all four legs, stakes on turf or weight on pavement. Read the wind, and take the tent down before a storm, not during it.
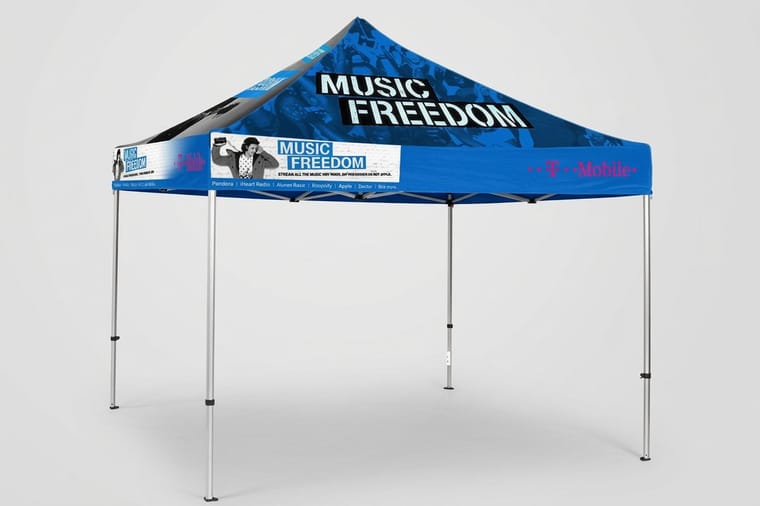
Quick answer
The short version of a safe event tent setup
Set the base, then the frame, then the anchors. Start on flat, firm ground clear of anything overhead. Expand the frame with a partner, attach the printed top while it is still low, and lock every joint to a full click. Raise the legs evenly, keep the canopy lower in wind, and anchor all four legs with stakes on turf or weight on pavement. The tent is not finished until it is anchored, so never skip that last step to save a minute.
What you need before you set up an event tent
A safe setup starts before you touch the frame. Getting the site, the crew, and the kit right is what separates a canopy that stands all day from one that tips over the moment the wind changes. Run this quick check first.
- A crew of at least two. A pop-up frame is a spring-loaded scissor mechanism. Two people keep it square and keep fingers clear of the joints.
- Level, firm ground. Grass, packed dirt, or a solid paved surface. Avoid slopes, soft mud, and loose gravel where anchors will not hold.
- The right anchors for the surface. Steel stakes and a mallet for turf, or a weight for every leg on concrete and asphalt. Bring both if you are not sure what you will find.
- Ratchet straps or bungees to tie weights to the frame, plus guy lines for exposed or windy sites.
- A weather check. Look at the forecast for the whole event window, not just the hour you arrive.
Our custom event tents arrive as a matched frame and printed top, so once the site is ready the setup is the same every time. If you have never stood up your specific model, do one practice run at home so the real setup at the venue is calm and quick.
Choose these options on the order, because each one changes the setup.
| Option | Choices | Pick it when |
|---|---|---|
| Sandbags | None, or a set of 4 | You will set up on concrete or asphalt, where stakes cannot go in |
| Full walls | None up to 4 | You need shade or privacy on a calm day, and you can remove them when the wind builds |
| Half walls | None up to 4, printed one or both sides | You want branding at table height while air still passes over the top |
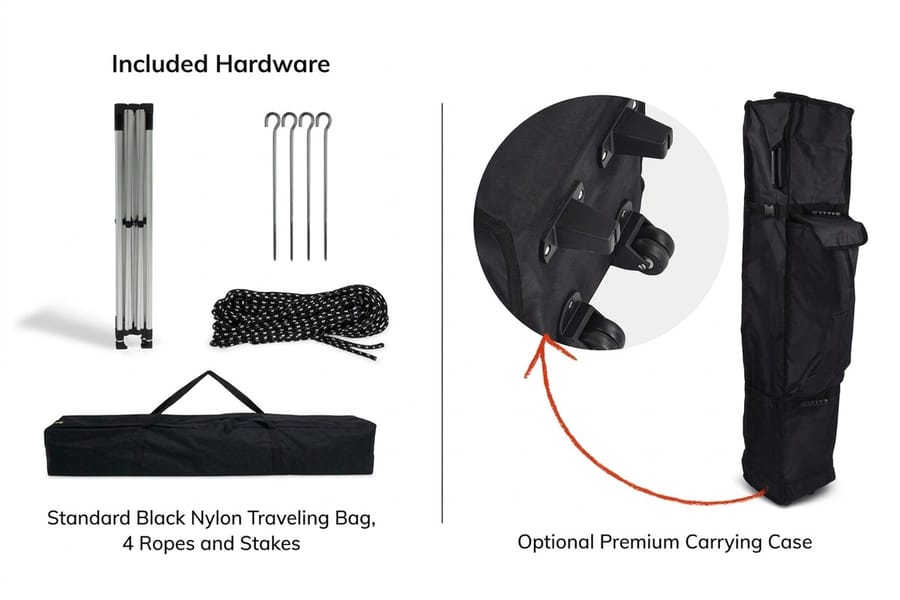
| Carrying bag | Standard, or premium with wheels | One person moves the tent from the car to the site |
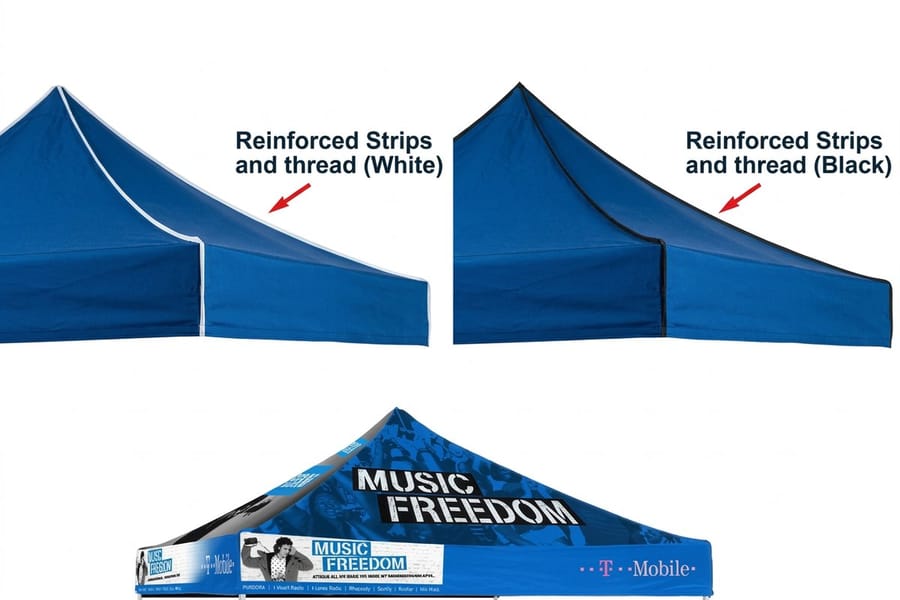
| Reinforced strips | White or black strips and thread | You match the seams to the canopy art |
Step 1: Choose a safe and stable location
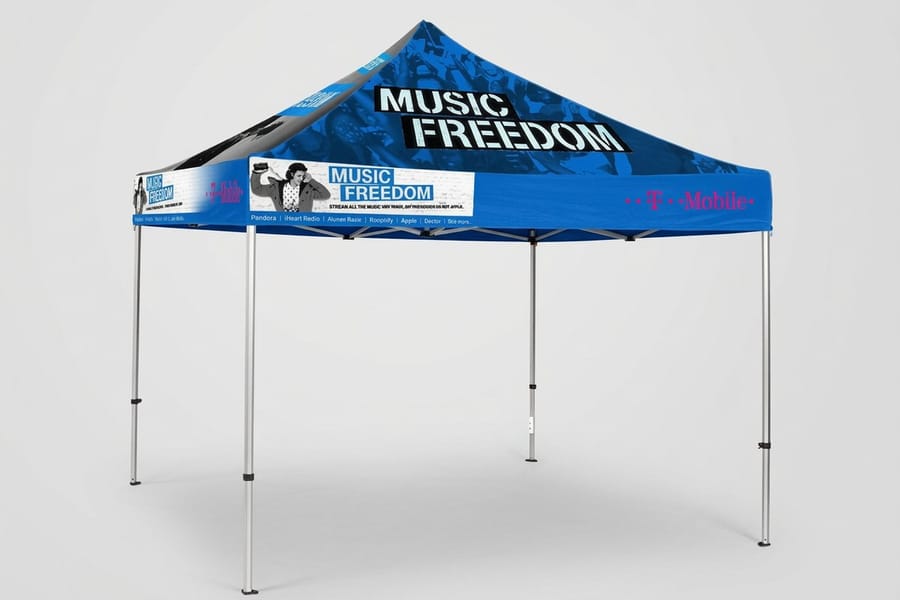
Where you place the tent decides how safe it is. Walk the spot before you commit to it and look up, down, and around.
Look up. Keep the full footprint clear of power lines, low branches, string lights, and building overhangs. You need room to lift the frame overhead and to raise it to full height without catching anything.
Look down. On turf, confirm the ground is firm and check for buried utilities before you drive any stake. If you are on a rented lot or venue, ask where it is safe to anchor. On pavement, look for a flat, drainage-friendly patch so water does not pool at your feet.
Look around. Note which way the wind is coming from and leave a clear exit path on at least one side so people are never boxed in. Give yourself a few feet of clearance from tables, vehicles, and neighboring booths. If you are laying out a larger footprint, our guide on how to plan a corporate event covers spacing the whole site, and the full event tent printing range shows the sizes you can order.
Step 2: Expand the tent frame
With the site clear, stand the collapsed frame upright in the center of the spot. This is the step where most pinched fingers happen, so slow down.
- Position one person at each opposite corner. Grip the corner legs, not the crossing trusses.
- Walk the corners outward together until the frame is open to about two-thirds of its full spread. Move at the same pace so it opens square.
- Keep hands on the legs the whole time. The scissor joints close hard and can catch a finger if you reach into the middle.
- Do not lock the height yet. Leave the frame low and only partly extended. You want it short and roomy for the next step.
Leaving the frame half-open here is deliberate. It gives the printed top slack to slide on cleanly, which you will do before you push everything out and up. Want your canopy art dialed in before it ever ships? Build it in the online designer and check the layout on screen first.
Step 3: Attach the canopy top
Fit the top now, while the frame is still low and partly collapsed. Throw a canopy over a fully extended, chest-high frame and you stretch the corner pockets and can tear the fabric.
Lay the printed top over the frame and line up the corner pockets with the four corner legs. Seat each corner fully, then work around fastening whatever your model uses, hook-and-loop straps, corner clips, or velcro ties along the legs. Take a moment to square the graphics so your logo faces the direction you want before anything tensions.
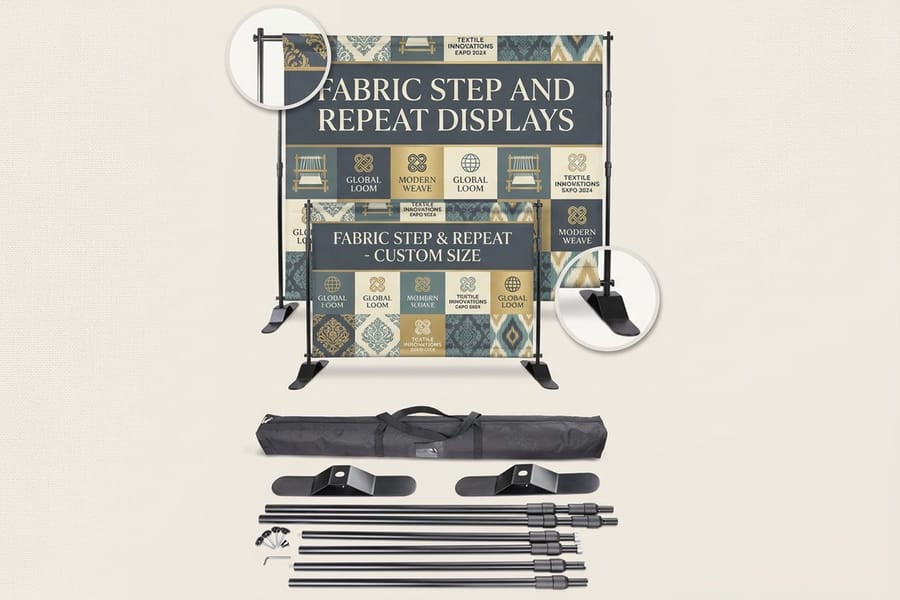
Fasten the top completely before you raise the frame. As you extend and lift in the next steps, the fabric pulls taut on its own and finishes drum-tight instead of loose and wrinkled. A canopy that is clipped down before extension also cannot get caught by a gust and lift off mid-setup. If your booth pairs the tent with a photo backdrop, the same clip-then-tension logic applies to a fabric step-and-repeat. Watch the fabric step-and-repeat video to see the backdrop pulled tight on its stand.
Step 4: Lock the frame into position
With the top on and secured, push the frame out the rest of the way. Each corner should travel to full spread until the truss locks or spring buttons on the legs click into place.
Confirm every joint has engaged. Walk each leg and listen and look for the lock. A button that is only half-seated or a truss that has not clicked is the single most common cause of a canopy folding on itself later. Push until it seats, do not force a bent joint.
Give the whole frame a gentle shake once it is out. It should feel like one rigid unit, not a loose assembly. If a corner still moves independently, a lock has not caught. Reset that leg before you move on. Skipping this check to save thirty seconds is not worth the risk of a collapse over people's heads.
Step 5: Adjust the tent height
Now raise the canopy to working height. Each leg telescopes and pins at a series of notches, so the trick is to raise them evenly.
- Lift one leg one notch at a time, then move to the next. Working corner by corner keeps the load balanced and stops the frame from racking to one side.
- Engage the pin or lock at each notch before you let go of the leg. Feel it seat.
- Circle the tent until all four legs sit at the same height. An even canopy sheds rain and handles wind far better than a lopsided one.
One safety note: do not automatically run the legs to their tallest setting. A lower canopy catches less wind and is more stable. Save maximum height for calm days when you genuinely need the clearance. On a breezy afternoon, a notch or two down is the safer call.
Step 6: Secure and anchor the tent
This is the step that keeps everyone safe, and the one people skip when they are in a hurry. A standing tent is not a secured tent. Anchor every leg before you put anything underneath it.
On grass or dirt, drive a stake at each leg at roughly a 45-degree angle, leaning away from the tent, so it grips against the outward pull rather than sliding straight up. Loop the leg to the stake with a strap or tie-down.
On concrete or asphalt, you cannot stake, so weight each leg. Sandbags, weight plates, or purpose-made canopy weights all work. Strap the weight to the frame so it cannot slide, and treat at least 40 pounds per leg as a starting point that goes up with the wind and the tent size.
On exposed or windy sites, add guy lines from the top of each leg out to a staked or weighted anchor point, so the load pulls outward and down. The idea is simple: four corners, four anchors, tension pulling away from the center. Anchor the four legs before the table, the backdrop or the flyers go in.
Wind, weather, and when to take the tent down
Most event tent accidents come from weather, after the setup is done. A canopy is a large, light sail, and it only takes one strong gust to lift an unanchored or overloaded tent. Build a simple weather plan into your day.
Let wind pass through, not against. If you run sidewalls, roll up or remove them when the breeze picks up so air flows under the canopy instead of pushing on a solid surface. Keep the tent at a lower height in wind.
Watch the forecast, and act early. Decide on a take-down threshold before the event and stick to it. Coming down before the weather arrives is calm and orderly. Coming down mid-gust with a canopy fighting you is neither.
Never leave a tent up and unattended in a storm, and clear out for lightning. A tent offers no protection from a strike and its metal frame is a liability. People first, gear second. When conditions turn, get everyone to a solid building and deal with the tent after it is safe.
What to set up under and around your tent
Once the tent is standing and anchored, the 10 by 10 foot footprint under it does the selling. Three matching pieces turn a bare canopy into a booth people walk toward.
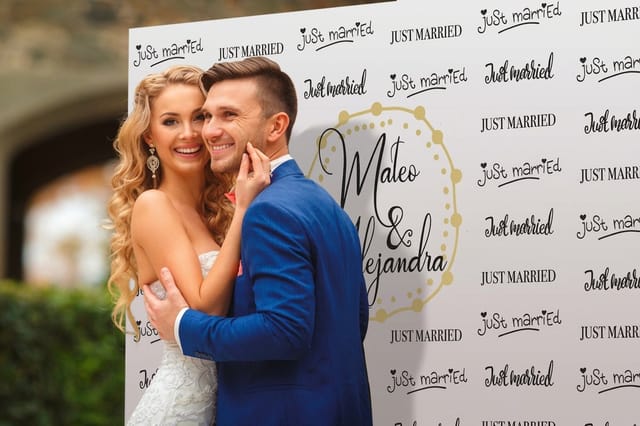
- A backdrop for photos and branding. A step-and-repeat banner or a wrinkle-resistant fabric step-and-repeat gives every photo your logo and anchors the back of the booth. Both come 8 by 8 or 8 by 10 feet, on 13 oz smooth blockout vinyl or 9 oz wrinkle free fabric, from $217.50 with an optional stand.
- Badges for your team. Custom event badges make staff easy to spot and keep the booth looking organized. They print 2 by 3 up to 4 by 6 inches on 18pt PVC or 30pt gloss laminated stock, with a lanyard slot, from $49.88 for 25.
- Handouts that leave with visitors. Stack event flyers on the table so the conversation continues after they walk away, from 50 for $57.11 at 5.5 by 8.5 up to 11 by 25.5 inches.
Because every piece is printed at 4OVER4.COM, your canopy, backdrop, and handouts share the same colors and logo out of the box. Browse the full celebration printing range to build a set that matches, or send us your art and we handle the rest.
Mistakes that turn a good setup into a hazard
Even seasoned crews slip on these. Avoid them and your setup stays safe from the first stake to take-down.
Standing the tent but never anchoring it. The most dangerous shortcut there is. A free-standing canopy on a calm morning becomes airborne the moment the wind shifts.
Attaching the top after full extension. It is slower, it stresses the fabric, and a half-on top can catch the wind. Always dress the frame low.
Half-locking the frame. One truss that has not clicked or a leg pin that has not seated is a collapse waiting for a load. Check every joint.
Running the legs to maximum height in wind. More height means more sail. Drop a notch when it is breezy.
Reaching into the scissor joints. Keep hands on the corner legs. The mechanism closes hard enough to pinch a finger.
Ignoring the forecast. A tent is only as safe as your willingness to take it down early. When in doubt, bring it down. For more step-by-step setups like this one, the full guide library covers everything from banners to backdrops.
Wally walks you through the safe setup
A tent that stands is not a tent that is secure
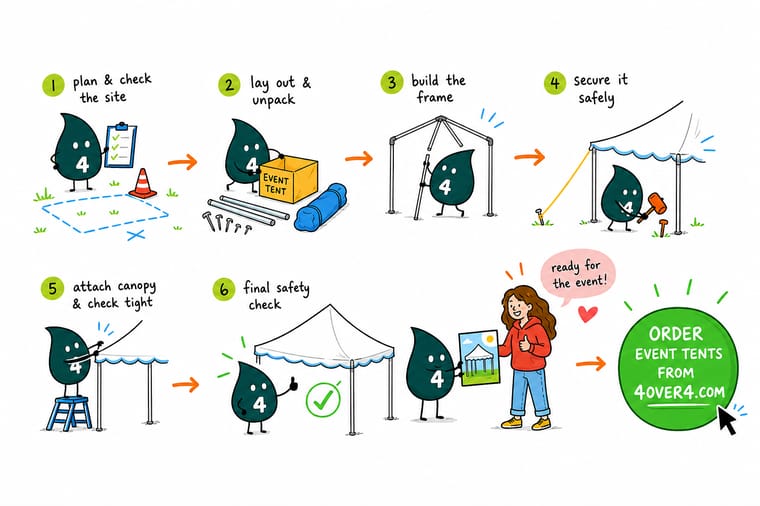
Wally treats an event tent like a kite you never want to fly: pick firm ground, dress the top before you raise it, and give every one of the four legs its own anchor before anything goes underneath. Stakes bite into turf, weight holds it on pavement, and the wind gets to pass through, not push. When you are ready for the canopy itself, 4OVER4 prints a full-color custom event tent that shows up as a matched frame and top, ready to set up the same way every time.
Order a custom event tent →
Specs and pricing
Custom event tent specs and live pricing
Ordering the canopy is the easy part. Event tents run $987.45 and ship in 5 business days, with live specs below so you can match the size to your booth.
| Quantity | Price Per Unit | Total |
|---|---|---|
| 1 | $987.45 | $987.45 |
| 2 | $987.44 | $1,974.88 |
| 3 | $987.44 | $2,962.32 |
| 4 | $897.65 | $3,590.60 |
| 5 | $898.25 | $4,491.26 |
| 6 | $896.83 | $5,380.96 |
| 7 | $896.75 | $6,277.22 |
| 8 | $896.41 | $7,171.30 |
Build the booth
Order the tent and everything under it at 4OVER4


Explore more
Where to go next


By the numbers
Tent graphics are one of 1,000+ things we print
Common Questions
Common questions about setting up an event tent
How many people do I need to set up an event tent?
Plan on two people for a 10x10 pop-up canopy and three or more for 10x20 and larger frames. One person can technically manage a small tent on a calm day, but a second set of hands keeps the frame square, protects your fingers from the scissor joints, and makes attaching the top far safer. Never wrestle a large frame alone.
How do I anchor an event tent on concrete or asphalt?
You cannot drive stakes into a hard surface, so switch to weight. Set a sandbag, weight plate, or purpose-made canopy weight on every leg, and connect it to the frame with a strap so it cannot shift. Guy lines running out to weighted anchor points add stability on exposed sites. Never rely on the tent standing on its own on a paved lot.
How much weight do I need to hold down a 10x10 event tent?
A widely used guideline is at least 40 pounds of weight per leg for a 10x10 canopy on a hard surface, and more as the wind picks up. Treat that as a floor, not a target. If a breeze is moving the canopy at all, add weight or take the tent down. Larger frames and higher settings need proportionally more.
Can I set up an event tent by myself?
For a small pop-up on flat, calm ground, yes, carefully. Extend the frame only part way, drape and clip the top before you push it out, then raise one leg at a time. That said, the top attaches faster and the frame stays square with a partner, and any frame larger than 10x10 really needs two people for safety.
How do I keep my event tent from blowing away in the wind?
Anchor every leg, keep the canopy at a lower height rather than fully extended, and remove or roll up the sidewalls so wind passes through instead of pushing against a solid wall. Watch the forecast. If sustained winds or gusts are building, take the tent down before the weather arrives rather than after it starts.
How long does it take to set up an event tent?
A two-person crew can stand up and anchor a 10x10 pop-up in roughly ten to fifteen minutes once they know the frame. Your first setup will run longer, so do a practice run at home before the event. Anchoring is part of the setup, not an optional last step, so build that time into your plan.
Get Started
Order an event tent at $987.45
Pick your size, drop in your logo or full-color art, and we print a matched frame and canopy that sets up clean and stands out at every event.
Legal Disclaimer
Gold Standard guarantees apply to all standard orders placed through 4over4.com. Price match requires verifiable proof of a competitor's published price for an equivalent product with matching specifications and turnaround time. Satisfaction guarantee covers manufacturing defects and print quality issues. Contact support with order number and documentation.
