
How to Make a Wedding Sign Step by Step


Tobias is our voice for cutting, binding and large format, built from the knowledge of our production team, with over 20 years in printing.
Welcome boards, seating charts, and directional yard signs, made the easy way. Decide the job, lock a style, pick the material, lay out the wording, and print it sharp. One wobbly knife cut on an 18 by 24 board shows from across the room, which is why trimming is the step to hand over.
To make a wedding sign, work through five steps in order: decide what the sign has to do, build a mood board and lock a style, choose the material and size for its spot, lay out the wording with a large headline and plenty of white space, then proof it and print it. Design it in a free tool at home and print it on rigid stock at 4OVER4.COM for a homemade sign with a professional finish.

Start here
Five steps, one trimmed edge
A wedding sign is a series of small decisions made in order, not an art project. Decide what the sign has to do, lock a style with a quick mood board, choose the material and size that fit its spot, lay out the wording with a large headline and real white space, then proof it and print it. Handle the design at home in a free tool and hand only the printing to 4OVER4.COM, and a homemade sign comes out looking professional. The step diagram further down sums the whole method up at a glance.
Create them
Create wedding signs at the size your guests read
Set the canvas to a real board size before you place a word. Foam core wedding signs come in 16 by 20, 18 by 24, 20 by 24, 20 by 30, 22 by 28, 24 by 36, 30 by 40, 36 by 48 and 40 by 60 inches, or any size up to 40 by 60. An 18 by 24 board suits a seating chart read at arm's length, and a 24 by 36 board carries a welcome headline guests read from ten feet away. Pick 3/16 inch white or black foam core, a semi gloss, hi gloss or uncoated print, and add 3 mil gloss lamination if the board will be handled. Prices start at $49.99 for a single board.
Why a wedding sign carries more weight than couples expect
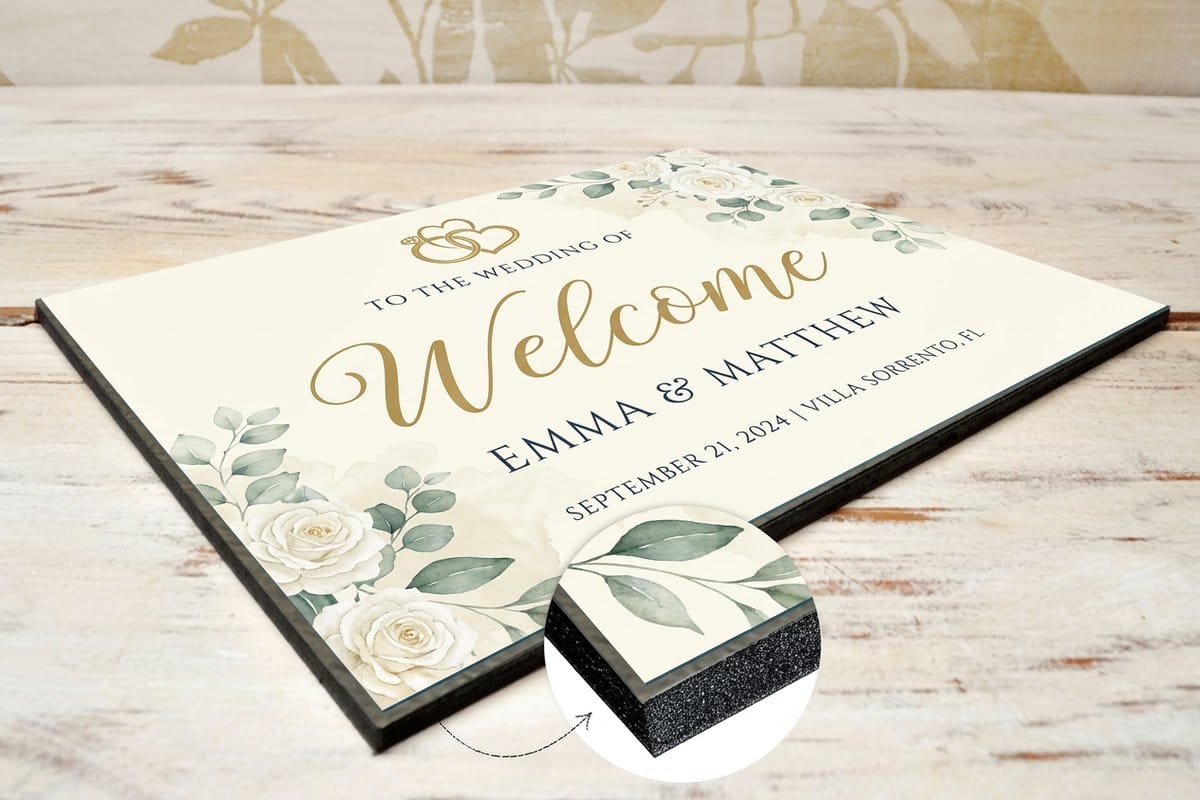
A wedding sign is the first thing a guest reads and the last piece of signage they photograph before the day begins. It sets the tone at the door, quietly runs the logistics inside, and shows up in the background of half the pictures. Get it right and nobody notices the work. Get it wrong, with a font no one can read from across the lawn, and it is the one detail people remember for the wrong reason.
The good news is that a great wedding sign is not an art project. It is a series of small, ordered decisions, and this guide walks through them one at a time: what the sign needs to do, the style it should carry, the material and size that fit the spot, the wording and layout, and finally the print. If you would rather skip straight to making something, our online designer and design templates already do a lot of the layout work for you.
Throughout, the aim is a homemade sign with a professional finish. You keep control of the design at home, and you hand only the printing to a shop that can put it on the exact wedding sign stock and size you need. When the sign stands on an easel indoors, foam core is usually that stock: printed wedding signs on foam core are light enough to carry from the ceremony to the reception and rigid enough to stay flat all evening, and the wedding version, printed wedding signs made for a welcome board or a seating chart, arrives at the size you asked for so there is nothing left to cut by hand.
What is a wedding sign?
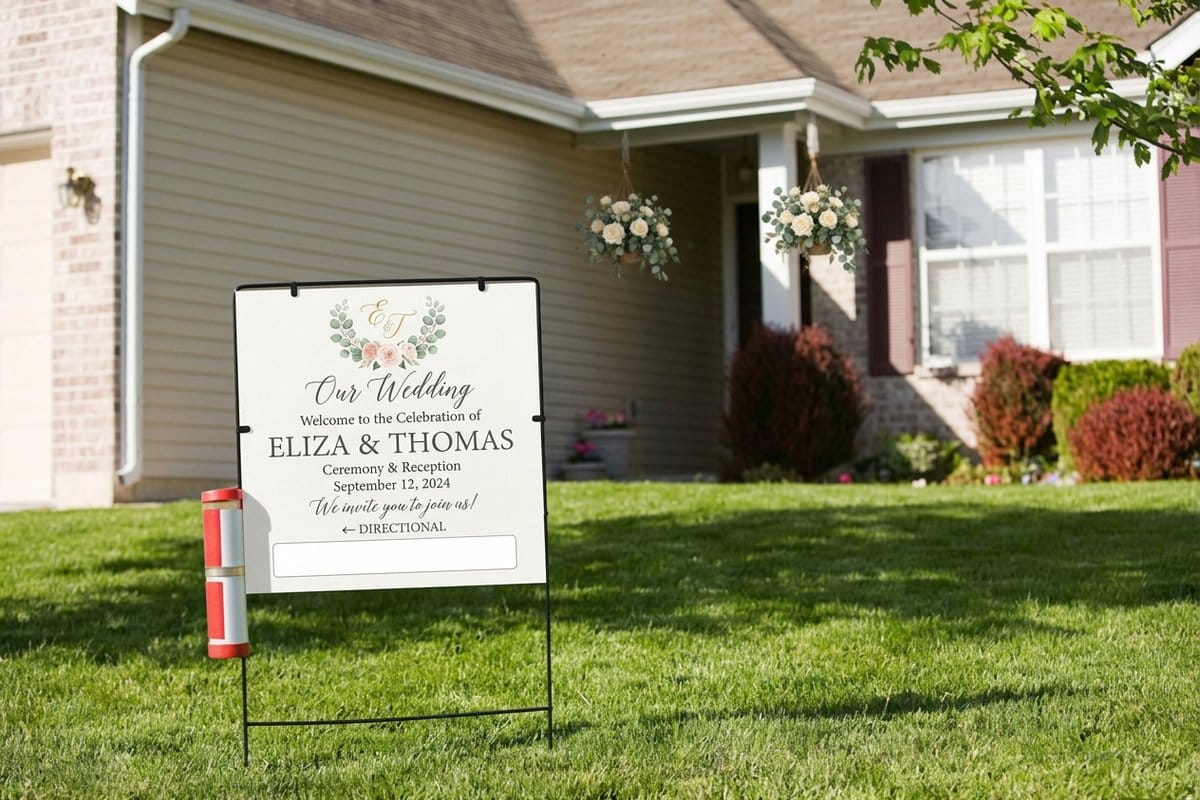
A wedding sign is any printed board, panel, or card used to welcome, direct, seat, or inform guests during a wedding. The formats run from a 24 by 36 inch easel welcome board at the entrance, through 12 by 18 inch coroplast yard signs that point cars to parking, down to small numbered cards on each reception table. They all share one purpose: to say something clearly at a glance so people can enjoy the day instead of asking where to go.
Because a wedding uses several of these at once, the smart move is to treat them as a family rather than one-off pieces. When your welcome board, your directional yard signs, and your seating chart share the same two colors and one type pairing, the whole event reads as designed. That is the same logic behind a matched wedding printing suite of invitations, menus, and favors.
You do not need special software to do this. A free tool or our online designer handles the layout, and free paper samples let you feel the stock before you commit, so the only specialist step is the print.
Types of wedding signs, from welcome board to seating chart

Knowing the common types helps you plan the full set before you design a single one. Most weddings pull from this short list:
- Welcome signs. The large piece at the entrance, usually on an easel. This is where acrylic and brushed aluminum earn their keep, because they photograph beautifully.
- Seating charts and table numbers. Read from arm’s length, so the type can be smaller and the layout denser, but it still has to be scannable while people mingle.
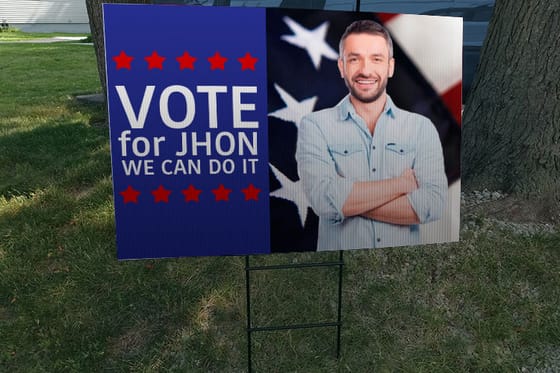
- Directional and yard signs. These point guests to parking, the ceremony, and the reception. They live outdoors, so they belong on weatherproof yard signs on stakes.
- Bar, menu, and detail signs. Smaller boards for the drinks list, the menu, an unplugged-ceremony note, or a guest-book prompt.
Once you know which of these you need, you can decide the material for each spot. For the outdoor pieces specifically, our guide on how to make yard signs goes deeper, and the yard signs vs A-frames vs banners comparison helps you pick the right directional format.
Step 1: Decide what each sign needs to do

Every good sign starts with a job, not a look. Before you touch a color or a font, write one sentence for each sign that names its single purpose: this one welcomes people, this one sends them to parking, this one seats them. That sentence quietly decides everything downstream, because the job sets the viewing distance, the amount of text, and therefore the size and the material.
A welcome sign is read from ten feet away by someone walking, so it needs few words and large type. A seating chart is read up close by someone standing still, so it can hold far more detail. A directional yard sign is read from a moving car, so it gets one arrow and one or two words, nothing else. Naming the job stops you from cramming a paragraph onto a piece that only had room for a greeting.
If several signs share a job across the venue, plan them together now. Getting the count right up front also lets you take advantage of lower per-unit pricing on the pieces you need in quantity, which is almost always the directional set.
Step 2: Build a mood board and lock your style
With the jobs defined, decide how everything should feel before you design anything. Pull together five or six wedding signs you love from anywhere, then look for what they share. Name the two colors and the single type pairing that keep showing up, and that becomes your rulebook. This is the step most DIY signs skip, and it is exactly why a homemade set can look mismatched even when each piece is fine on its own.
Anchor the style to the rest of the wedding so the signs are not their own island. If your invitations already exist, borrow their palette and fonts directly. Our guide to the best wedding fonts is a good shortcut for a pairing that reads well at large sizes, and the boutique wedding case study shows how a single visual system ties a whole suite together. For the print side of the type choice, our list of the best designer fonts for print covers faces that hold their shape at sign sizes.
Keep the rulebook short: one script or serif for headlines, one clean sans for details, two colors plus a neutral, and one repeated shape or motif. Restraint is what makes the finished set look intentional rather than busy.
Step 3: Choose the material and size for each spot
Now match each sign to where it will actually stand, because the spot decides the stock. Indoors and at a sheltered entrance, rigid acrylic signs and brushed aluminum read as premium and photograph cleanly under lights. On a lawn or by the road, weatherproof coroplast yard signs on wire stakes and aluminum panels shrug off sun and rain. On an easel indoors, lightweight foam board keeps a large welcome sign easy to move.
Size follows the viewing distance you set in Step 1. Welcome boards are typically large, seating charts are medium and dense, and directional signs are compact with one arrow. When you are unsure how a stock will look and feel in hand, order free samples first, and check the venue rules early, since some outdoor sites limit staked signs the way public streets do. Our overview of sign permits by state is worth a glance if your ceremony is anywhere public.
To compare exact dimensions, stocks, and finishes side by side, the specs and pricing panel further down pulls the live options straight from the configurator.
Step 4: Lay out the wording and set your type
With the material and size fixed, the design becomes almost mechanical. Open a free tool such as Canva or our online designer, set the canvas to your chosen dimensions, and start with the one thing the sign has to say. Make that headline large, keep the supporting details small, and leave real white space around everything so the message can breathe. Crowding is the fastest way to make a sign look homemade in the bad sense.
Write the wording tight. A welcome sign often needs nothing more than the couple’s names, a date, and a warm line. A directional sign wants one or two words and an arrow. A seating chart should be alphabetized by last name so guests find themselves in seconds. Keep contrast high, dark type on a light field or crisp white on a deep color, so the words hold up in photos and under evening light.
Before you export, set the file up correctly for print: work at the right resolution, add bleed, and keep important text away from the edges. If any of that is new, our step-by-step creation guides and design templates take the guesswork out and hand you a print-ready file.
Step 5: Proof it, print it, and know what it costs
The last step turns your file into a physical sign, and it is the easiest one to get a professional result from. Proof carefully first: read every word aloud for typos, double-check the date and names, and view the layout at full size on screen so you catch anything that looks cramped. A single misspelled name on a welcome board is the one mistake you cannot fix on the day.
Then print. Upload the finished artwork, choose your size, stock, and finish, and let the shop handle the rest. Pricing is simple to reason about because it scales with quantity, size, material, and finish. Rigid wedding signs at 4OVER4.COM start at $49.99, and the per-unit price on yard signs drops as the quantity climbs, which is exactly what you want for a run of directional signs. To see finished boards at real venues first, read the wedding signs story and the Wedding Yard Signs story.
You can watch the total change live in the configurator as you adjust each option, so there are no surprises before you order. When the design is ready, the specs and pricing panel below is where you turn it into the real thing.
Wally explains wedding signs
A good sign says one thing clearly, from the right distance
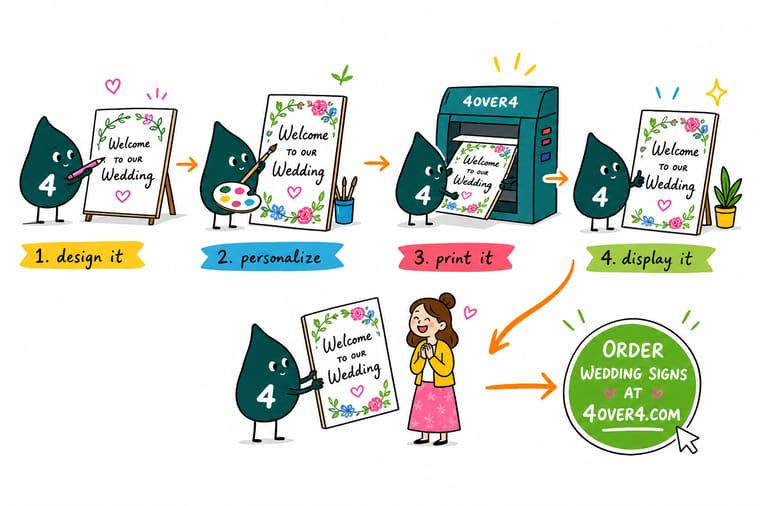
Wally treats every wedding sign like a single question: who reads this, and from how far? A welcome board is read on the walk in, so it gets a big headline and lots of air. A seating chart is read up close, so it can hold more. Nail the job first, keep the wording tight, and let 4OVER4 print it on the size and stock that fits the spot.
Design and print wedding signs →
Step diagram
How to make a wedding sign in 5 steps
Five steps on one frame: name the job, lock two colors and one type pairing, pick acrylic, aluminum or coroplast at the right size, set a large headline with white space, then proof and print. Save it as the checklist for your next welcome board, seating chart, or set of directional yard signs.
The five steps build on each other: the job sets the material and size, the mood board sets the style, and a clean layout carries the reader to a sign you can print sharp and hand out with confidence.
Specs and pricing
Wedding sign specs and live pricing
When the design is ready, size, stock and finish are what is left: a board from 16 by 20 to 40 by 60 inches, 3/16 inch white or black foam core, and a semi gloss, hi gloss or uncoated print with optional gloss lamination. Foam core, acrylic and aluminum all ship in 4 business days.

| Quantity | Price Per Unit | Total |
|---|---|---|
| 1 | $49.99 | $49.99 |
Print it
Print your wedding signs at 4OVER4
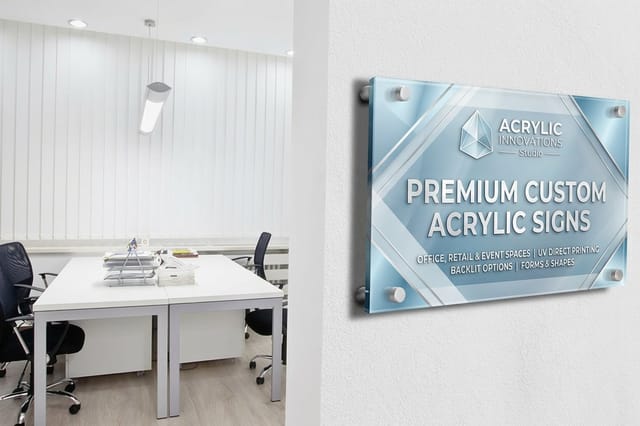
Coroplast yard signs at 12 by 18, 12 by 24 or 18 by 24 inches point the way outdoors and take an H-stake, acrylic signs on 1/4 inch plexiglass at 16 by 24 to 24 by 36 inches greet guests at the door, and foam core wedding signs from $49.99 carry the seating chart.


See it in use
Welcome boards and seating charts we printed




Explore more
Where to go next

By the numbers
Foam core, acrylic, aluminum, coroplast
Common Questions
Common questions about making wedding signs
What does making a wedding sign involve?
Making a wedding sign comes down to five decisions in order: what the sign needs to do (welcome, direct, seat, or set a mood), the style you want it to carry, the material and size it should be printed on, the wording and layout, and finally the print itself. Do them in that sequence and the design almost lays itself out, because each choice narrows the next. You can handle the whole thing yourself in a free design tool and hand only the printing to a shop like 4OVER4.COM.
Can I make a wedding sign myself?
Yes. A DIY wedding sign is very doable if you separate the design from the production. Lay the artwork out in a free tool such as Canva or in our own online designer, keep the wording short and the type large, then send the finished file to print on a rigid stock instead of trying to paint or letter it by hand. That split gives you a homemade sign with a clean, professional finish, and it scales easily when you need a welcome board, a seating chart, and a stack of directional yard signs all matching.
What are the types of wedding signs?
The common ones are welcome signs at the entrance, seating charts and table numbers inside, directional or yard signs that point guests toward parking and the ceremony, bar and menu boards, and small detail signs such as “unplugged ceremony” or a guest-book prompt. Most weddings use a handful of these together, which is why it helps to design them as a set that shares one color palette and one type pairing.
What is the best material for an outdoor wedding sign?
For anything that lives on a lawn or by the road, coroplast yard signs on wire stakes or a weatherproof aluminum panel hold up best against sun and rain. For a covered entrance or a photo-worthy welcome board, acrylic and brushed aluminum look premium and still handle a breezy day. Foam board and mounted prints are perfect indoors on an easel but should stay out of the weather.
Which board survives an outdoor ceremony?
Work backward from the moment. A grand entrance calls for a large acrylic or aluminum welcome sign on an easel, a busy venue needs clear directional yard signs, and the reception wants a legible seating chart plus table numbers. Once you know the job and the viewing distance, the size and material follow, and you can check the exact options and live price on the product page before you commit.
What does a wedding sign cost, and how is the price set?
Price scales with a few simple levers: quantity, size, the material you print on, and the finish. Rigid wedding signs at 4OVER4.COM start at $49.99, and per-unit prices on yard signs drop quickly as the quantity climbs, which matters when you need a run of directional signs. You set each option in the configurator and the total updates live as you go, so there are no surprises before you order.
What sizes, stocks, and finishes are available for wedding signs?
Wedding signs come in sizes from small table cards up to large easel-scale welcome boards, on stocks that range from lightweight coroplast and foam board to rigid acrylic and aluminum, with matte or gloss finishes that change how the piece reads under lights and in photos. Use the specs and pricing panel on this page to see the exact combinations, or order free samples first so you can feel the stock before you commit.
What do I need to make a wedding sign at home?
Two short lists, depending on the route. If you are printing at home, you need cardstock in a cover weight, a printer that takes 8.5 by 11 sheets with a full cartridge in it, a sheet of foam board in the common 3/16 inch thickness cut to your finished size, spray adhesive, a metal ruler and a fresh craft knife blade, and an easel to stand the finished board on. If you are having the board printed instead, you need the artwork, the finished size, and an easel or stand, plus double sided mounting tape when the sign hangs on a wall or a door rather than standing on its own. The design work is the same either way: lay it out in a free tool such as Canva or in our online designer, keep the headline large and the wording short, then decide whether you tile and mount it yourself or send the file to print on foam core, acrylic, aluminum or coroplast. The practical dividing line is trimming, since one wobbly knife cut on an 18 by 24 board shows from across the room.
Get Started
Order an acrylic sign, printed in 4 business days
Bring your design to 4OVER4.COM and print it on the size, stock, and finish that fits every spot at your wedding. Acrylic, aluminum and foam core all ship in 4 business days.
Legal Disclaimer
Gold Standard guarantees apply to all standard orders placed through 4over4.com. Price match requires verifiable proof of a competitor's published price for an equivalent product with matching specifications and turnaround time. Satisfaction guarantee covers manufacturing defects and print quality issues. Contact support with order number and documentation.
