
How to Make a Loyalty Stamp Card Customers Actually Fill Up


Set the reward, size the grid for a real rubber stamp, pick a stock that survives a wallet, and print a loyalty punch card that brings people back. Every step below ends in a file you can send to press today.
To make a loyalty stamp card, decide how many visits earn the reward, then lay out that many stamp boxes on a wallet sized card with the offer in one plain sentence above them. Leave a quarter inch of clearance around every box so ink or a punch lands cleanly, print on uncoated 16PT or heavier stock so the card survives a full cycle, put your hours and terms on the back, and add bleed before you export the print ready file.

Start here
The whole method in one paragraph
A loyalty stamp card is a reward promise printed on something people carry. Choose the visit count and the prize, put the offer in one line at the top of a wallet sized card, and build a grid of boxes big enough for the stamp or punch your staff will actually use. Print the terms and your contact details on the back, pick an uncoated stock that takes ink, add bleed, and order a test card before the full run.
Why a printed stamp card still outperforms a loyalty app
A loyalty app asks for a download, an email address, and a password before it does anything for the customer. A stamp card asks for a pocket. That difference is the whole reason small businesses keep printing them: the signup cost is zero, the card starts working on the first visit, and the customer can see exactly how close the reward is without unlocking a phone.
The card also does quiet marketing every time it is pulled out at another counter. Your name, your logo, and your offer travel in a wallet next to a driver license. If you already think about that surface, the same thinking that goes into a business card slogan applies here, because a loyalty card is a business card that earns its keep on every visit.
What a stamp card is and what belongs on it
A stamp card, also called a loyalty punch card, is a small card with a grid of marks. Staff fill one mark per qualifying purchase, and a full grid buys the reward. The mechanic has not changed in fifty years because it is legible to everyone the moment it is handed over, with no explanation required.
The front carries four things: your business name, the offer in plain words, the stamp grid, and a mark for the reward slot. The back carries the boring but necessary parts, which is where most cards fail. Print your address, phone, hours, and the terms in small type so the card answers questions when nobody is around to answer them.
Keep the offer to one sentence. Buy nine, get the tenth free reads instantly. A tiered structure with points and bonus multipliers does not fit on a wallet card and does not survive a busy counter.
Step 1: set the reward math before you open a design file
Decide two numbers first: how many stamps a card requires, and what the full card is worth to the customer. Every layout decision follows from them. Ten boxes need a different grid than five, and a free item needs less explanation than a percentage discount.
Set the count against how often people actually come in. If your customers visit daily, a ten stamp card completes in about two weeks and feels achievable. If they visit once a month, that same card takes most of a year and gets abandoned. Shorten the grid until the finish line is visible from the start.
Make the reward something you are glad to give away. The best rewards cost you little and feel generous, which is why a free drink, a free add on service, or a free upgrade outperforms a small percentage off a future purchase.
Step 2: choose a size that fits a wallet and a layout that fits the grid
The standard 3.5 by 2 inch card is the safe answer, because it slides into the same slot as a credit card and stays there. Vertical 2 by 3.5 gives you a taller grid and reads well when the stamps run in two columns. Square cards stand out but need a wallet with a wider pocket, so use them where customers keep cards in a bag or a phone case instead.
Divide the front into two zones and stop fighting for space: a top band for the name and offer, and a lower area for the grid. Keep the logo small. On a card this size, the offer line has to be the largest thing on the page, not the branding.
If you also want a version people can save on a phone, the layout thinking in making a digital business card pairs cleanly with the printed run, and the two can share the same artwork and offer copy.
Step 3: build a stamp grid that survives a real rubber stamp
This is where most homemade loyalty cards break. A rubber stamp spreads beyond its die, a punch bites a real hole, and neither respects a tidy 6mm box. Design the grid for the physical tool you plan to hand your staff, not for how neat it looks on screen.
Give each box at least a quarter inch more than the stamp face, and leave visible gaps between boxes so two marks never blur into one. Use a light outline rather than a solid fill, because ink on a dark box disappears. Number the boxes, or shade the final box, so the customer can count progress at a glance.
If you punch instead of stamp, keep the mark positions away from the edge so the card does not tear, and test one printed card with the actual punch before you approve a full run. A reveal mechanic works too, and the approach in scratch off card printing shows how to hide a reward until the last visit.
Step 4: pick a stock and finish that lasts a full reward cycle
A loyalty card lives longer than a business card. It gets pulled out, stamped, shoved back, sat on, and rained on. Thin stock curls after a week and the grid becomes unreadable, which quietly kills the program before anyone notices.
Uncoated 16PT stock is the workhorse, because it takes stamp ink and pen without beading and it holds a crease. Matte finishes behave similarly. Gloss, soft touch, and UV coatings look excellent but repel water based ink, so if you want a coated card, leave the stamp area uncoated with a spot treatment.
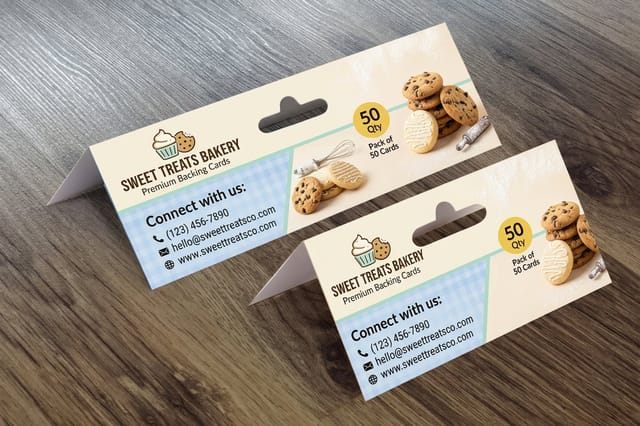
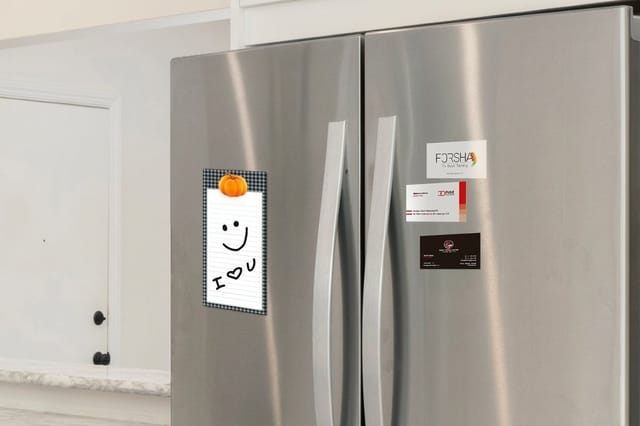
For visits that are weeks apart, take the card out of the wallet entirely. Business card magnets start at $19.68 and put your offer on a fridge where it is seen daily instead of buried behind receipts. For a heavier keepsake card that hangs at retail or anchors a package, a backing card starts at $218.30 and prints on much thicker board.
Step 5: decide how each visit gets marked
Three tools do the job, and each one changes the design. An ink stamp is fastest and cheapest, but it needs a clean pad, an uncoated surface, and generous boxes. A hole punch cannot smudge or be forged with a pen, which matters if staff turnover is high, but it slowly weakens the card.
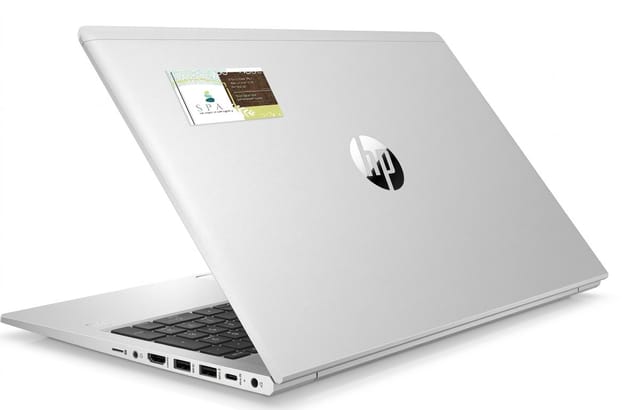
Printed stickers are the strongest option against fraud and the best looking on the finished card. Business card stickers start at $10.76 and let you use a custom shape or a numbered mark that is effectively impossible to fake with a marker. Budget one sticker per visit and order accordingly.
Whichever you choose, buy a spare tool for every register and store a backup pad. A loyalty program that stalls because the only stamp dried out teaches customers the card does not matter.
Step 6: set the file up so it prints exactly as you drew it
Build the artwork at final size with an eighth inch of bleed on every edge, and keep the grid and all type at least an eighth inch inside the trim. Boxes that sit near the trim line drift on a real press, and a grid that looks centered on screen can land visibly crooked on the finished card.
Export a print ready PDF in CMYK at 300 DPI with fonts outlined. Build the grid outlines in a solid dark color rather than a rich black, because heavy ink coverage in thin lines fills in and closes up the boxes.
Order a small test run before committing to thousands. Stamp it, punch it, carry it in a wallet for a week, and look at it again. Comparing options is worth the hour too, and a straight look at business card pricing alternatives often changes what you can afford in stock and finish.
Step 7: launch the card, then keep it working
Print enough cards for at least one full cycle plus the replacements customers will need, and keep a stack at every point of sale so the offer is made every single time. A card handed over with the receipt gets used. A card sitting in a drawer does not.
Brief the team on one line they say out loud when they hand it over. The wording carries the program, and the same instinct behind a memorable business card slogan works here: short, specific, and worth repeating.
Watch what comes back. Count redeemed cards each month, note how long a full card takes, and adjust the grid on the next run rather than changing the rules mid cycle. If you print for schools, campuses, or events, the audience thinking in college print materials transfers directly. And if the design deserves a bit of theater, the obsessive detail in that famous business card is a fun reminder that stock and typeface are noticed.
Wally explains the stamp grid
The card only works if the next stamp feels close
Wally has watched plenty of loyalty cards die at stamp number two. The fix is never fancier artwork, it is the math and the spacing. Count how often your customers really come in, set the grid so the reward lands inside a month or two, and give each box enough room that a stamped card still reads at a glance. Then print it on stock thick enough to make it that far.
Order loyalty card magnets →Infographic
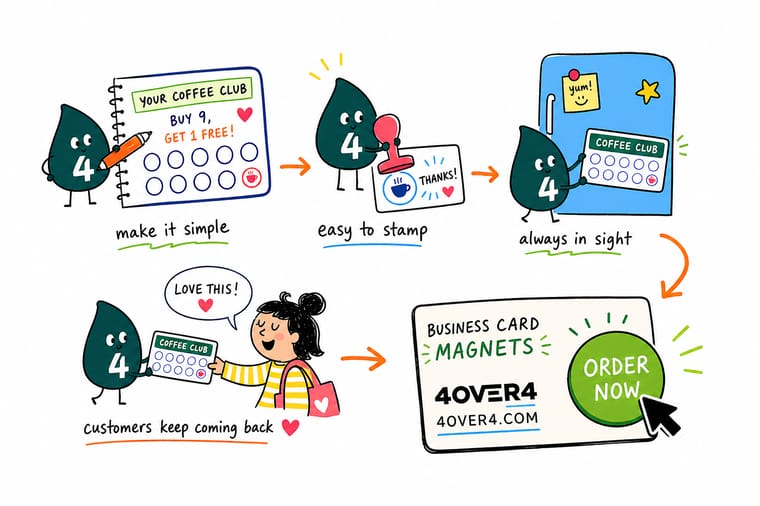
The 7 steps to a loyalty stamp card at a glance
One frame, seven steps. Save it, send it to whoever designs your card, and check the finished artwork against it before you export the file.
The steps run in this order for a reason. Reward math sets the grid, the grid sets the size, and the size decides which stock and finish still leave room for a legible stamp.
Specs and pricing
Business card magnet specs and live pricing
Magnet backed loyalty cards skip the wallet and live on a fridge, which suits any business people visit weekly rather than daily. Check the specs, then set quantity and options to see your price.
| Quantity | Price Per Unit | Total |
|---|---|---|
| 1 | $19.68 | $19.68 |
Print it
Three ways to put your stamp card in a customer hand
See it in use
Real card work, printed in-house




Explore more
Where to go next


By the numbers
Printing you can count on at 4OVER4.COM
Common Questions
Common questions about loyalty stamp cards
What is a stamp card?
A stamp card is a small printed card a customer carries and presents at checkout, where the staff adds an ink stamp, a hole punch, or a sticker to mark one qualifying visit. When the grid is full, the customer trades the card for the reward printed on it. It is the simplest loyalty program there is: no app, no account, no software fee, and no signup friction at the counter.
How do I choose the right stamp card?
Work backwards from how often people visit and how you will mark the card. A coffee shop with daily traffic can carry a ten stamp grid on a standard card. A salon with monthly visits should use a five or six stamp grid on thicker stock, because that card has to survive half a year in a wallet. If your team stamps with ink, leave larger boxes. If they punch, keep the marks near an edge. If they apply stickers, size the boxes to the sticker.
What does a loyalty stamp card cost and how are prices set?
Price is driven by quantity, stock, size, and finish, and it falls fast as the run grows because setup is spread over more pieces. On 4OVER4.COM, business card stickers start at $10.76, business card magnets start at $19.68, and heavier backing cards start at $218.30. Live pricing on this page updates as you change quantity and options.
What sizes, stocks, and finishes are available for stamp cards?
The wallet friendly standard is 3.5 by 2 inches, with 2 by 3.5 vertical and square formats also popular for grid layouts. Stocks run from 14PT and 16PT card through heavier uncoated sheets that take ink stamps cleanly. For finishes, uncoated and matte accept stamp ink and pen; gloss and UV coatings look sharp but resist ink, so keep the stamp area uncoated if you choose them.
How long does it take to print and ship stamp cards?
Turnaround depends on the product, the finish, and the shipping method you pick at checkout, and every option shows its own production time in the configurator before you pay. Coated and specialty finishes add a step over plain stock. Upload a print ready PDF with correct bleed and the job moves straight into production instead of waiting on a file fix.
Should I use stamps, punches, or stickers to mark the card?
Ink stamps are cheapest and fastest but need an uncoated area and a clean pad. Hole punches never smudge and cannot be faked with a pen, though they weaken the card over time. Stickers look the best and are the hardest to copy, especially custom printed ones, but they cost more per visit and slow the handoff at the register slightly.
How many stamps should a loyalty card have?
Match the grid to your visit rhythm so the reward feels reachable. Daily businesses can ask for eight to ten visits. Weekly businesses do better at six. Monthly services should stay at four or five. If the finish line is too far away, the card gets abandoned after two stamps and the print run is wasted.
Get Started
Ready to print a loyalty card people keep?
Bring your grid to 4OVER4.COM and print it on stock that survives a full reward cycle, with live pricing, real proofs, and a team that checks your file before it runs.
Legal Disclaimer
Gold Standard guarantees apply to all standard orders placed through 4over4.com. Price match requires verifiable proof of a competitor's published price for an equivalent product with matching specifications and turnaround time. Satisfaction guarantee covers manufacturing defects and print quality issues. Contact support with order number and documentation. On-time delivery rate based on tracked orders 1999 to 2026. Individual results may vary based on shipping carrier performance.
