Table of Contents
- Home
- content hub
- How to Print Stickers at Home: A Quick DIY Guide
How to Print Stickers at Home: A Quick DIY Guide
Mar 10, 202617 views
Mar 10, 202617 views
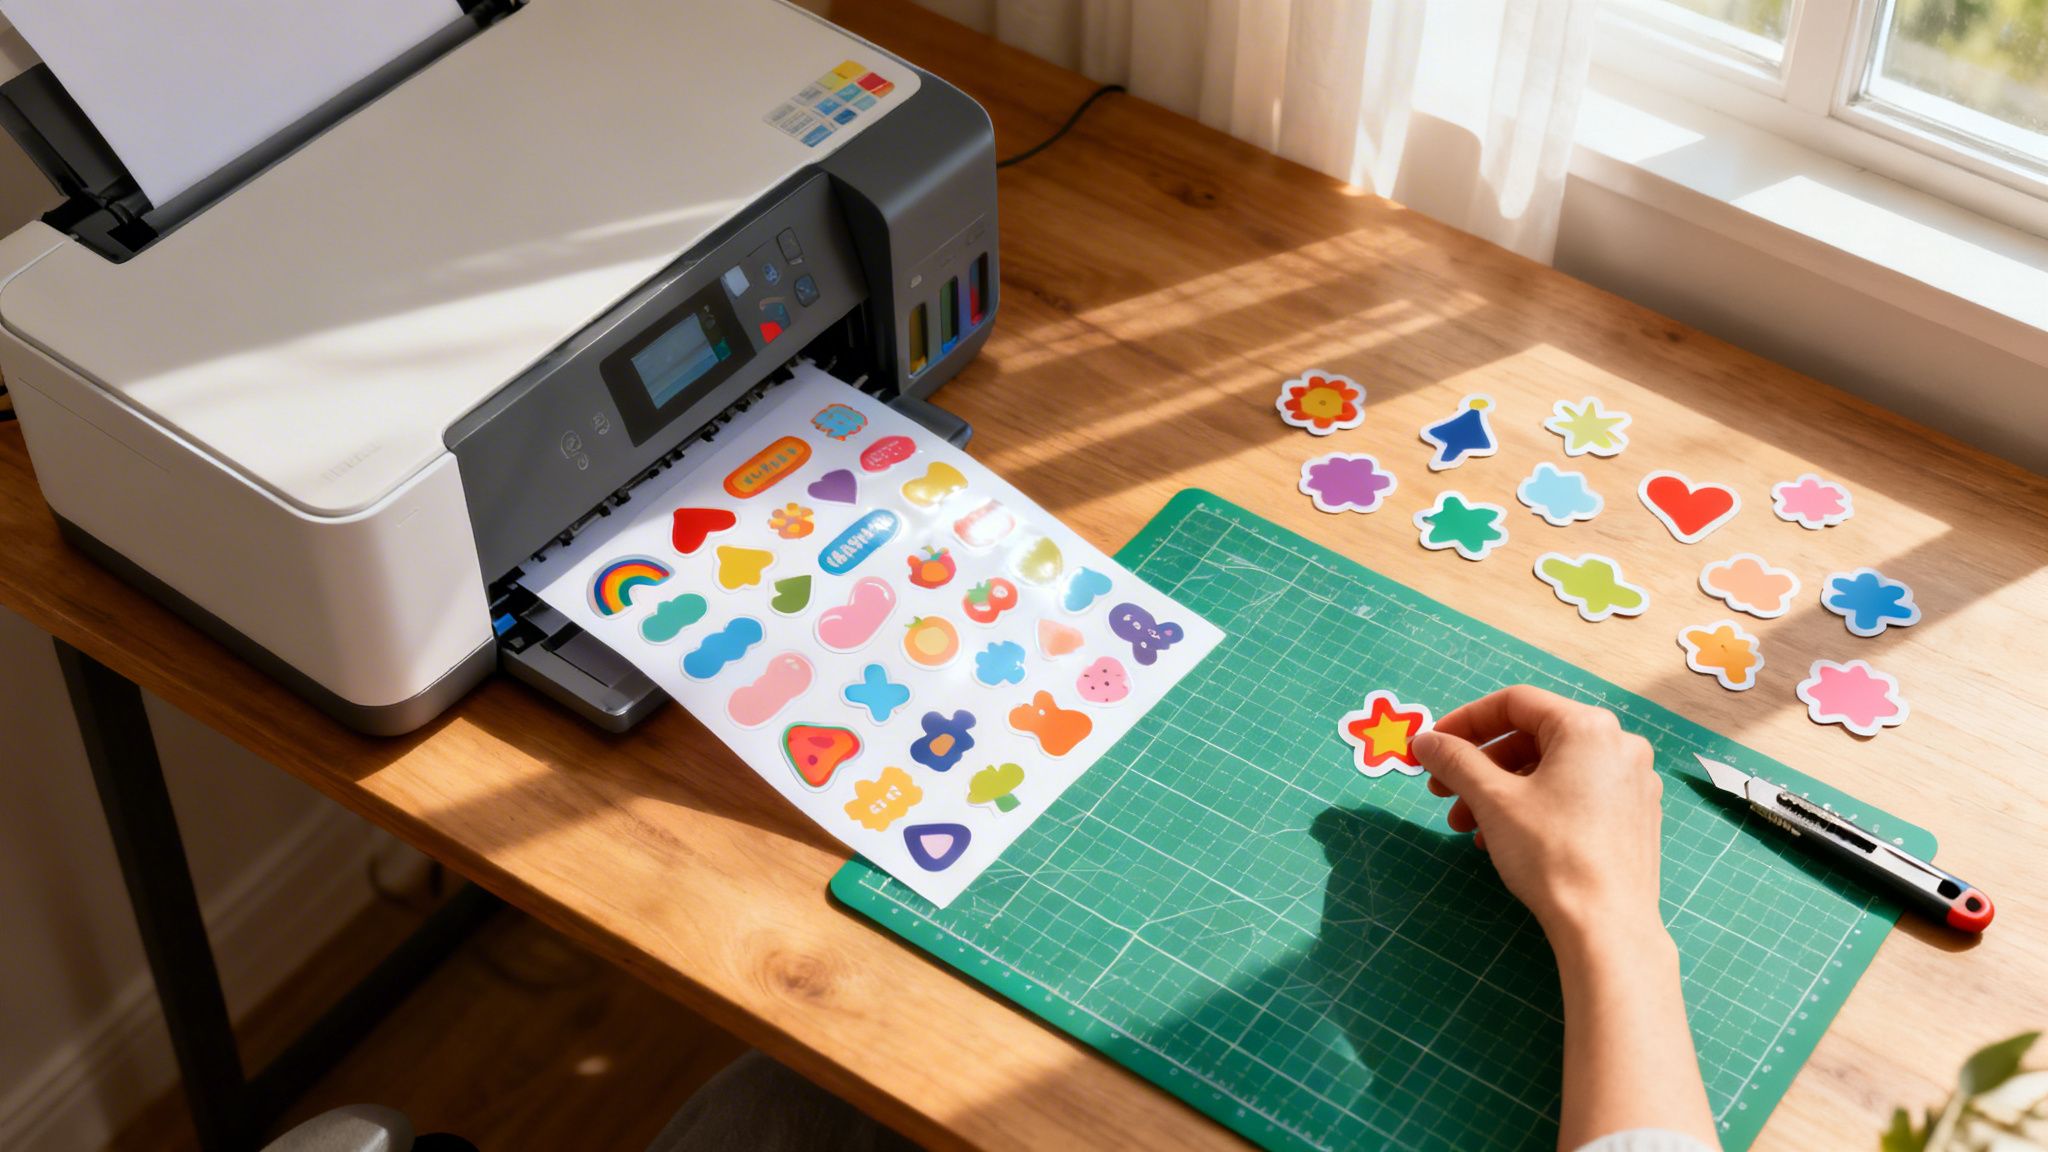
Printing stickers at home is a seriously fun and rewarding project. It boils down to four main parts: designing your image, picking the right sticker paper, printing it correctly, and finally, cutting it out. To get going, you'll need sticker paper that works with your printer (inkjet or laser), a finalized design, and a way to cut them out, whether it's with scissors or a machine like a Cricut.
Everything You Need to Print Stickers at Home
Ready to turn those digital ideas into actual, custom stickers? Printing your own gives you total creative control, whether it's for your small business, a personal planner, or an Etsy shop. Before you hit "print," though, it's a good idea to get all your ducks in a row. Think of it like setting up a workshop—having the right tools and materials ready from the start saves a ton of frustration and wasted supplies.
This simple visual breaks down the core workflow for pretty much any DIY sticker project you can think of.

It really is that straightforward. The journey from a digital concept to a physical sticker follows a clear three-part sequence—Design, Print, and Cut—and each step just needs the right tools and a bit of attention to detail.
Your Essential Sticker Printing Toolkit
Your success really hinges on having the right mix of materials and hardware. Every single piece plays a part in the final quality of your stickers.
Here’s a quick overview of the key components you'll need to make great stickers at home.
DIY Sticker Printing At a Glance
| Component | Key Decision | Best For |
|---|---|---|
| Printer | Inkjet vs. Laser | Inkjet for vibrant colors, laser for speed and sharp text. |
| Sticker Paper | Matte, Glossy, or Vinyl | Matte for a subtle look, glossy for photo-quality pop, and vinyl for durability. |
| Design File | High-Resolution Image | 300 DPI resolution to ensure prints are sharp and clear, not blurry. |
| Cutting Method | Manual vs. Machine | Scissors for simple shapes, a cutting machine for complex or bulk jobs. |
Each of these choices will steer the look, feel, and durability of your final product.
Breaking Down the Essentials
Let's dig a little deeper into what you absolutely need:
- A Reliable Printer: An inkjet printer is usually the go-to for its fantastic, vibrant color output, which is perfect for detailed artwork. That said, a laser printer can definitely work, you just have to use compatible laser sticker paper.
- The Right Sticker Paper: This is non-negotiable. You have to use paper designed for your printer type. Choices range from matte and glossy to durable vinyl, each giving a completely different look and feel.
- A Completed Design: Your artwork should be totally finished and saved as a high-resolution file—at least 300 DPI is the standard to avoid any pixelated or blurry prints.
- A Cutting Method: For simple shapes, a good pair of scissors or a craft knife works just fine. If you’re dealing with complex designs or making a bunch at once, an electronic cutting machine like a Cricut or Silhouette gives you that clean, professional precision.
The most common mistake beginners make is using the wrong paper for their printer. Inkjet paper in a laser printer can literally melt and wreck your machine. On the flip side, laser paper in an inkjet will just give you smudged, low-quality prints. Always, always double-check that compatibility.
Setting Up for Success
Once you have your tools, it’s all about prep. Arrange your designs on a single document to squeeze the most out of each sticker sheet, making sure to leave enough space between each image for easy cutting. This little step goes a long way in minimizing waste and saving you money on materials over time.
For projects that need to be extra tough, especially for outdoor use or on things that get handled a lot, you might want to look at professional options. For instance, exploring high-quality adhesive vinyls can give you a level of water and UV resistance that’s just plain hard to replicate with a standard home setup. Nailing this foundation puts you on the right path to creating some amazing, professional-looking stickers all by yourself.
Choosing the Right Sticker Paper and Tools
The secret to a sticker that looks and feels professional isn't just the design—it's the materials you start with. Learning how to print stickers at home means becoming a bit of a material expert, because your choice of paper directly dictates the final look, feel, and lifespan of your creations.
Think of it like choosing the right canvas for a painting. You wouldn't use watercolor paper for an oil painting and expect great results. The same logic applies here—your paper and printer have to work together perfectly.
Selecting the Perfect Sticker Paper
Walking into an office supply store or browsing online reveals a huge variety of sticker paper options, each with a specific purpose and finish.
Here are the most common types and what they’re best for:
- Matte Sticker Paper: This paper has a soft, non-glare finish. It’s perfect for labels you might want to write on, like for pantry jars or planners. The subtle surface gives designs a more elegant, understated look.
- Glossy Sticker Paper: With its shiny, reflective coating, glossy paper makes colors jump off the page. This is the go-to for photo-quality stickers or brand logos where you want the colors to really pop.
- Vinyl Sticker Paper: This is your most durable option. Since vinyl is a type of plastic, it’s both water-resistant and tear-resistant. It’s the best choice for stickers that will see some action, like on water bottles, laptops, or phone cases.
When you're picking out paper, the single most critical factor is making sure it's compatible with your printer. This isn’t just a friendly suggestion; it’s a hard and fast rule.
Using the wrong paper can lead to disaster. Inkjet paper fed into a laser printer can literally melt from the heat, which could cause serious damage to your machine. On the flip side, laser paper in an inkjet printer will leave you with a smudged, wet mess because its surface isn't made to absorb liquid ink.
For projects that demand ultimate durability, especially for outdoor use, you might want to consider professionally printed options. Learning about specialty materials like high-quality waterproof labels can show you the next level of resilience that's difficult to achieve with a home setup.
Printer and Cutting Tool Considerations
Your printer is the heart of your sticker-making operation. The two main types available for home use are inkjet and laser, and each has its own set of pros and cons.
Inkjet printers are generally the favorite for home sticker making. They work by spraying tiny droplets of liquid ink, which allows for incredibly rich, vibrant colors and smooth gradients. This makes them ideal for detailed illustrations and photo-realistic designs. Most consumer models use dye-based inks, which produce brilliant colors but can fade over time and aren't waterproof without lamination.
Laser printers, on the other hand, use a fine powder called toner that gets fused onto the paper with heat. This process creates exceptionally sharp text and graphics that are durable and water-resistant right out of the printer. However, laser printers sometimes struggle to reproduce the same color depth and subtlety as their inkjet counterparts.
To make the right paper choice, it helps to see a direct comparison. This table breaks down the core differences in the paper required for each printer type.
Sticker Paper Comparison Inkjet vs Laser
| Feature | Inkjet Sticker Paper | Laser Sticker Paper |
|---|---|---|
| Coating | Porous, absorbent coating to soak up liquid ink | Smooth, heat-resistant coating for toner fusion |
| Best For | Vibrant, photo-quality colors and gradients | Sharp, crisp text and bold graphics; durability |
| Durability | Prone to smudging if wet (unless laminated) | Naturally water-resistant and smudge-proof |
| Cost | Generally more affordable and widely available | Can be slightly more expensive |
As you can see, the paper itself is engineered completely differently. Choosing the right one ensures your printer can do its job and your stickers come out looking clean and professional.
Finally, you need a way to cut your stickers out. The method you choose will depend on your budget, the complexity of your designs, and how many stickers you're planning to make.
- Manual Cutting: For a low-cost, high-control option, you can't beat a sharp craft knife, a metal ruler, and a self-healing cutting mat. This method gives you complete control but requires a steady hand and a good deal of patience, especially for intricate shapes.
- Electronic Cutting Machine: Devices like a Cricut or Silhouette are absolute game-changers for anyone serious about making stickers. They use a tiny, computer-guided blade to cut your designs with incredible precision, allowing for complex shapes that would be nearly impossible to do by hand.
A great sticker starts with a great design. This is where your creative vision has to meet the technical realities of printing, and getting this step right is what separates a polished, intentional sticker from a first-time experiment. Luckily, the software you can use ranges from super accessible to the full industry standard, so there’s a solid option no matter your skill level.
For anyone just starting out, free tools like Canva or Sticker Mule’s Studio are fantastic. They come packed with templates and have simple drag-and-drop interfaces that let you put a design together in minutes. If you’re more of an artist who prefers a hands-on approach, something like Procreate on an iPad gives you the total freedom to draw your own creations from scratch.
Seasoned designers, on the other hand, almost always turn to Adobe Illustrator. It’s a vector-based program, which means you can create graphics that scale to any size imaginable without ever losing quality—a massive advantage for any professional-level work.
Setting Your Canvas for Print Quality
No matter which software you land on, two technical settings are absolutely non-negotiable if you’re learning how to print stickers at home: resolution and color mode. Getting these wrong from the get-go is probably the most common reason homemade stickers end up looking blurry or having funky colors.
First, you must set your canvas resolution to 300 DPI (dots per inch). Screens display images at a much lower resolution, typically 72 DPI, but printers need way more data to produce sharp, crisp details. If you design at a low resolution, your sticker will look pixelated when it comes out of the printer, no matter how good the machine is.
Second, make sure your document is set to CMYK color mode, not RGB.
- RGB (Red, Green, Blue) is for digital screens. It makes colors by adding light together, which is why you can get those super bright, vibrant hues.
- CMYK (Cyan, Magenta, Yellow, Black) is for printing. It makes colors by subtracting light as ink gets layered onto paper.
The CMYK color range is smaller than RGB's. This means some of those ultra-bright colors you see on your screen—like electric blues or neon greens—will naturally look a bit duller in print. Designing in CMYK from the start gives you a much more accurate preview of the final product and helps you avoid any disappointing color surprises.
The Secret to Perfect Edges: Bleed
Ever seen a sticker with that weird, thin white sliver around the edge where the cut wasn't perfectly lined up? That’s what happens when a design has no bleed. Bleed is simply an extra margin of your design’s background that extends beyond the final cut line.
Think of it as a safety net for the cutting process. No cutting machine is 100% perfect, 100% of the time. By adding a bleed—usually 1/8th of an inch or .125 inches on all sides—you ensure that if the cut is just a tiny bit off-center, the blade will slice through the extra background color instead of hitting the unprinted white paper. This is the key to a clean, professional-looking edge-to-edge color finish.
Design Tips for Standout Stickers
Beyond the technical setup, great design principles will make your stickers far more appealing. A sticker that's cluttered or hard to read is a sticker that gets ignored.
Keep these quick tips in mind:
- Prioritize Legibility: If you’re including text, pick fonts that are clean and easy to read, even when they’re small. Thin, overly decorative script fonts often just turn into an unreadable smudge once printed.
- Use High-Quality Graphics: Always start with high-resolution images, icons, or illustrations. Pulling a low-quality graphic off the internet is a surefire way to get a blurry, unprofessional-looking final product.
- Maintain a Cohesive Style: Try to stick to a consistent color palette and font pairing. A unified design looks far more intentional than one that’s throwing a bunch of competing styles together.
These details are especially crucial if you’re trying to create complex or intricate shapes. For those really ambitious designs, it can be helpful to see what’s possible with professional services. You can learn more about how intricate shapes are produced in our guide to custom shape die-cut printing. Once you get the hang of both the creative and technical sides of design, you’ll be well on your way to making stickers that truly look pro.
Your Guide to Flawless Sticker Printing
You’ve got a fantastic design and the perfect sticker paper ready to go. Now comes the moment of truth: printing. This is where your digital art becomes a real, tangible thing, and getting the printer settings just right is what makes all that prep work worthwhile.

It’s easy to get tripped up at this stage, and I’ve seen countless people waste good ink and expensive paper because of it. But with a few quick checks, you can get vibrant, sharp, smudge-free stickers on the very first try. You just have to tell your printer exactly what you're doing.
Dialing In Your Printer Settings
Before you even think about hitting that "Print" button, you need to open your printer’s settings. This menu usually pops up when you select "File > Print." Don’t just blow past the default options—this is your chance to tell the printer you’re making something special.
Your goal here is simple: max out the quality. Forget about speed or saving ink for now.
- Print Quality: Look for a setting labeled "Print Quality" or just "Quality." You'll want to switch this from "Standard" or "Normal" to the absolute best setting available. This might be called "Best," "High," "Fine," or "Photo Quality." This forces the printer to slow down and use more ink for maximum detail and color richness.
- Paper Type: This one is crucial. Your printer changes how much ink it sprays based on the paper it thinks it's using. Since "Sticker Paper" is rarely an option, you need to pick the next best thing.
- For glossy sticker paper, choose "Glossy Photo Paper" or "Premium Glossy."
- For matte sticker paper, select "Matte Photo Paper" or "Premium Matte."
- Color Management: Make sure "Color Printing" is turned on, not "Grayscale." Some printers also have an "Enhanced Color" or "Vivid Photo" mode, which can really make your sticker designs pop.
These settings genuinely make a night-and-day difference. If you want to get into the nitty-gritty of how professionals manage color and materials, our overview of digital printing techniques is a great place to dig deeper.
The single biggest mistake you can make is forgetting to change the paper type. If you leave it on "Plain Paper," the printer will use way too little ink, leaving you with faded, washed-out colors on your pricey sticker sheets.
A Quick Pre-Print Checklist
Wasting an entire sheet of premium sticker paper is just painful. To keep that from happening, run through this quick checklist before you print the whole batch. It's a simple habit that saves a lot of headaches.
- Print a Test on Plain Paper: Always, always print a single copy on cheap, regular paper first. This lets you check the size, layout, and colors without sacrificing a valuable sticker sheet.
- Confirm Paper Orientation: Every printer loads paper differently. Not sure which side gets printed on? Just take a piece of plain paper, draw an arrow on one side, and run a test print. Now you know exactly how to load your sticker paper correctly.
- Check Your Ink Levels: Nothing is worse than a low ink cartridge causing streaks or weird colors halfway through a print job. A quick check beforehand prevents a ruined sheet.
Inkjet vs. Laser: The Practical Differences
Once your sticker sheet is printed, what you do next depends entirely on the type of printer you have.
- Inkjet Prints: The ink will be slightly wet right out of the printer. You have to let the sheet air dry for at least 5-10 minutes before you even think about touching it or trying to cut it. Handling it too soon is a guaranteed way to get smudges and fingerprints all over your hard work.
- Laser Prints: These are good to go immediately. The toner is fused to the paper with heat, so there's zero drying time needed.
By taking a moment to nail your settings and follow a simple pre-print routine, you take all the guesswork out of the process. This methodical approach is the secret to pulling off flawless, pro-level stickers right from your home office.
How to Cut and Finish Your Stickers
You've successfully printed your sticker sheet, and the colors look incredible. Now comes the final, transformative step: cutting and finishing. This is what turns a simple printed sheet into durable, professional-looking stickers, defining their shape and adding that crucial polished touch.

There are a couple of ways to tackle this, from hands-on manual methods to automated precision cutting. The path you choose will really depend on your budget, the complexity of your design, and just how many stickers you plan to make.
Upgrading Durability with Lamination
Before you even think about cutting, consider adding a protective layer. This is a pro-level trick that massively boosts the lifespan of your stickers, especially if you're using an inkjet printer. Applying a self-adhesive laminate sheet makes your stickers waterproof, scratch-resistant, and even adds UV protection to stop the colors from fading in the sun.
The process is pretty straightforward:
- Cut a piece of laminate just slightly larger than your sticker sheet.
- Carefully peel back about an inch of the laminate’s backing paper.
- Align this exposed sticky edge with the top of your printed sticker sheet.
- Using a credit card or a plastic squeegee, slowly and firmly press the laminate down, pushing out air bubbles as you go.
Take your time here to avoid trapping air. A smooth application is everything. This single step can elevate your homemade stickers from a simple craft to a product that can actually withstand being on a water bottle or laptop.
Manual Cutting for Simple Shapes
If you're just starting out or only making a handful of stickers with simple shapes like squares or circles, you don’t need any fancy equipment. A steady hand and a few basic tools are all it takes to get surprisingly clean results.
Your essential toolkit for manual cutting should include:
- A self-healing cutting mat to protect your work surface.
- A sharp craft knife (like an X-Acto knife) for precision.
- A sturdy metal ruler for perfectly straight lines.
For squares and rectangles, just line up your ruler and make firm, confident cuts. When it comes to circles or other simple curves, it’s often easiest to cut the stickers into individual squares first, then carefully trim around the design. It takes patience, but the results can be excellent.
Automated Cutting for Precision and Speed
When your designs get more intricate or you start making stickers in larger quantities, manual cutting quickly becomes a serious time sink. This is where electronic cutting machines like a Cricut or Silhouette become absolute game-changers for anyone serious about printing stickers at home.
These machines use a small, computer-guided blade to cut your designs with flawless precision, opening up a world of creative possibilities. With a cutting machine, you'll need to get familiar with two key terms:
- Kiss Cut: This is the most common cut for sticker sheets. The blade slices through the top vinyl layer but leaves the paper backing completely intact. This is what lets you peel individual stickers off a larger sheet.
- Die Cut: This cut goes through both the vinyl sticker and its backing paper. It creates a custom-shaped sticker where the backing perfectly matches the design's outline, giving you a more premium, individual product.
Before you send a full sheet to be cut, always run a test cut on a small corner of your sticker paper. Different paper types (and laminate combinations) require different blade depth and pressure settings. A quick test prevents you from ruining an entire sheet with cuts that are too deep or too shallow.
Setting up your machine involves calibrating it to read the printed registration marks on your sheet, which ensures the cuts line up perfectly with your designs. You’ll also need to find the ideal cut settings for your specific material. For example, a common starting point for vinyl on a Cricut might be a blade depth of 2 and a speed of 5, but you'll almost always need to fine-tune from there.
The precision of these machines is what allows for the intricate outlines that define professional-grade stickers. For those interested in advanced cutting techniques, our guide to professional die-cutting services offers more insight into how complex shapes are achieved at a commercial scale.
When to Outsource Your Sticker Printing
Learning to print your own stickers at home is a fantastic skill. You get total control over small batches, test out new designs on the fly, and see your ideas come to life instantly. But as your sticker-making journey evolves, you’ll hit a wall where DIY just doesn't make sense anymore. That's when professional printing becomes the smart play.
It’s easy to assume DIY is the cheapest route, but the costs add up in ways you don't always expect. The true cost of a single sticker isn't just the vinyl sheet—it's the ink your printer guzzles, the wear on the machine, and most importantly, the hours you spend printing, laminating, and cutting each one.
I’ll never forget the time I calculated my actual cost for a batch of 100 3-inch die-cut stickers. Once I factored in the premium vinyl, the ink usage, and the two hours I spent babysitting my cutting machine, my cost per sticker was nearly $0.40. That didn't even touch on the inevitable misprints and wasted sheets.
The Real Cost of a 'Cheap' DIY Sticker
Before you commit to another all-nighter of cutting, take a moment and do the honest math. A realistic breakdown of your costs looks something like this:
- Sticker Paper: The price you pay per sheet, divided by the number of stickers you can squeeze onto it.
- Ink Usage: This is tricky to pin down, but a full-color, high-quality print uses a surprising amount of ink. A conservative estimate is often between 5-10 cents per sticker.
- Your Time: This is the big one. If you value your time at a modest $20/hour and it takes you an hour to cut a sheet of 50 stickers, you’ve just added $0.40 per sticker in labor costs alone.
When you start adding all that up, you might find your "affordable" homemade stickers are costing you more than you realize, especially when you see the per-sticker price from a professional printer on a bulk order.
When Professional Printing Is a No-Brainer
Sometimes the decision is made for you. If you find yourself in any of these scenarios, it’s a clear sign that it’s time to hand the job over to the pros.
- You're Scaling Up: If you need more than a couple hundred stickers, and especially if you're looking at an order of 1,000 or more, outsourcing is the only way to go. A professional print shop can run thousands of stickers in the time it takes you to perfectly cut a single sheet.
- Your Designs Are Intricate: Got a design with complex edges, sharp points, or delicate, thin lines? A consumer-grade cutting machine will likely struggle, leading to tears and frustration. Commercial die-cutters, on the other hand, handle these with flawless precision every single time.
- You Want Specialty Finishes: If you’re dreaming of holographic, foil, glitter, or crystal-clear stickers, these just aren't achievable at home. These incredible finishes require specialized equipment and materials that are only available at a commercial level.
- You Need Unbeatable Durability: For stickers that have to survive the elements, like Bumper Stickers, professional printing is non-negotiable. Pros use solvent inks and heavy-duty vinyls designed to withstand sun, rain, and snow for years without fading or peeling.
When you reach that point, working with a service like 4OVER4 opens up a world of possibilities. You get access to better technology, a huge variety of materials, and bulk pricing that saves you both time and money. It lets you step away from the printer and focus on what you do best: creating amazing designs.
Frequently Asked Questions About Printing Stickers
As you start making your own stickers, a few questions always seem to pop up. It's one thing to read a guide, but it's another to actually hit "print." Let's tackle some of the most common hurdles you might face.
Why Do My Printed Colors Look Different From My Screen?
Ah, the age-old problem. That vibrant electric blue on your monitor comes out looking a little more subdued on paper, right? This all comes down to the difference between RGB and CMYK color modes.
Your screen creates color by projecting light using RGB (Red, Green, Blue). This method can produce brilliant, glowing hues that ink simply can't replicate. Printers, on the other hand, work with CMYK (Cyan, Magenta, Yellow, Black) ink, which absorbs light on the paper's surface. The CMYK color range is just naturally smaller and can't hit those super-bright screen tones.
For a much more accurate preview of the final product, always set up your design file in CMYK mode from the very beginning.
Can I Use a Laser Printer for Stickers?
You definitely can, but you have to be careful. You must use sticker paper made specifically for laser printers. It will be clearly labeled on the packaging.
Laser printers use intense heat to fuse toner onto the page. If you feed it a sheet of standard inkjet vinyl sticker paper, you risk it melting inside the machine. That’s a fast track to a very expensive repair. While inkjets are usually the go-to for rich color in artwork, laser printers are fantastic for creating text and graphics that are crisp and durable right off the press.
Pro Tip: Never, ever guess on paper compatibility. Using the wrong paper is the quickest way to ruin a sheet of stickers and potentially your printer. Double-check the packaging to confirm it’s a match for your printer type—inkjet or laser.
Is It Okay to Sell Stickers I Make at Home?
While you can technically sell stickers you make at home, I generally don't recommend it if you're trying to build a serious brand or Etsy shop. Homemade stickers, particularly from a standard inkjet printer without any protective lamination, just don't have the professional polish and durability customers expect.
They often fade in sunlight, can smudge if they get wet, and tear pretty easily. The professional-grade equipment needed to overcome these issues is a major investment. That’s why many creators start by prototyping designs at home and then turn to a professional printer to produce their actual retail inventory.
When you're ready to scale up your business or need specialty finishes that just can't be done at home, 4OVER4 delivers the quality and durability your brand deserves. Take a look at our complete lineup of professional sticker printing options.
More from

37
Ever seen a logo that seems to float right on the glass of a jar or bottle? That’s the work of transparent label stickers.
![]() Emma Davis
Emma Davis
Mar 9, 2026

39
Picture this: your product’s beautiful label gets smudged and runny during shipping, or a gorgeous event banner fades to nothing after just
![]() Emma Davis
Emma Davis
Mar 8, 2026

46
In a sea of options, your product's packaging and labeling are its first, and often only, chance to make a real connectio
![]() Emma Davis
Emma Davis
Mar 7, 2026

70
Ever tried to print a hundred high-quality flyers on your home office printer? You probably ran out of ink, dealt with paper jams, and ended u
![]() Emma Davis
Emma Davis
Mar 6, 2026

64
So, what exactly is typography in graphic design? Put simply, it’s the art of arranging letters and text in a way that is clear, legible, an
![]() Emma Davis
Emma Davis
Mar 5, 2026

727
The fundamental difference between traditional and digital marketing really boils down to one thing: traditional marketing casts a wid
![]() Emma Davis
Emma Davis
Mar 4, 2026

59
Business loyalty cards are a classic for a reason. They're more than just a marketing gimmick; they're a powerful way to reward repeat
![]() Emma Davis
Emma Davis
Mar 3, 2026

310
The best business cards for a construction company nail three things: they feel durable, just like your work; they’re
![]() Emma Davis
Emma Davis
Mar 2, 2026