Table of Contents
- Home
- content hub
- Your Guide to Transparent Label Stickers
Your Guide to Transparent Label Stickers
Mar 9, 202611 views
Mar 9, 202611 views
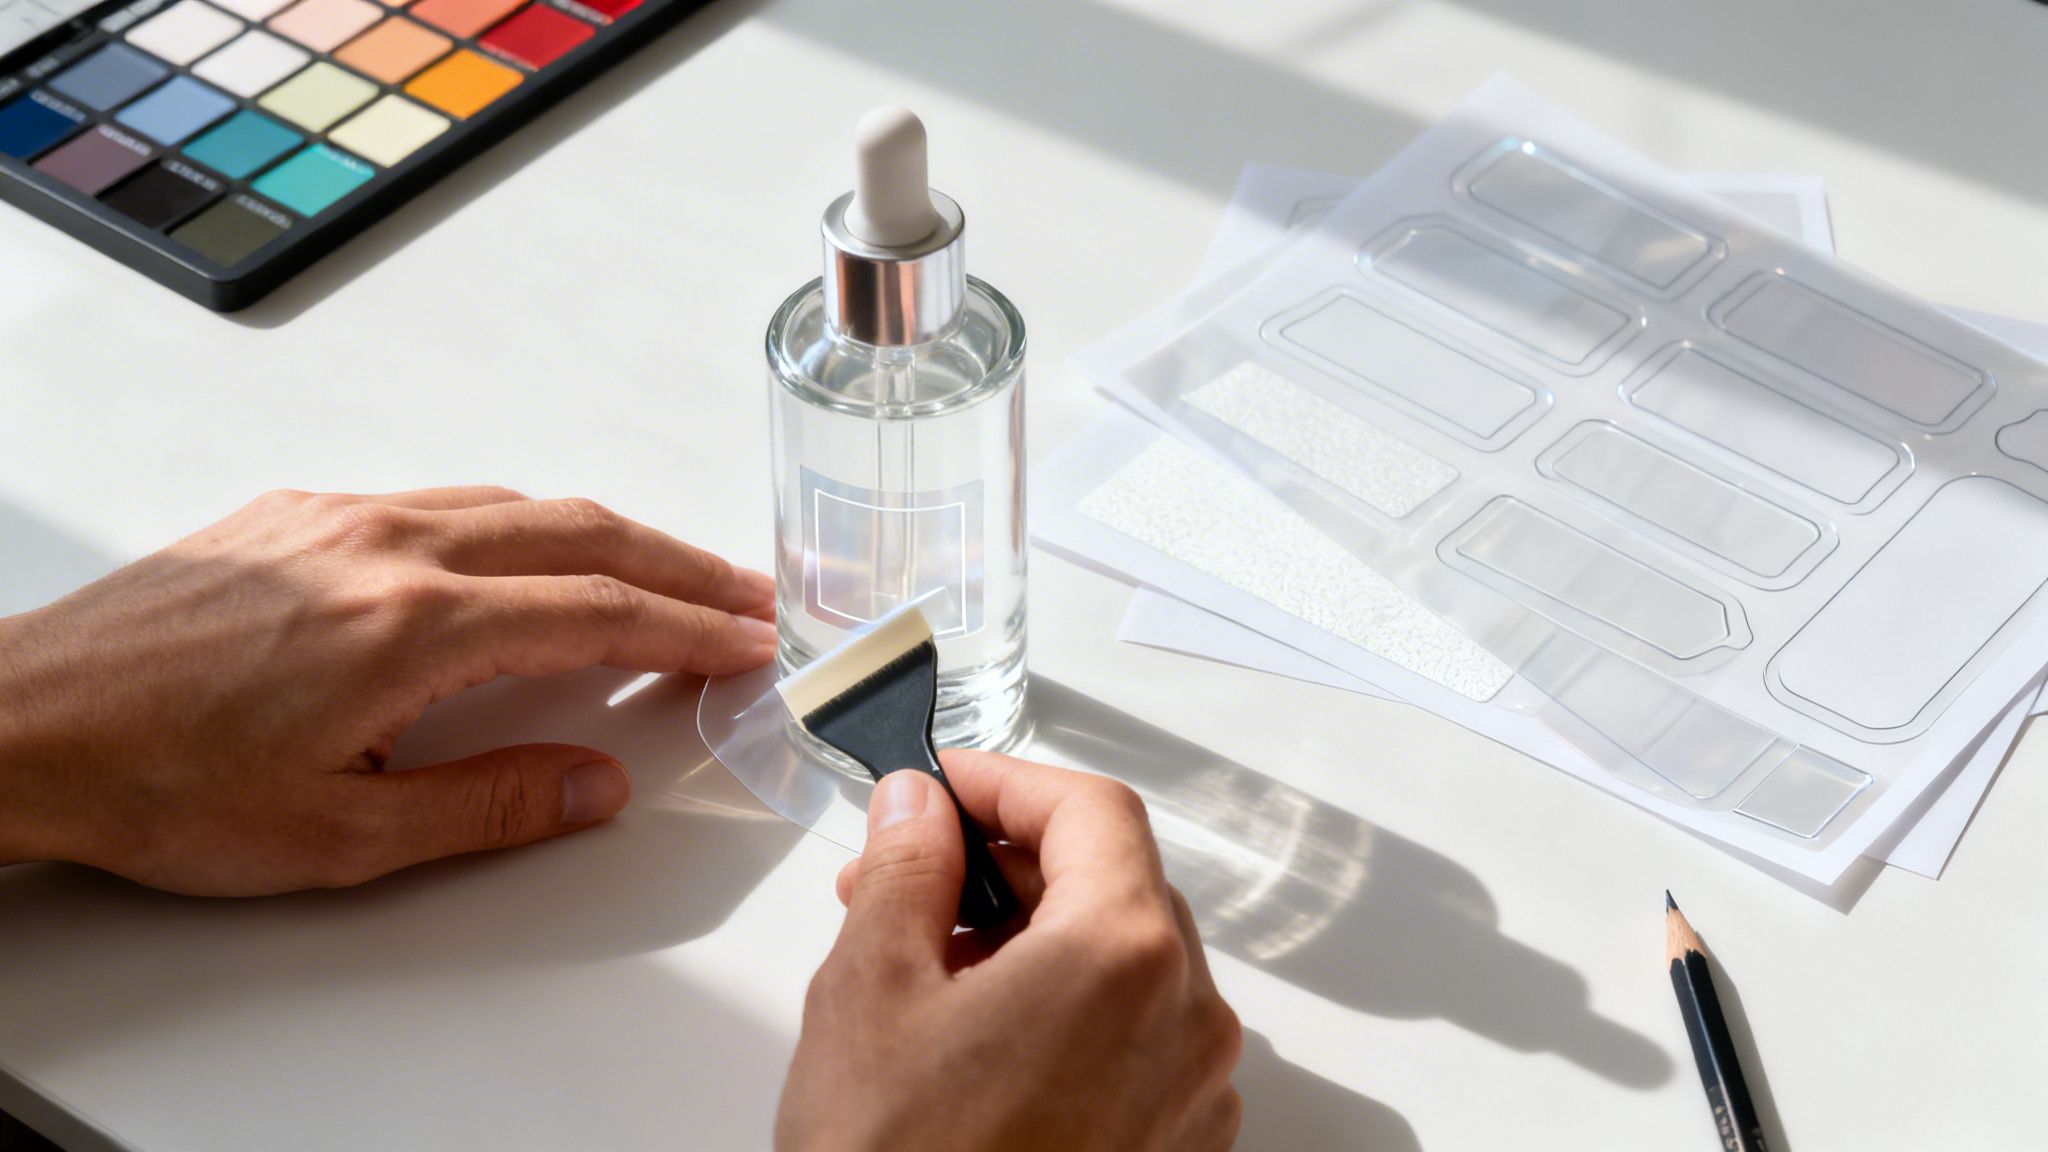
Ever seen a logo that seems to float right on the glass of a jar or bottle? That’s the work of transparent label stickers. They create that sleek, premium "no-label" look by using a clear material, which makes your product’s own color and texture a key part of the design.
What Are Transparent Label Stickers

Think of a transparent label sticker as a chameleon for your packaging. It’s not just a see-through sticker; it's a strategic choice. When you apply one to a glass jar, a cosmetic bottle, or a clear box, the label itself practically vanishes, leaving only your brand and key info to stand out.
This effect gives your product an immediate high-end feel. Instead of covering up what’s inside, you’re showcasing it, building trust and putting the quality of your product front and center. For things like cold-pressed juices, artisanal honey, or face serums, letting the product speak for itself is a huge selling point.
The Power of the No-Label Look
That "no-label" effect does more than just look clean—it projects confidence. It tells customers you're proud of your product and have nothing to hide. On a crowded store shelf or in a sea of online listings, that simple, minimalist appearance can make your item the one that catches the eye.
This shift toward clear, direct branding is a big deal. The global market for transparent stickers is valued at around $5 billion in 2025 and is on track to hit $8 billion by 2033. This boom is largely thanks to e-commerce, where your packaging is often the very first physical thing a customer touches.
A transparent label sticker turns your container into the canvas. Your product is no longer hidden behind a paper label; it becomes the hero of your packaging design. This creates a more authentic and engaging customer experience right from the shelf.
Why Transparency Matters in Branding
Opting for transparent labels is a conscious move that aligns your packaging with honesty and quality. It’s an incredibly effective strategy in competitive markets where a product's look can be the deciding factor for a shopper.
Here are the key benefits you get with transparent label stickers:
- Enhanced Product Visibility: Customers can see the exact color, texture, and quality of what’s inside the container.
- Premium Brand Perception: The sleek, professional finish is often associated with high-end and luxury goods.
- Design Versatility: Your logo and text can appear as if they were printed directly on the surface, opening up tons of creative possibilities.
- Durability and Resistance: Most are made from waterproof materials like vinyl or BOPP, perfect for products that handle moisture or heavy use.
Ultimately, these labels are a simple but powerful way to make your packaging do more work for your brand. For businesses ready to dive in, understanding the different types of packaging labels printing available is the perfect next step. By using transparency to your advantage, you start building a connection with your customer before they’ve even opened the box.
Choosing the Right Materials and Adhesives
Picking the right transparent sticker isn’t just about the design. It's about matching the physical sticker to the life your product is going to live. Think of it this way: you wouldn't wear suede shoes in a downpour. In the same way, you shouldn't put a basic label on a bottle that’s going to spend its life in a steamy shower. The material and the glue are the unsung heroes that make or break your product's presentation.
Get this part right, and your product looks sharp and professional from the moment it leaves your hands until it’s in your customer’s. A label that starts peeling, fading, or smudging after a week can do real damage to how people see your brand. Let's dig into the most common materials and adhesives to make sure your sticker is up for the job.
Understanding Transparent Sticker Materials
The magic of a "transparent" sticker all comes down to the film it’s printed on. These are typically plastic-based, and each one brings something different to the table. Getting to know them is your first step toward a label that looks great and actually lasts.
Here are the main players in the world of transparent stickers:
BOPP (Biaxially Oriented Polypropylene): This is the industry go-to for a very good reason. BOPP is a tough plastic film that shrugs off water, oil, and most chemicals. This makes it a fantastic, budget-friendly choice for things like food jars, drink bottles, and cosmetic products that might get wet or oily.
PET (Polyethylene Terephthalate): When you need exceptional clarity and strength, PET is your material. It’s more rigid and heat-resistant than BOPP, offering a premium, almost glass-like finish. This makes it perfect for high-end products or applications where the label has to endure higher temperatures.
Vinyl: If your top priority is pure toughness, you want vinyl. It's thicker, more flexible, and incredibly durable. This is the stuff you use for outdoor applications like car window decals or branding on heavy-duty equipment. While BOPP and PET are strong, vinyl is the undisputed champ for weathering the elements. For a deeper dive, check out the benefits of custom vinyl labels printing for those really demanding jobs.
To make the choice a little easier, we’ve put together a quick comparison of these materials.
Transparent Sticker Material Comparison
Choosing between BOPP, PET, and Vinyl really comes down to what your label will face every day. This table breaks down what each material does best, helping you match the film to its function.
| Material | Key Features | Best For |
|---|---|---|
| BOPP | Water & oil resistant, affordable, good clarity | Food jars, beverage bottles, cosmetic containers |
| PET | High-clarity, heat resistant, very durable | Luxury products, electronics, high-temperature uses |
| Vinyl | Extremely durable, weatherproof, flexible | Outdoor gear, window decals, heavy-duty applications |
Each one has its place, but the right choice ensures your design looks just as good on day one hundred as it did on day one.
Matching the Adhesive to the Application
Just as critical as the material itself is the adhesive—the "stick" that holds your label in place. The type of glue determines whether your label is there for good or can be peeled away without a fight. The wrong choice can lead to anything from a messy product to a frustrated customer.
The adhesive is the unspoken partner to your design. A permanent adhesive provides security for essential information, while a removable one offers flexibility for promotional messaging. The right choice ensures the label functions exactly as intended.
Here’s a look at the three main types of adhesives you’ll encounter:
Permanent Adhesive: This is your standard, workhorse adhesive. It’s engineered for a powerful, long-lasting bond and isn't meant to be removed easily. This is the go-to for primary product branding, warning labels, and any information that needs to stay with the product for its entire lifespan.
Removable Adhesive: This adhesive is designed to peel off cleanly, leaving no sticky gunk behind. It's perfect for things like promotional stickers on new electronics, temporary price tags, or labels on items the customer will want to be clean, like glassware or book covers.
Repositionable Adhesive: Giving you the best of both worlds, a repositionable adhesive lets you make small adjustments right after application. If you don't stick it on perfectly straight the first time, you can lift and re-apply it within a short window before the bond sets and becomes permanent. This is a total lifesaver for anyone applying labels by hand.
How to Design and Print Your Stickers
Taking an idea from a digital file to a crisp, physical sticker involves a few key design choices. It might sound technical, but getting it right from the start is what separates professional-looking transparent labels from ones that look washed-out or flimsy. The most important thing to get your head around is how colors work on a clear background.
Imagine trying to paint a bright yellow sun on a glass window with watercolors. The color would look faint and almost see-through, right? The same thing happens when you print on clear sticker material. Without a solid base, your colors just don't have the punch they need to stand out.
The Secret Weapon: White Ink
This is where white ink comes in. It’s the solution for getting vibrant, opaque designs on transparent label stickers. Think of it as a primer for your artwork. Just like a painter primes a canvas before adding color, we print a layer of white ink directly underneath your colored design.
This white underbase creates a solid, opaque foundation. When your CMYK colors are printed on top of it, they look just as bright and saturated as they would on white paper. The difference is night and day. Designs without a white ink underlayer often look faded and get lost against whatever product is behind them, while those with an underbase pop.
A white ink underbase is the single most important element for achieving professional-grade color on transparent label stickers. It provides the opacity needed to make your logo and design elements pop, ensuring they don't fade into the background.
This is exactly why any professional printer will recommend using white ink for any part of your design you want to be completely solid and opaque.
Mastering Your Artwork Files
To get a flawless print, your design files need to be set up correctly so the printer knows exactly where to lay down color, where to apply the white ink, and where to make the cut. The gold standard for any kind of sticker design is using vector graphics.
Vector files, typically made in programs like Adobe Illustrator, are built with mathematical paths instead of pixels. This means you can scale them to any size—from a tiny lip balm label to a huge window graphic—and they’ll stay perfectly sharp. The most common vector formats are AI, EPS, and SVG.
For a transparent sticker that uses white ink, your file should be organized with a few specific layers:
- Artwork Layer: This is your main design, containing all the CMYK color information.
- White Ink Layer: A separate layer that acts as a map, showing exactly where the white ink underbase should be printed. This is usually made by copying your artwork and filling it with a designated spot color labeled "White Ink."
- Dieline Layer: This is the vector path that tells the machine the exact custom shape to cut your sticker into.
This chart shows the basic steps, from choosing a material to selecting the right adhesive for your specific needs.

As you can see, your material and adhesive choices are foundational decisions that directly impact your sticker's performance and how well it holds up over time.
Printing Methods for Every Need
Once your design files are ready to go, it’s time to print. While old-school methods like offset printing are still used for massive orders, digital printing is now the go-to for most small and medium-sized businesses looking for custom labels.
Digital printing is a game-changer for anyone ordering transparent label stickers, and for good reason:
- Short-Run Friendly: You can order small quantities without a huge upfront investment. This is perfect for startups, seasonal products, or just trying out a new look.
- High-Quality Results: Modern digital presses produce incredibly sharp, vibrant colors that capture even the most intricate details with precision.
- Fast Turnaround: There are no physical plates to create, which means setup is minimal and production is much, much faster.
This flexibility puts professional-quality transparent labels within reach for businesses of any size. And even if you don’t have a background in design, platforms like 4OVER4 offer intuitive online design tools. These tools give you templates and a simplified interface to guide you through adding your logo, text, and even setting up your white ink layer, making custom sticker creation accessible to everyone.
Creative Ways to Use Transparent Labels
So we've covered the technical side, but let's be honest—the real magic happens when you get creative. Clear labels aren't just for listing ingredients; they're a powerful way to tell your brand’s story right on the product itself. Let’s look at how some of the most successful brands use these versatile labels to make a lasting impression.
The sticker market is massive and growing fast. It was valued at $4.61 billion in 2024 and is expected to hit $7.67 billion by 2033. Label stickers make up a huge 72.2% of that pie, thanks to their use everywhere from food to healthcare. For commercial products, where clear labels truly excel, they account for 54.7% of the market as of 2024, giving countless products a clean, durable look.
Elevating Cosmetics and Beauty Products
The beauty world is all about aesthetics, making transparent labels an obvious choice. Why hide your beautiful product behind a clunky, opaque label? Smart brands use clear stickers to let the product do the talking.
Think about a row of foundation bottles. A clear label lets customers see the exact shade inside, which is a game-changer for anyone trying to find their perfect match. The brand name and essential details seem to just float on the glass, creating a sophisticated look that feels both modern and trustworthy.
The same goes for things like vibrant lip glosses or shimmering body oils. A clear label lets the product's unique color and texture become the main event. You can go minimalist with a simple logo, or you can add a touch of luxury with elegant white or metallic ink. It’s a simple trick that instantly makes a standard container feel like a high-end purchase.
Showcasing Honesty in Food and Beverage
When it comes to food and drinks, transparency is more than a design trend—it's a promise of quality. When a customer can see the rich amber color of local honey, the bright green of a cold-pressed juice, or the fresh herbs in a gourmet sauce, you build trust before they even read a word.
Transparent labels create a 'farm-to-table' feel, even on a busy store shelf. By letting the natural beauty of the product show, you are communicating freshness and honesty before the customer even reads a word.
This approach works wonders for so many products:
- Glass Jars: The perfect choice for honey, jams, pickles, and sauces. A clear label gives off an artisanal, handcrafted vibe.
- Juice Bottles: Lets the healthy, vibrant colors of the juice grab all the attention.
- Spice Containers: Allows customers to see the texture and quality of the spices you're selling.
A matte finish on these labels can give you a soft, organic look that feels very high-end. If you want the colors to really pop, a gloss finish will give the product a polished, eye-catching look on the shelf. You can find more tips on how to design effective product labels printing that truly capture your brand's personality.
Adding a Touch of Class in Retail
Clear labels are fantastic for more than just product packaging. Their elegant, low-key nature makes them perfect for adding that final, classy touch to the whole customer experience. A boutique, for instance, could use a beautifully designed clear sticker to seal its shopping bags or tissue paper.
It's a small detail, but it makes the unboxing feel more special and curated. Clear labels also work beautifully as window clings for promotions or store hours, offering a much more refined look than a paper sign. Since the sticker is clear, it doesn’t block the view into your store, keeping the space feel open and inviting.
Application Tips and Eco-Friendly Options

A fantastic design deserves a flawless finish. Applying your transparent label stickers correctly is the final, crucial step to nailing that professional, "no-label" look we all strive for.
Even a tiny bubble or a slightly crooked placement can completely throw off the vibe of an otherwise perfect product. Taking just a moment to get the application right is always worth the effort. The secret isn't some expensive tool—it’s just a bit of prep and a steady hand.
Achieving a Flawless Application
Getting a smooth, bubble-free finish is much easier than you might think. Follow these simple steps, and you’ll get a result that looks like it came straight from a factory assembly line.
- Clean Your Surface: First things first, grab some rubbing alcohol and a lint-free cloth. Wipe down the application area and make sure it's completely dry and free of any dust, oils, or residue.
- Position with Care: Gently peel back just a small portion of the sticker's backing. Carefully line up this exposed edge with where you want it on your container.
- Smooth It On: Press that first edge down firmly. Now, take a credit card or a small squeegee and slowly smooth the rest of the sticker onto the surface. Always work from the center outwards to push any potential air bubbles toward the edges.
- Final Press: Once the sticker is fully on, give it one last firm rub-down with your cloth to make sure it has a strong, even bond.
Taking your time with this process pays off with a clean, professional look, every single time. It's these small details that truly elevate a brand. If your products will be handled a lot or exposed to moisture, you might want to explore specialized options like waterproof labels printing for an extra layer of durability.
Sustainable Choices in Transparent Labels
As consumers become more aware of their environmental footprint, the materials you choose for your packaging become a direct reflection of your brand's values. The world of transparent label stickers is evolving, and new eco-friendly options are emerging that let you stay sustainable without sacrificing that premium look.
One of the most exciting developments is the "wash-off" adhesive. These innovative glues are designed to release cleanly from glass and PET plastic bottles during the standard recycling process. This means the container can be fully recycled without any label contamination—a huge win for sustainable brands.
The push for sustainability is reshaping the label industry. Innovations are focused on reducing waste and improving recyclability, directly aligning packaging choices with a brand's commitment to the environment and meeting new global standards.
This trend is backed by major industry shifts. For instance, the self-adhesive market in North America is projected to hit $9.47 billion by 2032, largely driven by innovations that reduce waste. Technologies like wash-off adhesives are becoming critical for complying with new regulations like the EU's Packaging and Packaging Waste Regulation (PPWR), which demands higher recycling compatibility, especially as bans on chemicals like PFAS take effect.
By choosing these forward-thinking options, you're not just making a green choice; you're future-proofing your brand.
How to Order Your Custom Transparent Labels
Alright, you're ready to make it happen. Ordering your own custom transparent labels is a lot less complicated than you might think. We've laid out the entire process step-by-step on the 4OVER4 platform, so you can move from idea to finished product with total confidence.
Think of it like ordering a custom-built piece of furniture. You start with the basic model—your clear label—and then you get to pick all the specific features that will make it perfectly yours.
Step 1: Configure Your Order
The first stop is the product page, where you'll find our instant price calculator. This is where you lay the foundation for your project, defining all the core specs. It's built to give you real-time price updates as you make changes, so there are never any surprises down the line.
Here’s what you’ll be setting up:
- Size: Punch in the exact width and height your labels need to be.
- Quantity: Decide on the number of stickers you need. Remember, the price per sticker usually drops as you order more.
- Material: This one's easy. Just select the Clear BOPP option for your transparent labels.
- Finishes: Choose any extra touches, like a specific laminate, to achieve the final look you're after.
- Turnaround Time: Pick a production speed that lines up with your deadline.
Getting these details dialed in from the start is the key to making sure the final product fits your vision and your needs perfectly.
Step 2: Upload or Create Your Design
With your order configured, it's time for the creative part—the artwork. We give you a couple of simple paths forward, depending on how far along your design is.
If you already have a print-ready file with your artwork, white ink layer, and dieline all set to go, you can just upload it directly. This is the quickest option for anyone with a completed design.
Don't have a design yet? No problem. You can use the 4OVER4 online designer to build one from scratch or start with one of our pre-made templates. It makes it easy to create professional-looking custom labels printing even if you don't have any design experience.
Step 3: Approve Your Digital Proof
Once your design is submitted, our team will prepare and send you a digital proof. This step is absolutely critical. It’s your last chance to review every single detail before your transparent labels are sent to the printers.
Think of the digital proof as the final dress rehearsal for your design. Meticulously check every element—spelling, colors, placement, and cut lines—to ensure the final performance is flawless.
Go over it carefully. Check for any typos, make sure the white ink is positioned correctly, and confirm the dieline is exactly the shape you wanted. As soon as you give your final approval, your order heads into production. Following these steps guarantees a smooth, hassle-free process that ends with high-quality, custom labels arriving right at your door.
Frequently Asked Questions
When you’re considering transparent labels for the first time, a few questions always come up. It's totally normal to wonder how they’ll hold up in the real world, from the design process to the final application. Getting these details sorted out is key to choosing the right sticker for your brand.
We've heard all the common questions, so we’ve put together some straightforward answers. Let's clear things up so you can order your labels with total confidence.
Are Transparent Label Stickers Waterproof?
Yes, the high-quality transparent labels you'll find today are incredibly water-resistant. We use materials like BOPP (Biaxially Oriented Polypropylene) and vinyl, which are essentially non-porous plastics. That means they naturally shrug off water and oils without a second thought. This makes them perfect for products that live in the fridge, on a bathroom shelf, or even outdoors.
Imagine a BOPP label on a bottle of cold-brew coffee. It will handle all that condensation without ever peeling, smudging, or fading. For that extra layer of defense, especially against scratches or sun exposure, many stickers also feature a protective laminate.
Will My Colors Look Faded on a Clear Background?
This is a great question, and the answer is no—as long as you use a white ink underbase. Think of it like a painter’s primer. If you print color directly onto a clear surface, the ink will look translucent and washed out. It just won't have the impact you're looking for.
To make sure your colors are rich, vibrant, and fully opaque, a white ink underlayer is non-negotiable. This solid white foundation acts as a base that makes your design pop, ensuring it looks just as bright on a clear sticker as it would on solid white paper.
This is a standard technique in professional printing and it’s the secret to getting those bold, saturated colors that truly grab a customer's attention.
Can I Get Transparent Stickers in a Custom Shape?
Absolutely! Custom shapes are where transparent labels really get to shine. Through a process called die-cutting, we can produce your labels in almost any shape you can dream up.
This frees you from the standard circles and squares. You can design a sticker that perfectly traces the outline of your logo or follows a unique curve in your artwork. It’s a simple change that makes a huge difference in your product's visual appeal and helps your brand stand out on a crowded shelf.
What Is the Best Way to Apply Them Without Bubbles?
A smooth, bubble-free application all comes down to a little prep work. The first step is always to make sure your surface is completely clean, dry, and free of any dust, oils, or fingerprints.
When you're ready to go, start by placing just one edge of the label down. Then, using a squeegee or even the firm edge of a credit card, slowly smooth the rest of the sticker onto the surface. The key is to press from the center outwards—this simple motion pushes any trapped air out toward the edges, leaving you with a flawless finish.
Ready to see what high-quality transparent labels can do for your brand? With 4OVER4, you can easily design and order custom stickers that give your products that professional, high-end look. Explore our options and bring your vision to life today at https://4over4.com.
More from

25
Picture this: your product’s beautiful label gets smudged and runny during shipping, or a gorgeous event banner fades to nothing after just
![]() Emma Davis
Emma Davis
Mar 8, 2026

28
In a sea of options, your product's packaging and labeling are its first, and often only, chance to make a real connectio
![]() Emma Davis
Emma Davis
Mar 7, 2026

53
Ever tried to print a hundred high-quality flyers on your home office printer? You probably ran out of ink, dealt with paper jams, and ended u
![]() Emma Davis
Emma Davis
Mar 6, 2026

54
So, what exactly is typography in graphic design? Put simply, it’s the art of arranging letters and text in a way that is clear, legible, an
![]() Emma Davis
Emma Davis
Mar 5, 2026

714
The fundamental difference between traditional and digital marketing really boils down to one thing: traditional marketing casts a wid
![]() Emma Davis
Emma Davis
Mar 4, 2026

52
Business loyalty cards are a classic for a reason. They're more than just a marketing gimmick; they're a powerful way to reward repeat
![]() Emma Davis
Emma Davis
Mar 3, 2026

299
The best business cards for a construction company nail three things: they feel durable, just like your work; they’re
![]() Emma Davis
Emma Davis
Mar 2, 2026

109
Placing bulk sticker orders is one of the smartest investments a growing business can make. It’s a move that dramatically c
![]() Emma Davis
Emma Davis
Mar 1, 2026