Table of Contents
- Home
- content hub
- A Guide to the Label Die Cut Process
A Guide to the Label Die Cut Process
Jul 3, 20251182 views
Jul 3, 20251182 views
Ever wondered how brands get those cool, one-of-a-kind label shapes that perfectly match their logo or packaging? The secret isn't magic—it's a process called label die cutting.
Think of it like using a super-precise cookie cutter for labels. A custom-made tool, or "die," is created in the exact shape you want. This tool then cleanly cuts the design out of the label material, leaving the backing paper completely intact.
How Does Label Die Cutting Work?
At its heart, label die cutting is a brilliantly simple idea. Instead of being stuck with boring old squares, circles, or rectangles, you can have labels in virtually any shape you can dream up. This freedom comes from the specialized tool called a die—a sharp, custom-formed blade designed just for your project.
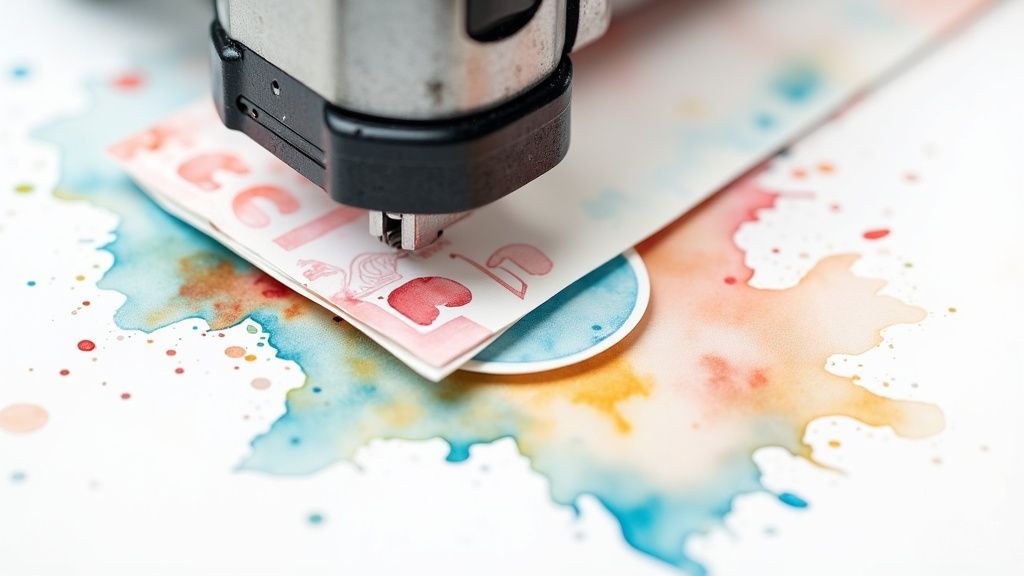
The die is pressed onto the label material with just the right amount of pressure. It slices through the top label layer but doesn't cut into the liner paper underneath. This delicate move, often called a "kiss cut," is what makes it so easy to peel your custom-shaped label off the sheet.
The result is a clean, professional-looking label that perfectly matches your vision and is ready to apply. That precision is what elevates a simple sticker into a powerful piece of your brand's identity.
Moving Beyond Standard Shapes
Sure, standard labels get the job done, but they just don't have the same "wow" factor as a custom shape. A die-cut label instantly tells customers you care about the details. It shows you've put real thought into every single part of your product's presentation.
Think about the key differences this makes:
- Brand Identity: A custom shape can become an iconic part of your brand. Imagine a coffee bean shape for a local roaster or a leaf shape for an organic skincare line.
- Shelf Appeal: On a crowded store shelf, a unique silhouette can grab a customer's attention much faster than another plain rectangle.
- Functional Design: Labels can be cut to fit tricky packaging perfectly, wrapping around corners or settling into recessed areas without any weird gaps or overlaps.
To give you a quick visual, here’s a side-by-side look at how die-cut labels stack up against their standard counterparts.
Die Cut Labels vs Standard Labels at a Glance
This table breaks down the core differences, helping you see at a glance why custom shapes can be a game-changer.
| Feature | Die Cut Labels | Standard Labels |
|---|---|---|
| Shape | Fully customizable to any unique shape | Limited to pre-set squares, circles, rectangles |
| Visual Impact | High, grabs attention and reinforces branding | Low to moderate, can blend in easily |
| Branding | Excellent for creating a memorable brand icon | Good for basic information and logo display |
| Cost | Generally higher due to custom tooling | More budget-friendly and cost-effective |
| Best For | Premium products, brand differentiation, unique packaging | High-volume needs, budget constraints, simple labeling |
As you can see, the choice often comes down to balancing brand impact with budget. But for brands looking to make a statement, die-cut is the way to go.
The ability to create something truly unique is why this part of the printing world is booming. The die-cut label market, currently valued at around USD 5.2 billion, is on track to hit USD 8.1 billion by 2033. This growth is all thanks to businesses recognizing how much a distinctive package can influence a buyer.
Key Takeaway: A label die cut isn't just a manufacturing technique; it's a strategic branding tool. It gives you the power to break away from generic formats and create packaging that's as unique as the product inside.
By moving beyond basic shapes, you create a memorable experience for your customers from the moment they see your product. If you're ready to see how this can transform your own products, it's worth exploring the possibilities with professional die cutting services. It’s how your label stops being just a label and becomes part of your product's story.
The Label Die Cut Production Journey
Turning a digital idea into a physical, perfectly shaped label is a fascinating journey of precision and craftsmanship. The die-cutting process isn’t just a single action but a sequence of carefully managed steps. Each one is vital to getting that flawless final product, and it all begins long before any machinery is turned on—it starts with a creative concept.
The first stop is the design phase. This is where the custom shape gets finalized in a digital format, almost always using vector graphics. This is critical because vector files are built from mathematical lines and curves, not pixels. This allows the cutting machines to read the exact path without any loss of quality, no matter the size. A clean cutline is established, which serves as the blueprint for the physical die.
Next, that digital blueprint is used to forge the actual die. This tool, typically made from hardened steel, is meticulously bent and shaped to match the label's outline precisely. For big jobs, a rotary die—a cylindrical tool—is the weapon of choice for fast, continuous cutting. For smaller batches or more complex, intricate designs, a flatbed steel-rule die might be created, which operates more like a traditional press.
The Art of the Kiss Cut
With the die ready to go, the process moves to the cutting machine. Here, large sheets or rolls of label material, which consist of the face stock (the label itself) and the backing liner, are fed into the press. The die is then pressed onto this material with incredibly precise, calibrated pressure.
This is where the real magic of the kiss cut happens. The goal is to apply just enough force to slice cleanly through the label material while leaving the paper backing completely untouched. It’s a delicate dance; too little pressure and the cut is incomplete, but too much pressure will slice right through the liner, ruining the whole sheet.
This infographic gives a simple visual breakdown of this three-stage journey, from a concept on a screen to a finished label ready for action.
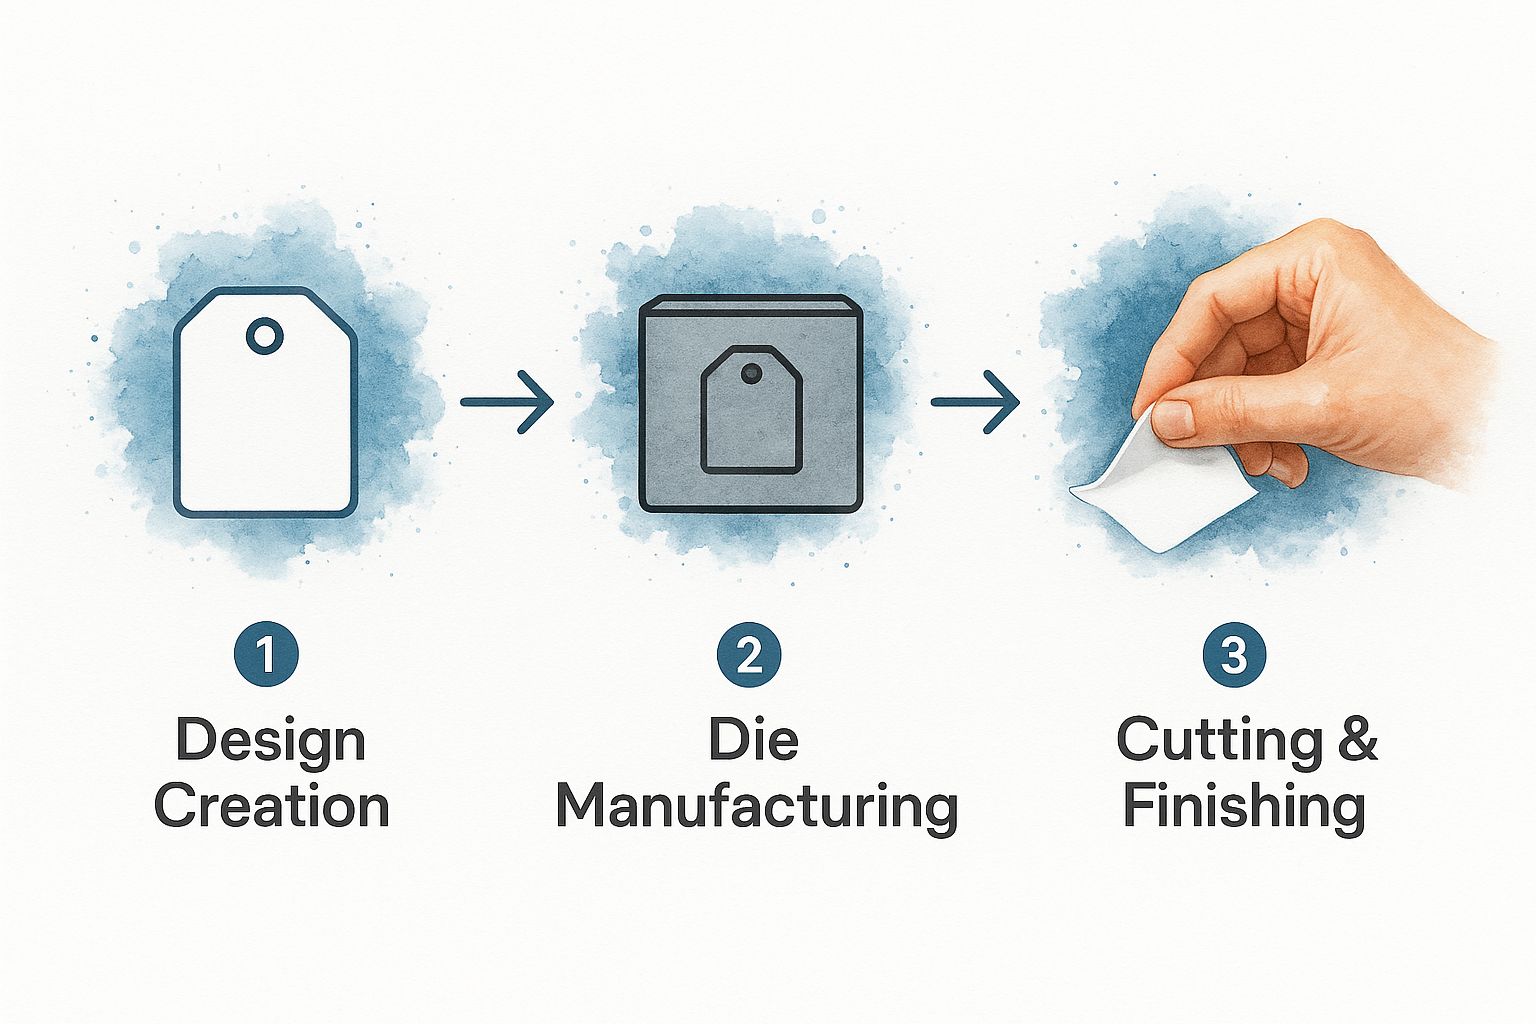
As you can see, the process flows logically from a digital design file to the manufacturing of a physical die, and finally to the cutting stage where the label is prepared for peeling.
Finishing and Final Touches
The journey doesn't quite end the moment the blade lifts off the paper. Once the kiss cutting is done, the final step is weeding. This is the oddly satisfying process of removing all the excess label material—often called the "matrix"—that surrounds your freshly cut shapes.
A precise and clean weeding process is essential. It ensures that only your perfectly shaped labels remain on the backing sheet, making them easy to peel and apply without any frustrating tears or snags.
Once the matrix is stripped away, the sheets or rolls of finished labels are inspected for quality, cut down to their final size, and prepped for shipping. From a simple digital file to a roll of ready-to-use custom labels, the entire production journey is a great example of how technology and mechanical precision come together.
Why Custom Shapes Are a Branding Superpower
In a marketplace crowded with products, standard squares and circles just don't cut it anymore. They get lost in the noise. A custom-shaped label, on the other hand, acts like a visual shortcut, making your brand instantly recognizable. It’s the difference between a generic sign on the highway and a logo you remember for years.
Think about a local honey company. A plain rectangular label gets the job done, sure. But what if that label is die cut into the shape of a honeycomb or a bee? Now you're telling a story. It immediately communicates the product's natural, handcrafted quality and creates an emotional connection before the customer even reads a single word.
This power to stand out is a huge reason why the die-cut label market is booming. It's projected to grow from USD 175.2 million to an estimated USD 230.6 million by 2032, all because businesses are catching on to the power of attention-grabbing packaging.
More Than Just a Pretty Shape
A unique label does more than just look good—it quietly boosts the perceived value of your product. When customers notice that extra detail and care, they instinctively associate it with higher quality. A thoughtfully shaped label hints that the product inside is just as special.
Custom shapes also have some serious practical advantages. They can be designed to wrap perfectly around odd-shaped containers, fit snugly into recessed areas, or even highlight a specific feature of the packaging itself. To really get a feel for how a label and its package work together, it helps to understand the fundamentals of product packaging design.
Key Insight: A label’s shape is a non-verbal cue that instantly communicates your brand's personality. In a single glance, it can signal playfulness, elegance, nature, or innovation.
Flipping through a custom shape diecut collection can be a great way to brainstorm how to bring your brand to life. Just imagine:
- A bone-shaped label for a gourmet dog treat company.
- A coffee-bean-shaped label for an artisanal roaster.
- A leaf-shaped label for an organic skincare line.
These shapes aren't just for decoration; they're smart, strategic branding choices. They turn a simple label into a core part of the product experience, creating a lasting impression that builds brand loyalty and drives sales. By thinking beyond the rectangle, you turn your packaging into a silent marketing powerhouse that works for you 24/7 on the shelf.
Choosing the Right Materials and Finishes
A show-stopping design for your die-cut label is a great start, but it’s only half the battle. The material you print it on is the canvas that truly brings that design to life. Picking the right material and finish isn't just about looks—it’s about making sure your label can survive its intended environment and send the right message about your brand.
Think about it this way: you wouldn’t use a delicate paper label for a beer bottle that’s going to live in a cooler, just like you wouldn’t slap an industrial-grade vinyl sticker on an elegant wedding favor. The product's context is everything. This choice directly affects your label's durability, its feel, and the overall impression it leaves on your customer.
Matching Materials to Your Product
The first thing to figure out is where your label will end up. A product’s journey, from the store shelf to your customer’s hands, will tell you exactly which material you need. Different materials are built to handle specific conditions.
For products that will face moisture, temperature swings, or lots of handling—think beverage bottles, bath products, or outdoor gear—vinyl is a fantastic choice. Its natural durability and waterproof qualities mean the label will stay looking sharp no matter what. If you're curious about just how tough these labels can be, check out our guide on waterproof vinyl labels to see them in action.
On the flip side, products that live in dry environments, like bags of gourmet coffee, artisanal bakery boxes, or high-end retail packaging, often look their best with paper-based materials. An uncoated paper stock can give off a rustic, organic vibe, while a classic semi-gloss paper offers a clean, professional look that works for almost anything.
It’s impossible to ignore the huge trend toward sustainable packaging. More and more businesses are choosing eco-friendly and biodegradable materials to connect with their customers' values. This has pushed printers to innovate, creating high-quality recyclable and compostable label options that don't compromise on looks. You can dive deeper into this trend by reading the market analysis from Valuates Reports.
The Impact of the Right Finish
Once you’ve locked in your material, the finish is the final touch that gives your label its personality. A finish can completely transform how colors pop and how the label feels to the touch.
Here are a few of the most popular choices:
- Gloss Finish: This shiny, reflective coating makes colors look super vibrant and saturated. It’s perfect for grabbing attention on a crowded shelf and gives your product a polished, high-energy look.
- Matte Finish: For a more understated and sophisticated feel, a matte finish is the way to go. It has a non-reflective, smooth surface that cuts down on glare and communicates a sense of modern elegance or earthy, natural quality.
- Textured Finish: Want to add a tactile element? Materials like linen or felt can give your label a physical texture. This premium touch invites customers to actually touch the product, creating a memorable sensory experience that makes it feel more valuable.
Designing Labels That Actually Work
It’s one thing to create a label that looks incredible on your computer screen. It's a completely different ballgame to design one that prints perfectly every time. A successful label die cut depends on nailing a few key design principles that bridge the gap between your creative vision and the physical production process. Get these right, and your final product will be flawless, not frustrating.
The first—and most critical—concept to get your head around is the safe area. Think of this as a protective bubble inside your design. All your essential elements, like text, logos, and important graphics, must live comfortably within this zone. This buffer protects your core message from getting accidentally sliced off during the cutting stage.
On the flip side, you have the bleed area. This is the part of your background design that intentionally extends beyond the final cut line. Why? This small overprint guarantees that even if the cut is off by a hair, you won’t be left with a sliver of an ugly white edge. It ensures your color goes right to the very edge.
Building a Print-Ready File
Your design file is the blueprint for your label, and that blueprint needs to be crystal clear for the printing and cutting machines. The cutline—which is the vector path the die will actually follow—must be a clean, solid, continuous line. Faint, dashed, or overly complex cutlines can easily confuse the equipment, leading to a sloppy cut.
And while intricate shapes are one of the best parts of die cutting, it is possible to go too far. Extremely sharp points or super-delicate extensions are just asking to be torn during production or when you're applying them. A good rule of thumb is to keep your design bold and your curves smooth for the best results.
Pro Tip: Always, and I mean always, design your labels in CMYK color mode, not RGB. CMYK (Cyan, Magenta, Yellow, Key/Black) is the universal standard for professional printing. Starting your design in this mode ensures the colors you see on screen are the colors you get on the final label.
Key Design Tips for Success
Getting your design right goes beyond the technical stuff. It’s about making smart choices that boost readability and reinforce your brand. If you want to make your labels truly pop but aren't sure where to start, you might consider working with professional design services that can help translate your brand's soul into a powerful visual.
Here are a few quick tips to keep you on the right track:
- Choose Readable Fonts: Your typeface needs to be clear and legible, even at a tiny size. That gorgeous script font might look amazing blown up on your monitor, but it can quickly become an unreadable smudge on a small product label.
- Leverage the Shape: Don’t just stick a square design inside a cool shape. Let the shape become part of the design itself. A great label uses its unique outline to complement the artwork and the packaging it’s destined for.
By keeping these guidelines in mind, you'll be well on your way to creating a print-ready file that produces a perfect final product. For a little inspiration, check out the huge variety of custom labels printing options out there—it can really help spark some fresh ideas for your own brand.
Inspiring Die Cut Label Ideas
It's one thing to talk about the theory behind a label die cut, but its real power clicks when you see it out in the wild. Let’s look at how different industries are using custom shapes to make their products absolutely unforgettable. These examples show how a simple label can become one of your best storytelling tools.
Take the food and beverage world—it's incredibly competitive. A unique shape is a game-changer. Imagine a craft brewery using a label cut into the shape of a hop cone for its flagship IPA. Right away, you know what the star ingredient is and you get a sense of their passion for brewing. Or think of an artisanal sauce company with a label shaped like a chili pepper; it's a playful, visual clue about the product's heat before you even read a word.
From Cosmetics to Celebrations
In health and beauty, custom shapes often whisper luxury and elegance. A high-end cosmetic brand might opt for a label with soft, flowing curves die-cut to frame its logo perfectly. This subtle detail elevates the entire package, making the product feel more premium and thoughtfully designed before the customer even opens it. The shape itself becomes part of that sophisticated brand experience.
A well-executed die cut label does more than just display information; it adds to the product's narrative. It transforms packaging from a simple container into an engaging piece of art that invites customers to look closer.
And this creative potential isn't just for retail shelves. This versatility shows up in all sorts of places:
- Promotional Stickers: Shops can create die-cut stickers of their logo or a fun seasonal mascot to hand out with purchases. Suddenly, your customers are walking billboards.
- Event Labels: For weddings or big parties, labels cut into monograms, dates, or symbols like interlocking hearts add a deeply personal touch to favors and invitations.
For vintners trying to get noticed in a crowded wine aisle, custom shapes are a secret weapon. You can see some brilliant examples by exploring specialized wine labels that use unique die cuts to tell the vineyard’s story. Each one is proof that with a little creativity, a label can become one of your most effective marketing assets.
Common Questions About Label Die Cutting
As you start digging into the world of custom labels, a few practical questions always seem to pop up. Let's walk through some of the most common ones so you can move forward feeling confident about your project.
What Is the Difference Between a Kiss Cut and a Die Cut?
Think of it like this: a die cut (sometimes called a "through cut") is the more dramatic of the two. It slices clean through both the label material and the backing paper it's attached to. This process creates a single, standalone sticker or tag in a custom shape.
A kiss cut, on the other hand, is what you'll typically find on label sheets or rolls. It’s a much more delicate cut. The blade just "kisses" the top layer—the vinyl or paper—slicing through your design while leaving the backing paper perfectly intact. This is what makes it so easy to peel your custom-shaped label right off the sheet when you’re ready to use it.
Are Die Cut Labels More Expensive Than Standard Labels?
They can be, especially when it comes to the initial setup. Traditional die cutting requires a custom steel die—a physical tool made just for your unique shape. Naturally, there's a cost associated with creating that tool.
However, once that die is made, the price per label drops dramatically on larger print runs, making it very competitive. When you consider the powerful branding impact a custom shape delivers, that initial investment often pays for itself many times over.
The real game-changer here is digital die cutting. This technology completely eliminates the need for a physical die. It's opened the door for incredibly small, affordable print runs, making custom shapes a realistic option for businesses of all sizes.
What Is the Minimum Order for Custom Die Cut Labels?
Minimum order quantities, or MOQs, really vary from one printing company to another and depend entirely on the technology they're using.
- Traditional Die Cutting: This older method almost always requires a higher MOQ to make the cost of producing the custom die worthwhile. You'll often see minimums starting around 250 or 500 labels.
- Digital Die Cutting: Since there’s no physical tool to create, this modern process offers amazing flexibility. Many printers can handle extremely small orders, sometimes as little as a single sheet of labels.
Ready to create labels that truly capture your brand's personality? 4OVER4 uses state-of-the-art die cutting services to bring any shape you can imagine to life. Explore our custom label options today and see what's possible.
More from

15
When you think of a yard sign, the classic 18"x24" is probably what comes to mind. It’s the industry workhorse fo
![]() Emma Davis
Emma Davis
Mar 14, 2026

28
When you’re ready to invest in an A-frame sign, the first question you'll ask is, "What size do I need?" It usually comes down
![]() Emma Davis
Emma Davis
Mar 13, 2026

255
The real secret to mastering your direct mail budget isn't complicated. It comes down to one simple fact: a standard 4" x 6&q
![]() Emma Davis
Emma Davis
Mar 12, 2026

73
Tear-off flyers are a classic for a reason. They’re a tangible marketing tool, designed with perforated, removable tabs at the bottom. Each
![]() Emma Davis
Emma Davis
Mar 11, 2026

125
Printing stickers at home is a seriously fun and rewarding project. It boils down to four main parts: designing your image, picking the right
![]() Emma Davis
Emma Davis
Mar 10, 2026

114
Ever seen a logo that seems to float right on the glass of a jar or bottle? That’s the work of transparent label stickers.
![]() Emma Davis
Emma Davis
Mar 9, 2026

74
Picture this: your product’s beautiful label gets smudged and runny during shipping, or a gorgeous event banner fades to nothing after just
![]() Emma Davis
Emma Davis
Mar 8, 2026

66
In a sea of options, your product's packaging and labeling are its first, and often only, chance to make a real connectio
![]() Emma Davis
Emma Davis
Mar 7, 2026