What You Need to Know About EDDM Postcard Sizes
USPS Every Door Direct Mail postcards must fall between 6.125" × 11" (minimum) and 12" × 15" (maximum) to qualify for saturated mailing rates. The most popular EDDM postcard sizes are 6.5" × 9", 8.5" × 11", and 8" × 10". Pick the wrong dimensions and your mailer gets rejected or reclassified at a higher postage rate. 4OVER4.COM has printed over 10 billion+ cards for 150,000+ businesses, so getting these specs right is something we know cold.
Your EDDM Postcard Size Guide Starts Here

EDDM postcards let you blanket entire neighborhoods without buying a mailing list. But USPS has strict size rules. Miss them by a fraction of an inch and your entire print run sits in limbo. This EDDM postcard size guide breaks down every approved dimension, explains which sizes work best for different campaigns, and helps you avoid costly mistakes before you hit print.
Whether you're a restaurant pushing a grand opening or a real estate agent farming a zip code, size drives everything - postage cost, design space, and mailbox impact. Check out our Showcase for real EDDM campaigns that nailed it. And if you're looking for unrelated but handy print knowledge, our guide on How To Clean Rubber Stamps is worth a bookmark too.
4OVER4.COM backs every order with a quality guarantee and 99.8% on-time delivery. Let's get your sizes right.
EDDM Postcard Dimensions Explained - Every Size, Every Rule
USPS defines EDDM-eligible mail by two hard boundaries. The shortest side can't go below 6.125 inches, and the longest side can't exceed 15 inches. Anything outside that range doesn't qualify for retail saturated rates. Your postcard also needs to be at least 0.007 inches thick (roughly the weight of a standard postcard stock) and can't weigh more than 3.3 ounces.
These aren't suggestions. They're requirements. USPS automation equipment is calibrated to these specs. A postcard that's even slightly undersized gets kicked out of the sorting machine and flagged for manual processing - or returned altogether.
The Three Most Popular EDDM Postcard Sizes
Most EDDM campaigns use one of three formats. Each has a distinct advantage depending on your goals and budget.
6.5" × 9" EDDM Postcards - This is the workhorse. It meets USPS minimums with room to spare, qualifies for the lowest automation-compatible postage, and fits standard mailbox slots without folding or bending. If you're running a high-volume campaign across multiple routes, this size keeps your per-piece cost as low as possible. Restaurants, dental offices, and service businesses love this format because it delivers a clean, professional look without eating into the marketing budget.
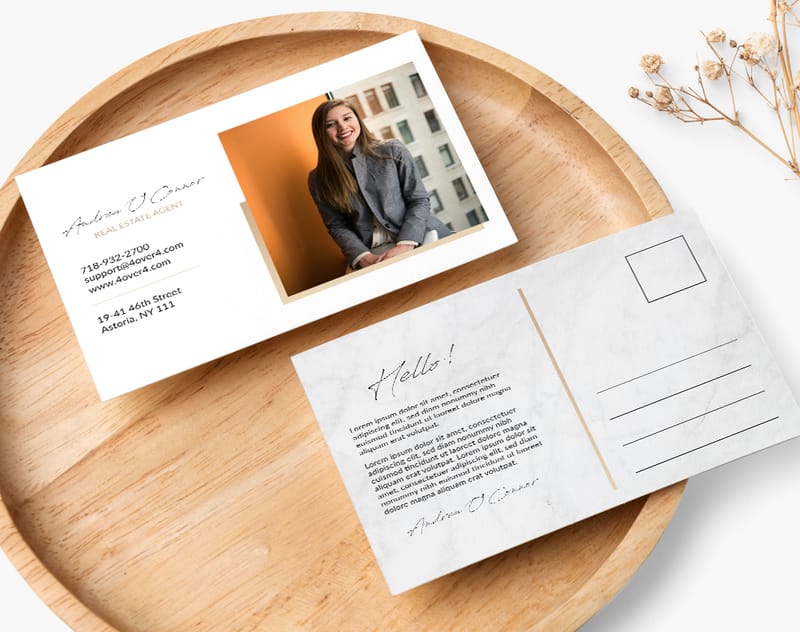
8.5" × 11" EDDM Postcards - Letter-size gives you serious design real estate. You can fit a full menu, a detailed service list, or a map with directions. It still qualifies for the same saturated mail rate as the 6.5" × 9" option, so you're getting more space without paying more in postage. Real estate agents use this size constantly because it can hold multiple property photos, a headshot, and contact details all on one side. If you want to learn about other large-format print projects, our guide on How To Make Flyers covers similar territory.
8" × 10" EDDM Postcards - A middle-ground option that gives you more room than 6.5" × 9" but feels slightly more compact than letter-size. It's a strong pick when you want visual impact but don't need the full 8.5" × 11" canvas. Gyms, salons, and auto shops tend to gravitate toward this size.
Oversized EDDM Flat Mailers
USPS also allows EDDM pieces up to 12" × 15", classified as flats. These are the attention-grabbers. A 12" × 15" postcard dominates the mailbox. It's impossible to miss. The trade-off? Higher postage per piece and heavier paper stock requirements to maintain rigidity at that size.
Flat-rate EDDM mailers work well for grand openings, seasonal sales, or any campaign where you want to make a statement. The extra space lets you include coupons, tear-off sections, or detailed infographics. For creative direct mail ideas, browse our Showcase to see how other businesses have used oversized formats.
"We sent 8.5" × 11" EDDM postcards to 5,000 homes around our new location. The size made our menu easy to read, and we saw a 12% redemption rate on the coupon. Way better than digital ads for local reach."
- Marco L., restaurant owner
USPS Postage Classes and How Size Affects Cost
EDDM postage rates depend on whether your piece qualifies as a "letter" or a "flat." Letters are smaller, lighter, and cheaper to mail. Flats are larger and cost more per piece. Here's the breakdown:
- EDDM Retail Letters: Postcards between 6.125" × 11" and roughly 6.5" × 9" at the lowest weight - cheapest postage option available
- EDDM Retail Flats: Anything larger than letter dimensions up to 12" × 15" - higher per-piece postage but more design space
- Non-qualifying pieces: Anything under 6.125" on the short side or over 15" on the long side - rejected by USPS for EDDM
The current EDDM retail rate sits around $0.20 per piece for standard postcards. That's a fraction of what addressed first-class mail costs. When you're mailing to every address on a carrier route, those savings stack up fast.
Setting Up Your EDDM Postcard File Correctly
Getting the physical size right is only half the battle. Your print file needs to match. Here's what 4OVER4.COM recommends for every EDDM postcard file:
- Bleed: Add 0.125" (1/8 inch) of bleed on all four sides. If your finished size is 6.5" × 9", your file should be 6.75" × 9.25"
- Safe zone: Keep all critical text and logos at least 0.25" from the trim edge. Anything closer risks getting cut off
- Resolution: 300 DPI minimum at final print size. Anything lower looks fuzzy, especially on larger formats
- Color mode: CMYK, not RGB. Print uses a different color model than screens
- Indicia placement: USPS requires a specific area on the address side for the EDDM indicia, return address, and delivery route information
The indicia panel is non-negotiable. USPS needs a clear area - typically the right half of the address side - for postal markings. Design around it. Don't cover it with graphics or dark backgrounds that make the text unreadable. If you're new to print file setup, the Faq Hub has walkthroughs for every product type.
Choosing the Right Paper Stock for Your EDDM Size
Bigger postcards need sturdier stock. A 6.5" × 9" postcard works fine on 14pt cardstock - it's rigid enough to survive mail sorting without bending. But an 8.5" × 11" or larger piece? You'll want 16pt or thicker to prevent flopping and curling in transit.
4OVER4.COM offers 60+ paper types across different weights and finishes. For EDDM postcards specifically, these are the go-to options:
- 14pt Coated Cardstock: Standard choice for 6.5" × 9" postcards. Smooth, vivid color reproduction, affordable
- 16pt Coated Cardstock: About the thickness of a credit card. Great for 8.5" × 11" pieces that need to hold their shape
- UV Coating or Aqueous Coating: Adds a protective layer that resists scuffing during mail processing. Glossy UV makes colors pop. Matte gives a softer, more upscale feel
Want to feel the difference before committing to a full run? Order Free Samples from 4OVER4.COM and compare stocks side by side. For something truly eye-catching, check out 3D Postcards - they're not standard EDDM fare, but they show what's possible with creative print.
"I ordered 16pt UV-coated EDDM postcards at 8.5" × 11" for my landscaping business. They survived rain in the mailbox and still looked sharp. Three new clients from one mailing."
- Danielle R., landscaping company owner
Design Tips That Work at Every EDDM Size
The size you pick shapes your layout. A 6.5" × 9" postcard needs a tight, focused message. One headline, one image, one call to action. Don't try to cram a novel onto it.
An 8.5" × 11" piece gives you room to breathe. Use that space for before-and-after photos, a short list of services, or a map showing your location. White space isn't wasted space - it makes your message easier to scan in the three seconds someone spends looking at mail before deciding to keep or toss it.
For any EDDM size, follow these rules:
- Use a bold headline that's readable from arm's length
- Include a clear, specific offer (not "Call us today" but "15% off your first visit - expires March 30")
- Put your phone number and website in at least two places on the card
- Use high-contrast colors so nothing gets lost in print
If you're working on other direct mail pieces alongside your EDDM campaign, our guides on How To Fold A Brochure, Custom Magnets Faq, and How To Make Envelopes cover the file setup and design basics for those formats too.
How to Confirm Your EDDM Postcard Meets USPS Requirements
Before you print thousands of postcards, double-check these five things:
- Both dimensions fall within the 6.125" minimum and 15" maximum range
- The piece weighs 3.3 ounces or less
- Thickness is at least 0.007 inches
- The address side has proper indicia placement and a clear delivery area
- The piece is rectangular (no die-cut shapes for EDDM)
USPS offers a free Business Mail Entry Unit (BMEU) verification at your local post office. Bring a printed sample before committing to a full production run. It takes five minutes and saves you from a rejected mailing.
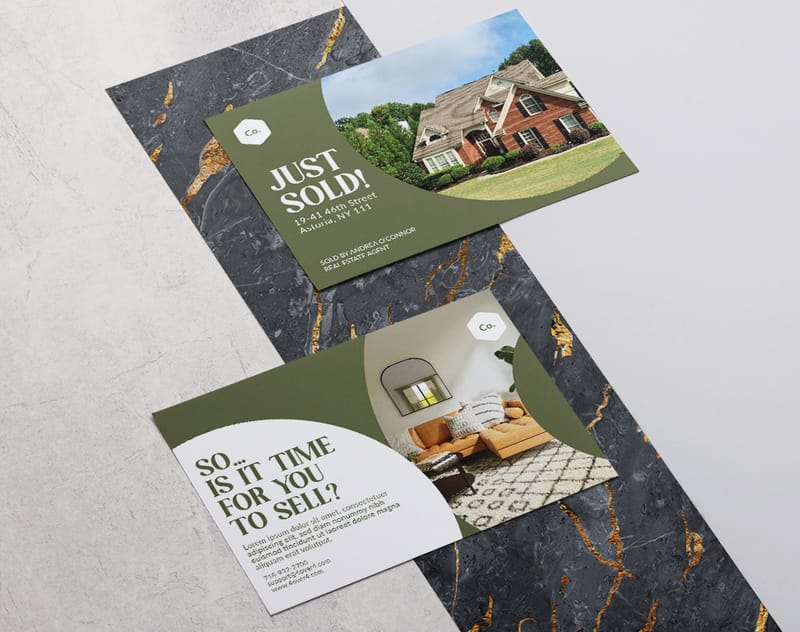
Here are some ready-to-use EDDM postcard design templates to get you started:
And if you prefer to start from a blank canvas, these blank templates give you the correct dimensions with bleed and safe zone guides already set up:
Blank Templates

Sizing Errors That Kill EDDM Campaigns
The most common EDDM postcard size mistake? Designing at 4" × 6" or 5" × 7" and assuming it qualifies. It doesn't. Standard postcard sizes fall below the 6.125" minimum on the short side. USPS will reject the entire bundle at the counter.
Another frequent error is forgetting bleed. Your file needs that extra 0.125" on every edge. Without it, you'll see white slivers along the trim line where your background color should be. It looks cheap and unprofessional.
Skipping the indicia panel is a third killer. Designers fill the entire address side with graphics, leaving no room for USPS routing information. That's an instant rejection.
Finally, don't ignore paper thickness requirements. Thin stock bends, jams sorting machines, and arrives looking beat up. Stick with 14pt or heavier. 4OVER4.COM prints EDDM postcards with a 99.8% on-time delivery rate because the file specs and stock weights are dialed in from the start. Get your EDDM postcard size guide details right before you order, and you'll avoid every one of these headaches.
Best EDDM Postcard Options at 4OVER4.COM
When you're ready to print, 4OVER4.COM gives you the full range of EDDM postcard sizes on 60+ paper types. Whether you need 6.5" × 9" postcards on 14pt gloss for a budget-friendly neighborhood drop or 8.5" × 11" pieces on 16pt matte for a premium feel, it's all here. For businesses looking to reduce their environmental footprint, our Green Printing options include recycled stocks that still hold up in the mail.
With 150,000+ businesses served and 10,000+ reviews, 4OVER4.COM is built for high-volume EDDM runs. Here's a closer look at available specs, sizes, and stock options for your EDDM postcard campaign:
Free Eddm Postcard Sizes Templates


| Dimension Description | Size (inches) | Notes |
|---|---|---|
| Minimum Postcard | 6.125 × 11 | Retail saturated rates |
| Maximum Flat | 12 × 15 | Bulk mail class |
| Common Format | 6.5 × 9 | Lowest postage per piece |
| Common Format | 8.5 × 11 | Wider branding area |
| Dimension Type | Minimum (in) | Maximum (in) |
|---|---|---|
| Short Side | 6.125 | N/A |
| Long Side | N/A | 11.5 |
| Flat Mail Maximum | N/A | 12 × 15 |
| Element | Measurement | Purpose |
|---|---|---|
| Bleed | 0.125 inches | Prevents white edges |
| Trim Line | Defined border | Marks final cut |
| Safe Zone | 0.125 inches | Keeps vital info intact |
| Size | Bleed | Trim | Safe Zone |
|---|---|---|---|
| 6.5 × 9 in | 6.75 × 9.25 in | 6.5 × 9 in | 0.125 in |
| 8.5 × 11 in | 8.75 × 11.25 in | 8.5 × 11 in | 0.125 in |
| 12 × 15 in | 12.25 × 15.25 in | 12 × 15 in | 0.125 in |
| File Type | Recommendation |
|---|---|
| PDF/X-1a | Embeds fonts and color |
| TIFF | No compression loss |
| JPEG | Ideal for simpler images |
- Minimum Dimensions: 6.125″ × 11″ for retail saturated rates
- Maximum Dimensions: 12″ × 15″ for flat-rate mailers
- Popular EDDM Formats: 6.5″ × 9″, 8.5″ × 11″, 8″ × 10″
- 6.5″ × 9″ offers the lowest postage and full compatibility with automation
- 8.5″ × 11″ gives you more real estate for images and copy without bumping up fees
- 12″ × 15″ turns heads with a premium flat-mailer feel
- Streamlined processing at USPS facilities
- Predictable postage costs and route coverage
- Higher neighborhood saturation with scalable prints
- Simplified design templates for multi-route campaigns
- Short Edge Measurement: Align the ruler with the shorter side of your artwork.
- Long Edge Measurement: Place the ruler along the longer side.
- Orientation Consistency: Numbers stay the same whether you’re in portrait or landscape.
- They selected 9 × 11 inches to stay under the flat mail maximum.
- They added 0.125-inch bleed margins and 0.25-inch safe zones.
- All edge measurements were double-checked to prevent resizing.
- Final files matched USPS trim specifications before upload.
- Quick visual checks that validate dimensions.
- Easier team alignment on design specs.
- Faster approval cycles without miscommunication.
- Trim Size: 6.5 × 9 inches
- Bleed Size: 6.75 × 9.25 inches
- Safe Zone: At least 0.125 inches from trim lines
- 4 × 6 Postcard Standard: Roughly $550 per 1,000 pieces at retail.
- 6.5 × 9 EDDM Postcard: About $460.20 per 1,000 when routes are bundled.
- 8.5 × 11 Format: Approximately $495 per 1,000 with volume discounts.
- Quantity 1,000, 4 × 6 campaign runs about $550; 6.5 × 9 EDDM format sits near $460.
- Quantity 5,000, Bulk pricing cuts 6.5 × 9 rates to $430 per 1,000, saving $1,000 overall.
- Quantity 10,000, Automated sorting and bundles reduce rates to $410 per 1,000, trimming $2,100 off standard mail.
- Tier 1 (1,000, 4,999): Base rate with no discount
- Tier 2 (5,000, 9,999): 5% off base postage
- Tier 3 (10,000, 19,999): 8% off base postage
- Tier 4 (20,000+): 10, 12% off base postage with route optimization
- Reduced manual sorting fees (saves up to $50 per route)
- Consistent drop-off points lower labor costs
- Faster delivery times with prioritized routing
- Trim Size Example: 6.5 × 9 inches
- Bleed Size Example: 6.75 × 9.25 inches
- Safe Zone Margin: 0.125 inches inside trim
- 80 lb cover: Budget-friendly and light
- 100 lb cover: Solid feel without bulk
- 110 lb cover: Premium heft for a standout impression
- Standard Postcard: up to 1 ounce
- Thick Cover: 1, 2 ounces
- Heaviest EDDM: up to 3.3 ounces
- FSC-Certified paper with high brightness
- Vegetable-based inks for lower VOC emissions
- Soy-based coatings that comply with USPS weight rules
- Resolution: Minimum 300 dpi for every image to avoid pixelation.
- Color Mode: CMYK matches USPS and print vendor standards.
- Slug and Crop Marks: Include crop marks so the printer knows exactly where to trim.
- Bleed Dimensions: Add 0.125" on each edge of your final trim size.
- Trim Line: This is where your postcard will be cut.
- Safe Zone: Essential content should sit inside this boundary to prevent being trimmed.
- PDF/X-1a: Guarantees embedded fonts and correct color profiles.
- TIFF: Ideal for layered or intricate visuals without compression loss.
- JPEG: Works for simpler images, just watch out for artifacts.
- Leave a 0.5-inch margin for postal barcodes and indicia.
- Convert text to outlines to avoid missing fonts at the printer.
- Keep your PDF under 100 MB to meet most vendor limits.
- Front Side Setup
- Start with final trim size plus bleed.
- Place your headline in the top third so it grabs attention right away.
- Keep your main visual above the fold to draw the eye in.
- Allocate space for the address block, postal indicia, and barcodes.
- Use a simple grid to align text and images cleanly.
- 6.5 × 9 inches for the lowest postage rates
- 8.5 × 11 inches when you need more design real estate
- 12 × 15 inches for premium flat mail that captures attention
- 80 lb cover: the budget-friendly choice with moderate heft
- 100 lb cover: a reliable middle ground, balancing durability and cost
- 110 lb cover: luxury weight for high-impact postcards
- Click Upload Artwork, then select PDF/X-1a, TIFF or a high-quality JPEG.
- Double-check that your bleed, trim and safe zones measure 0.125 inches.
- Review the online proof and click Approve when everything looks right.
- Choose ZIP codes for broad city coverage
- Pick carrier routes to target specific neighborhoods
- Use the built-in quote tool to estimate costs per thousand
- Count targeted routes
- Multiply by the current EDDM rate per route
- Compare against retail letter or flat postage rates
Common Questions About EDDM Postcard Sizes
What is the minimum size for an EDDM postcard?
The minimum EDDM postcard size is 6.125" × 11" to qualify for USPS retail saturated mailing rates. The short side must be at least 6.125 inches. Anything smaller gets classified as a standard postcard and won't qualify for EDDM pricing. Most businesses choose 6.5" × 9" as their starting point because it comfortably clears the minimum while keeping postage costs low.
What is the maximum size allowed for EDDM postcards?
USPS allows EDDM pieces up to 12" × 15", classified as flats. The piece also can't exceed 3.3 ounces in weight or 0.25 inches in thickness. Oversized formats grab attention in the mailbox but cost more per piece in postage. Use this EDDM postcard size guide to match your budget to the right dimensions.
Can I use a 4" × 6" postcard for EDDM?
No. A 4" × 6" postcard doesn't meet the USPS minimum of 6.125" on the shortest side. It will be rejected at the post office. You need to design at 6.5" × 9" or larger for EDDM eligibility.
Does EDDM postcard size affect postage cost?
Yes. Postcards that qualify as "letters" (smaller sizes like 6.5" × 9") get the lowest EDDM retail rate. Larger pieces classified as "flats" cost more per piece. Both are still far cheaper than addressed first-class mail, but the difference adds up on large route mailings.
What paper thickness should I use for EDDM postcards?
USPS requires a minimum thickness of 0.007 inches. For practical purposes, 14pt coated cardstock is the standard for 6.5" × 9" postcards. Go with 16pt or heavier for 8.5" × 11" and larger sizes. Thicker stock survives sorting machines and arrives looking crisp. 4OVER4.COM offers 60+ paper types so you can match the stock to your EDDM postcard size.
Do I need to add bleed to my EDDM postcard file?
Yes. Add 0.125" of bleed on all sides. If your finished EDDM postcard size is 6.5" × 9", your design file should measure 6.75" × 9.25". Without bleed, you'll see white edges after trimming. Keep text and logos at least 0.25" inside the trim line.