TABLE OF CONTENTS
- Home
- content hub
- Enhance Your Branding with spot uv business cards
Enhance Your Branding with spot uv business cards
Dec 10, 2025247 views
Dec 10, 2025247 views
Ever run your thumb over a business card and felt two different textures? Imagine a smooth, velvety matte finish for most of the card, but your logo and name are slick, glossy, and pop right off the surface. That’s the unforgettable first impression you get with spot UV business cards—a premium touch that adds serious visual and tactile flair to your brand.
What Are Spot UV Business Cards
Picture a rain-slicked city street at night. Most of the pavement is dark and muted, but the puddles and street markings catch the light, drawing your eye with a brilliant shine. Spot UV works a lot like that. It’s a special finishing technique where a high-gloss, clear polymer coating is applied to specific areas—or "spots"—of your card.
This isn't your average all-over gloss. The real magic is in the contrast. When you pair a super-shiny spot UV layer with a non-reflective base, like a matte or silk laminate, you create a dynamic look and feel that’s impossible to ignore. This effect doesn't just look cool; it cleverly guides the recipient's eye and touch right where you want them.
The Power of Tactile Marketing
When you hand someone a spot UV card, you’re giving them more than just your contact info. You’re handing them a multi-sensory experience. The contrast between the smooth matte surface and the raised, glossy parts makes people want to touch it, feel it, and explore the design. This physical interaction sticks in their memory, creating a much stronger connection to your brand. In a crowded market, understanding the importance of brand recognition is everything, and a memorable card is a huge advantage.
Spot UV turns a simple piece of cardstock into a powerful branding tool. It quietly communicates a commitment to quality and attention to detail before you even say a word, setting a professional tone from the first handshake.
This finishing technique has quickly become a go-to for businesses wanting to make a real impact. Its popularity is surging, with industry reports showing orders for spot UV finishes have jumped by about 25% in recent years as professionals look for tangible ways to stand out.
Core Benefits of Choosing Spot UV
The advantages of this finish go way beyond just looking good. Let's break down how choosing spot UV directly impacts the way people perceive your brand.
| Benefit | Impact on Your Brand |
|---|---|
| Enhanced Visual Appeal | The high-gloss finish makes colors in the coated areas look richer and more vibrant, creating a striking pop that grabs attention instantly. |
| Creates a Premium Feel | The luxurious texture and professional look signal to clients that your brand values quality and invests in the details. |
| Increases Memorability | That unique tactile experience makes your card—and by extension, your brand—far more likely to be remembered long after the meeting ends. |
| Durable and Protective | The UV-cured coating adds a tough layer of protection, helping your most important elements, like your logo, resist scuffs and moisture. |
Ultimately, choosing from the variety of spot UV printed products is a strategic move. It elevates your networking gear from a simple handout to a powerful marketing asset that works for you.
How the Spot UV Printing Process Works
Ever wonder how that perfectly glossy logo or pattern gets onto a business card with such pinpoint accuracy? The magic behind spot UV business cards isn't your everyday ink-on-paper job. It’s a fascinating mix of careful design and high-tech printing that feels closer to a specialized screen-printing process, but for a clear, liquid gloss.
The whole thing starts with a solid foundation. You need a quality cardstock, usually one with a non-glossy finish like matte or silk. This creates the perfect canvas, giving you that rich contrast that makes the shiny spot UV elements pop right off the card. It's this difference in texture that grabs attention.
Step 1: The Foundation and the Mask
First things first, your main design—logo, contact info, background colors—gets printed onto the cardstock using standard methods. This is the base layer, the canvas where the spot UV magic is about to happen.
Next comes the most critical part: the spot mask. Think of this as a digital stencil. It’s a separate, solid black file that tells the printing press exactly where to apply the clear varnish and where to leave the card’s surface alone. Every black shape on that mask file corresponds directly to an area that will get the glossy treatment.
This diagram breaks down how those key benefits of spot UV come together to make a real impact.
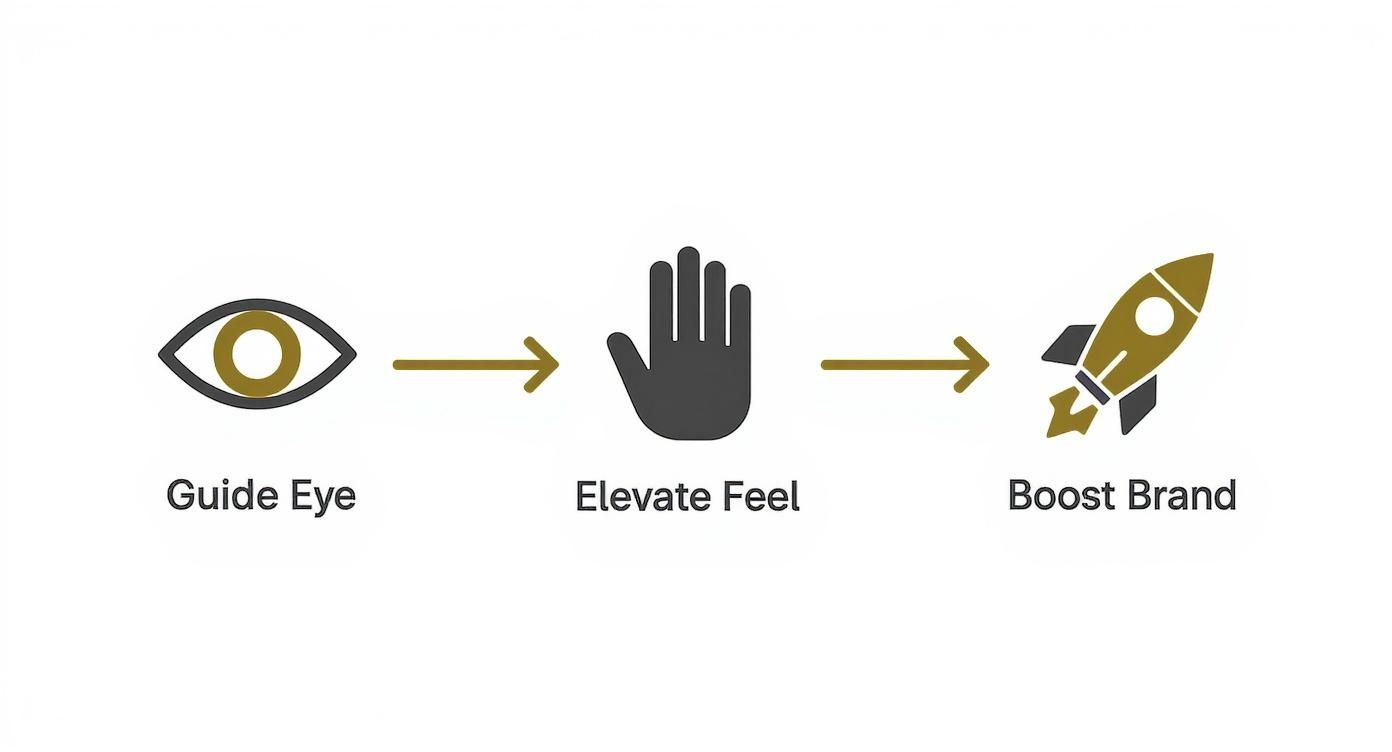
It’s a simple flow: first, you catch their eye. Then, you create a memorable tactile experience. The result? A stronger brand perception.
Step 2: Applying the UV Varnish
With the mask file ready to go, the printed cards are fed through a specialized machine. Here, a UV-curable polymer varnish is applied through a screen or roller, sticking only to the areas laid out by your spot mask. The precision here is incredible, which is how you get those clean, sharp edges on a logo, bit of text, or intricate pattern.
At this point, the varnish is a wet, tacky photopolymer sitting right on top of the cardstock. It's a far more advanced technique than the old-school method of just flooding the whole card with a simple gloss coat.
The secret to a flawless spot UV finish is perfect alignment between the printed design and the spot mask. If it's even a fraction of a millimeter off, the gloss will look off-center. That's why professional printers have such rigorous quality checks at this stage.
Step 3: Curing with Ultraviolet Light
Finally, we get to the "UV" in spot UV. Immediately after the varnish is applied, the card zips under a set of high-intensity ultraviolet lights. This blast of UV light triggers an instant chemical reaction called curing.
The liquid varnish hardens almost instantly into a solid, durable, and brilliantly glossy layer. Unlike regular inks that dry slowly through evaporation, this curing process is immediate, which means no smudging or spreading. What you're left with is a crisp, slightly raised, and super shiny finish that makes your chosen design elements impossible to ignore.
Seeing the craftsmanship involved really shows why spot UV is considered a premium finish. It’s a multi-step process that requires a perfect marriage of precise digital prep and sophisticated machinery. If you're curious about the broader world of modern printing, you can explore more about the technologies that make finishes like this possible in high-quality digital printing.
How to Prepare Your Design Files for Spot UV Printing
Getting a flawless spot UV result doesn't start at the printing press—it starts with your design file. Nailing your artwork setup is the single most important step to ensure your cards look as incredible in person as they do on your screen. The process is all about making smart design choices and creating a separate instruction file for our printers.

Here's a simple way to think about it: your main design file is the painting, and the spot UV file is a super-precise stencil that tells the varnish exactly where to go. If the stencil is off, the whole effect falls apart. Let’s walk through how to create both so you get a professional, eye-catching finish every time.
Choosing What to Highlight with Spot UV
First things first, you need to decide which elements of your spot uv business cards will get the glossy treatment. The trick is to be selective. If you try to highlight everything, nothing stands out. The magic of spot UV is in the contrast.
Here are a few classic choices that always work well:
- Your Logo: This is a no-brainer. Making your logo the immediate focal point reinforces your brand identity with a touch of class.
- Your Name or Company Name: Highlighting key text makes it pop off the card, adding a sophisticated, premium feel.
- Subtle Background Patterns: A "blind" spot UV (gloss applied directly to the matte cardstock) can create an elegant, textured pattern you only see when the light hits it just right. It’s a real showstopper.
- Key Graphics or Icons: Got some cool social media icons or a unique graphic? Make them shine—literally.
Just as important is knowing what not to highlight. Super-thin lines or tiny, intricate text are tough for the varnish to stick to perfectly. This can lead to a blurry or incomplete finish. For the best results, stick to bold, clearly defined shapes and text.
Creating the Spot UV Mask File
This is where we get a little technical, but don't worry, it's straightforward. The spot mask, sometimes called a spot layer, is a separate file you'll send us along with your main color design file. This file is the blueprint for our printing press.
Think of the spot mask as a black-and-white map. Every area that is solid black on this map will get the glossy UV coating. Everything you leave white will keep the original matte or silk finish of the card.
Creating this file is simple, but precision is everything. If your mask is misaligned with the main design by even a fraction of a millimeter, the gloss will look off-center and ruin the effect.
Here’s a quick guide to creating your spot mask:
- Duplicate Your Design: Make a copy of your finished business card design. This copy will become your mask.
- Isolate the Target Elements: In the new file, delete everything you do not want to be glossy.
- Convert to 100% K Black: Now, change the color of every remaining element (your logo, text, pattern, etc.) to solid black. It is absolutely critical that this is 100% K black (C:0, M:0, Y:0, K:100), not a "rich black" mix.
- Save as a Separate File: Save this black-and-white file with a clear name, like "MyBusinessCard_SpotMask.pdf" or something similar.
Final File Preparation Checklist
Before you hit that upload button, give this checklist a quick once-over. Catching common mistakes here will save you time and headaches later, ensuring a perfect print run. This level of precision is also key for other custom finishes; for instance, understanding the file specs for die-cutting can open up a whole new world of creative card shapes.
Ready to prep your artwork? Here’s a simple checklist to follow.
Spot UV File Preparation Checklist
| Checklist Item | Specification or Requirement |
|---|---|
| Two Separate Files | You need one full-color design file and one separate black-and-white spot mask file. |
| Perfect Alignment | The black elements in your mask must line up perfectly with the elements in your design file. |
| Correct Black Value | The spot mask must use 100% K Black only. Rich black will cause printing errors. |
| Vector Artwork Preferred | Whenever you can, use vector graphics for your spot mask to get the sharpest, cleanest edges. |
| No Fine Details | Avoid applying spot UV to hairlines, tiny text, or overly complex details that might not print clearly. |
Follow these steps, and you'll be all set. Preparing your artwork correctly is the final piece of the puzzle to ensure your spot uv business cards deliver that "wow" factor you're looking for.
Spot UV Compared to Other Premium Card Finishes
Picking a finish for your business card is a lot like choosing the right accessory for an outfit—it pulls the whole look together and makes a specific statement. While spot UV business cards deliver a stunning, touchable contrast, they're just one of several fantastic ways to make your cards stand out.
To make the right call, it helps to see how spot UV stacks up against other popular choices like foil stamping, embossing, and debossing. Each one creates a totally different vibe.
Spot UV is perfect for creating a subtle, sophisticated gloss that you can both see and feel. It’s a modern, minimalist hero. But what if your brand needs a bit more bling or a different kind of texture? That’s where the other options come into play.
Spot UV vs. Foil Stamping
For pure, unapologetic luxury, foil stamping is the undisputed champion. Instead of a clear varnish, this process uses heat and pressure to bond a thin layer of metallic or colored foil directly onto the cardstock. The result? An opaque, brilliantly reflective finish that catches the light like nothing else.
Here’s a quick breakdown:
- The Look: Spot UV adds a clear, high-gloss layer that makes the color underneath pop. Foil stamping, on the other hand, gives you a solid, metallic shine—think gold, silver, copper, or even holographic effects.
- When to Use It: Go with spot UV for adding subtle texture to a logo or pattern. Choose foil for high-impact, glamorous elements that scream prestige and value.
- The Feel: Spot UV creates a slightly raised, perfectly smooth surface. Foil is usually pressed into the paper, creating a slight indentation (or deboss) that feels distinctly high-end.
If your brand is all about making a bold, glamorous statement, it’s worth exploring what you can do with foil stamping.
Spot UV vs. Embossing and Debossing
While spot UV adds a layer to the paper, embossing and debossing physically reshape the paper itself. These techniques are all about creating 3D texture without any ink or varnish at all.
Embossing uses a custom die to press a design up from the back of the card, creating a raised, three-dimensional element on the front. Picture a classic monogram on a fancy wedding invitation. It’s elegant, traditional, and adds real physical depth.
Debossing is the exact opposite. It presses a design down into the card from the front, leaving a crisp, indented impression. This creates a subtle, handcrafted effect that just begs to be touched and communicates a sense of quiet craftsmanship.
Embossing and debossing are purely textural. They use the paper itself to create plays of light and shadow, offering a timeless, classic form of luxury that relies on structure, not shine.
So, how do you decide?
- For a Sleek, Modern Contrast: Spot UV is your best bet. It lives in the interplay between matte and gloss.
- For a Classic, Raised Texture: Embossing gives your logo or text a traditional, tangible lift.
- For an Understated, Indented Feel: Debossing offers that high-quality, letterpress-style impression.
Ultimately, the best finish depends on the story you want your card to tell. Spot UV whispers modern sophistication, foil shouts luxury from the rooftops, and embossing conveys a sense of timeless quality.
Alright, you’ve nailed down the design and prepped your files. Now for the fun part: bringing those brilliant spot UV business cards to life. Ordering with 4OVER4 is a straightforward process, designed to make sure what you see on your screen is exactly what you get in your hands. This is where all that careful file prep really pays off.
The whole thing kicks off on our spot UV business card page. We've built an easy-to-use project calculator that guides you through every single option, so you can build your perfect card step-by-step.
Step 1: Configure Your Card Specifications
First things first, you'll lock in the core details of your card. Think of this as laying the foundation. Before you even think about uploading your artwork, you'll make a few key decisions that define the final look and feel.
You’ll choose from some top-notch paper stocks, but for spot UV, a sturdy 16pt cardstock is a fantastic choice. It's our most popular for a reason—its thickness gives the card a premium, substantial feel and creates the perfect canvas for that glossy finish to really pop.
Next, you'll dial in the rest:
- Quantity: How many do you need? We can handle small batches for boutique agencies or massive runs for your next big conference.
- Size: Standard business card dimensions are always a safe bet, but don't be afraid to explore other sizes if you want to make a truly unique impression.
- Turnaround Time: Got a trade show sneaking up on you? Or just doing a standard restock? Pick the production speed that fits your schedule.
This is the main interface where you'll lock in all these important choices.
As you can see, the project calculator updates the pricing in real-time as you tweak quantities, paper, and turnaround times. No surprises.
Step 2: Upload Your Artwork and Spot Mask
This is the moment of truth. Once you've set your card specs, it’s time to upload your files. And as you know, for a successful spot UV run, you need two perfectly aligned files.
You’ll need to upload:
- Your Full-Color Design File: This is your main artwork, the whole visual shebang (e.g., "MyCard_Design.pdf").
- Your Spot UV Mask File: This is your simple black-and-white map that tells us exactly where to apply the gloss (e.g., "MyCard_Mask.pdf").
Getting these two files prepared and labeled correctly is absolutely critical for a flawless result. Our system is built to handle this two-file process smoothly, taking any guesswork out of it for you.
Pro Tip: Do a final sanity check before you hit upload. Open both files in your design program and layer them on top of each other. Is the alignment perfect? A millimeter off can throw the whole effect. This five-minute check can save you a world of headaches.
And hey, if you don't have a print-ready design, no worries. We've got you covered with our free online design tool. It’s packed with thousands of templates you can customize with your logo, text, and brand colors, making professional-level design accessible to anyone.
Step 3: Review Your Digital Proof
After your files are uploaded and your order is in, our prepress team jumps into action. We don't just blindly send your files to the printer—that's not how we roll. Instead, we create a digital proof and send it back to you for one final approval.
This proof is your last chance to see exactly how your card will look, spot UV placement and all. It’s your opportunity to catch any last-minute typos, check alignment, and make sure everything is perfect before we start printing. Giving your proof a quick approval is the key to keeping your order moving on schedule. It's a simple quality-check step that guarantees you'll love what you see when you open the box.
Finalizing your order is a huge step, but it's just one piece of building a powerful brand. To see all the possibilities, feel free to explore our full range of professional business cards printing services. Once your files are uploaded and your proof is approved, all that's left is to sit back and wait for your incredible new cards to arrive.
Which Industries Get the Most Out of Spot UV Cards?
While just about any business card can get a boost from a premium finish, some industries see a truly powerful return on their investment with the tactile elegance of spot UV. It’s not just about looking good; it’s a strategic move. A spot UV card sends a clear message about brand values like creativity, luxury, and a serious commitment to detail.
For these sectors, a card that engages the sense of touch isn't just a "nice-to-have"—it's a competitive edge.
The Go-To for Creatives
Professionals in highly visual and creative fields are a natural fit for spot UV business cards. Think about photographers, graphic designers, architects, and interior decorators. Their entire business is built on a sharp aesthetic and an eye for the little things.
A card that uses spot UV to pop a crisp logo or lay down a subtle, glossy pattern on a matte background becomes a miniature portfolio piece. It’s a physical demonstration of their design skills before a client ever even sees their actual work.
Communicating Luxury and Sophistication
For businesses swimming in the luxury market, projecting an image of undeniable quality isn't optional. The subtle, sophisticated vibe of spot UV is a perfect match here.
- High-End Real Estate Agents: A spot UV card can subtly trace the sleek lines of a modern home or a luxury condo, giving a feel of premium quality that perfectly mirrors the properties they represent.
- Boutique Agencies and Consultants: For marketing strategists, financial advisors, or creative consultants, the card’s refined texture helps build immediate trust and reinforces their position as a high-value expert.
- Luxury Retail: Brands in fashion, jewelry, or high-end cosmetics use spot UV to echo the premium feel of their products. A glossy logo on a soft-touch card can evoke the same sense of quality a customer would expect from the item itself.
The choice to use a premium finish like spot UV is a direct signal to potential clients. It says, "We invest in quality in everything we do, and that includes the very first impression we make on you."
This focus on tangible branding tools is a key reason the market is so healthy. In fact, market analysis predicts the global business card market will climb to an estimated $380 million by 2033, powered by a sustained demand for sensory marketing that digital channels just can't replicate. You can find more insights about the growing business card market on UPrinting.com. This growth proves that professionals really get the power of a card that makes a lasting, physical impression.
Got Questions About Spot UV? We've Got Answers.
Even after seeing all the possibilities, you probably have a few practical questions kicking around. That's smart. Getting these final details sorted out is the key to ordering your spot UV cards with total confidence. Let's tackle the most common questions we hear every day.
Can I Get Spot UV on Both Sides of My Card?
You absolutely can. Applying spot UV to both sides is a fantastic way to create a fully immersive, premium experience.
A popular strategy we see is highlighting the logo on the front with a glossy pop, then using a more subtle, tactile pattern on the back. Think a repeating geometric shape or even your brand's initials. Of course, the choice is completely up to you and what you want your design to achieve.
Will the Spot UV Layer Scratch or Peel Off?
Not a chance, at least not with normal use. When it's professionally applied and cured, the spot UV finish is incredibly tough. The UV curing process bakes the varnish into a hard, solid layer that stands up to scuffs and scratches from daily handling way better than a standard gloss coat.
Think of it this way: the UV-cured varnish forms a permanent bond with the paper. It’s not a sticker or some delicate film; it's a resilient finish designed to make a lasting impression without wearing away.
How Much More Do Spot UV Cards Really Cost?
Let's be upfront: because spot UV is a premium finish, these cards do cost a bit more than your standard matte or glossy options. The price bump covers the extra materials, the specialized machinery, and the additional steps needed in production to get that effect just right.
However, most businesses we work with see it as a worthwhile investment, not just an expense. The major boost in perceived value and the unforgettable first impression you make with a tactile card easily justifies the small increase in cost. It turns a simple piece of paper into a powerful networking tool that people actually hold onto.
Ready to create a business card that people will actually remember? At 4OVER4, we make it easy to design and order premium spot UV business cards that show off the quality of your brand. Start designing your unforgettable cards today!
More from

729
Full bleed printing is a simple but game-changing technique. It's how you get your artwork—whether it’s a photo, a background color, o
![]() Emma Davis
Emma Davis
Feb 3, 2026

336
Even though we live in a digital world, the humble business card is still a powerhouse networking tool. But here's something most people d
![]() Emma Davis
Emma Davis
Feb 2, 2026

1308
Staring at a wall of banner dimensions can feel a little overwhelming. But while there's no single "typical banner size" that wo
![]() Emma Davis
Emma Davis
Feb 1, 2026

397
Stretching your marketing budget doesn't mean you have to settle for flimsy, forgettable brochures. The real secret to low cost br
![]() Emma Davis
Emma Davis
Jan 31, 2026

387
Advertising magnets are one of those marketing tools that are so simple, you might overlook their power. They’re tangible, they last for age
![]() Emma Davis
Emma Davis
Jan 30, 2026

198
Tired of fighting with torn paper and sticky residue? We’ve all been there. The best way to get labels off bottles is often a simple soak in
![]() Emma Davis
Emma Davis
Jan 29, 2026

352
Want to know the real secret to getting a poster to stick to a wall without it peeling off in the middle of the night? It's all about what
![]() Emma Davis
Emma Davis
Jan 28, 2026

320
When you hear "table tent specs," what we're really talking about are the foundational details for printing them correctly: the
![]() Emma Davis
Emma Davis
Jan 27, 2026