Table of Contents
- Home
- content hub
- Your Guide to a Free Label Template Download and Pro Printing
Your Guide to a Free Label Template Download and Pro Printing
Mar 28, 20269 views
Mar 28, 20269 views
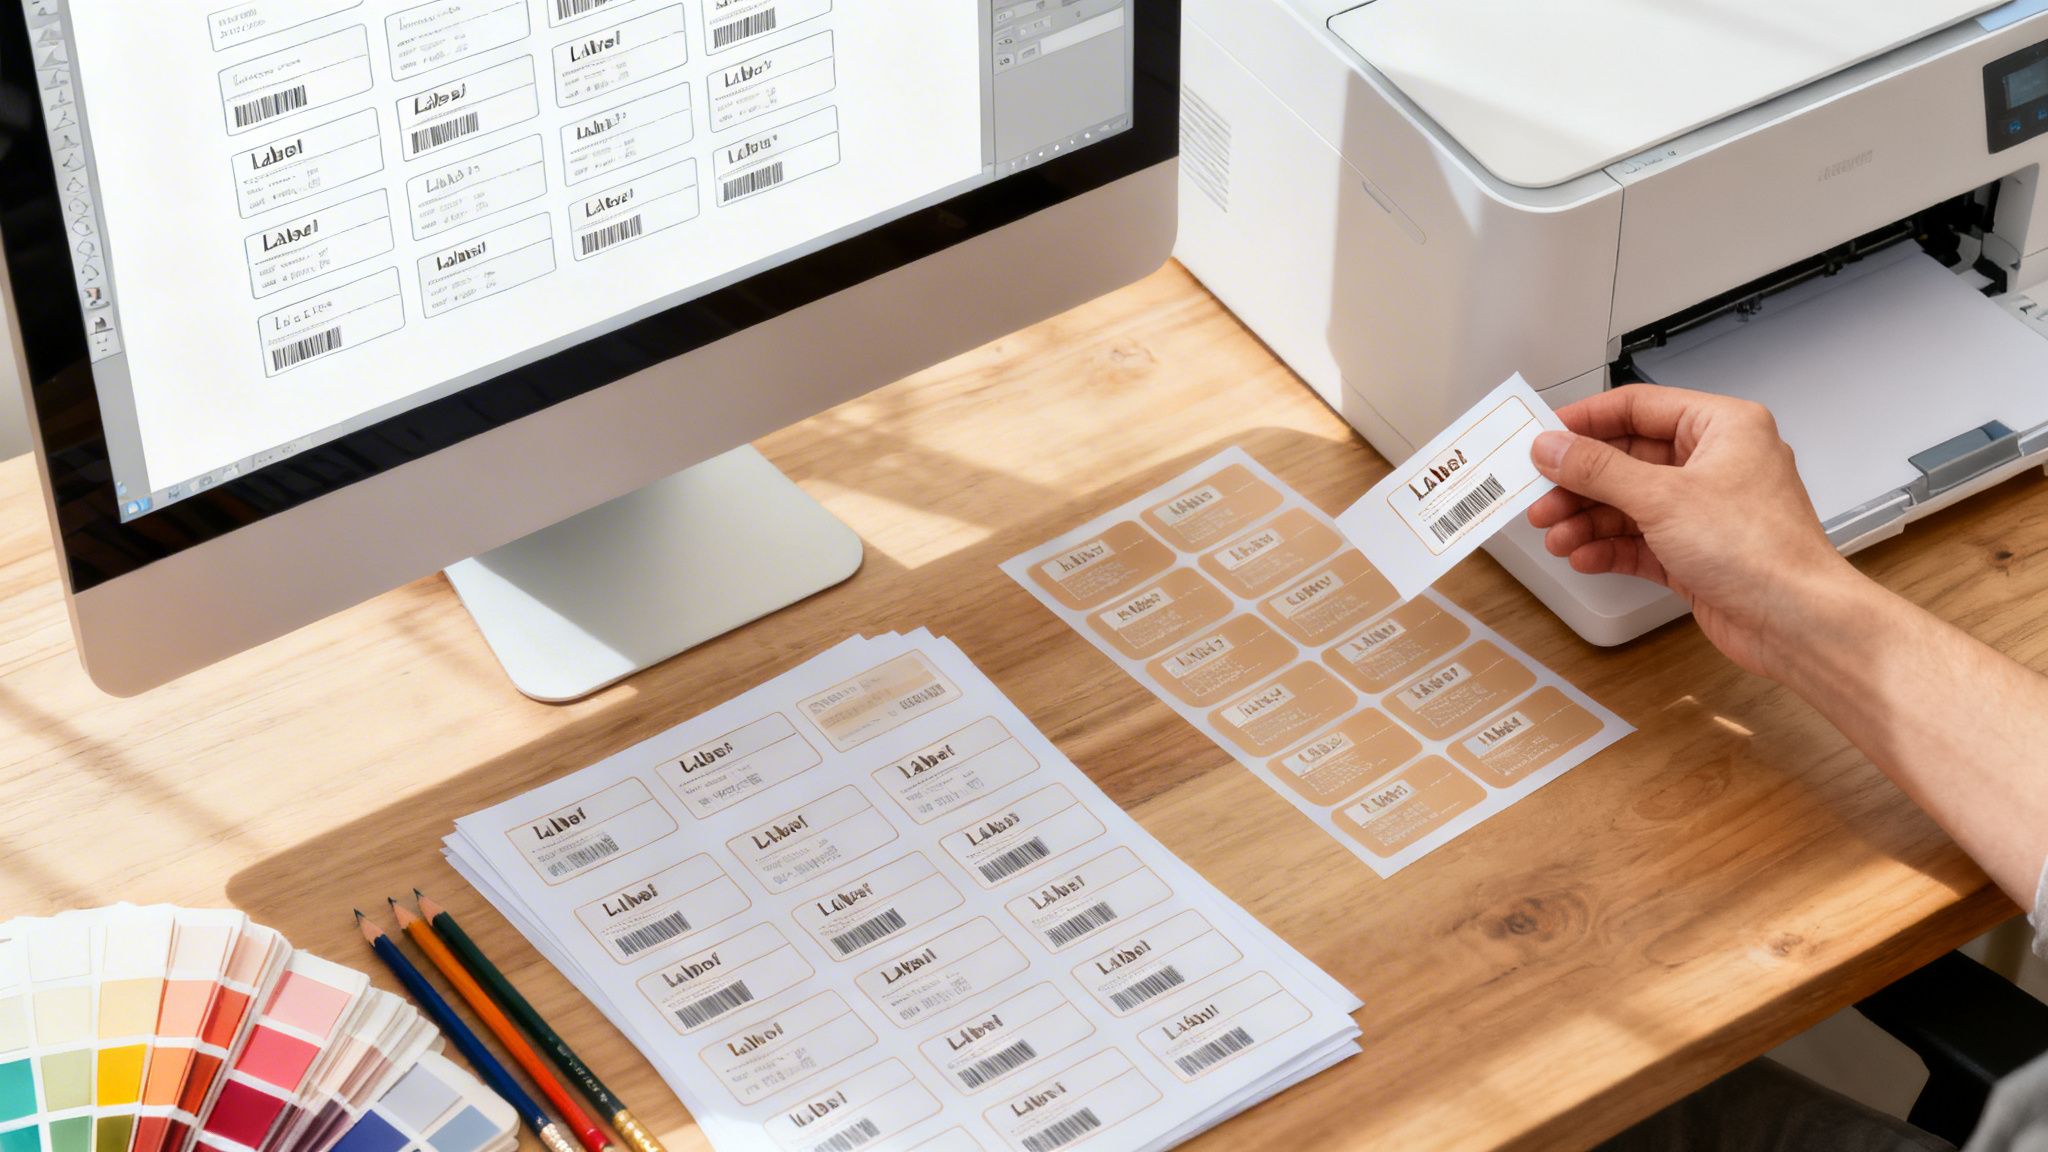
A quick free label template download is often the single fastest way to get professional-looking packaging without needing to hire a designer. It’s a huge head start for startups and small businesses, letting you create and print high-quality labels in a fraction of the time and at a fraction of the cost.
Why Free Label Templates Are a Game-Changer for Startups

If you're running a startup or a growing e-commerce brand, you know that time and money are your most precious resources. Every dollar you don't spend on operations is a dollar you can pour back into product development or marketing. That’s where something as simple as a free label template becomes a surprisingly powerful business tool.
Instead of paying hundreds for design fees and then waiting days for proofs, you can have a design that’s ready for the printer in minutes. This kind of speed is a massive advantage, especially when you’re launching new products or running a limited-time promotion.
The Real Savings of DIY Design
The demand for free design resources isn’t just a feeling; it’s a real trend backed by numbers. For example, data shows that 68% of users on platforms like Canva are startups and small businesses. These users report saving an average of $150 per project simply by using templates instead of hiring a designer.
The growth has been staggering. One platform, PosterMyWall, saw a 25% year-over-year increase in template downloads since 2020. It just goes to show how many small businesses are embracing this lean approach.
Here’s what that really means for your business:
- Immediate Cost Reduction: You completely sidestep graphic design fees.
- Unmatched Speed: You can go from a blank slate to a finished design in under an hour.
- Brand Consistency: Using the same base template makes it easy to create a unified look across your entire product line.
A great template is the foundation of your brand's visual identity. It ensures that whether a customer finds your product online or on a shelf, the branding feels consistent, professional, and instantly familiar.
Turning a Free Template Into a Polished Product
The real magic happens when you connect that free design to a polished, professionally printed label. This is where a printing partner like 4OVER4 comes in. While a template gives you the design framework, a quality printer brings it to life with the right materials, finishes, and precision.
By starting with templates designed for professional printing, you dodge common DIY mistakes like poor resolution or incorrect sizing. For more ways to elevate your brand on a budget, you can check out our dedicated resources for startups and SMBs.
At the end of the day, a free label template download isn't just about saving a few bucks—it's about giving your brand the power to look and feel like an established player, right from day one.
Finding the Right Free Label Template for Your Brand

Starting your search for a free label template download can feel like you're diving into an endless sea of options. A quick search will throw thousands of designs at you, but let’s be honest—they aren't all created equal. The real goal is to find a template that’s not just pretty, but is technically solid enough for professional printing.
Think of it like building a house. You wouldn't grab a blueprint meant for a dollhouse to build a real home, right? In the same way, using a flimsy or badly formatted template is a recipe for disaster. It often leads to blurry text, weird colors, or designs getting chopped off during printing.
The smartest place to start your hunt is usually with the printer you’re planning to use. Platforms like 4OVER4 offer huge libraries of templates that are already built to work perfectly with their printing equipment. This one move saves you from a world of guesswork and potential mistakes, since the sizes, dielines, and file specs are already good to go.
Filtering for Quality and Fit
Once you’ve found a trustworthy source, it's time to zero in on your specific needs. Don't just get distracted by a design that catches your eye. A great template is a functional tool first and a piece of art second.
Before you even think about hitting that download button, make sure the template has these key features:
- Editable Layers: A good template will have separate layers for your text, graphics, and background. This makes it so much easier to customize in programs like Adobe Illustrator or Photoshop without messing everything up.
- High Resolution: The file absolutely must be set to at least 300 DPI (dots per inch). Anything lower is going to look fuzzy and unprofessional once it's printed.
- Correct Dimensions: Double-check that the template's dimensions are an exact match for the label size you plan to order. Being off by even a few millimeters can completely ruin the final look.
Modern template libraries can be massive, with some offering thousands of configurations. The best ones are designed to minimize those frustrating alignment issues we've all struggled with when trying to print from home.
Matching the Template to Your Product
Your product’s unique shape, size, and what it’s used for should be the main guide for your template choice. Are you labeling a round candle tin, a tall rectangular sauce bottle, or maybe a small oval cosmetic jar? Each one needs a completely different shape and size.
For example, a honey producer might search for a "rustic oval label template" to get that perfect look for their jars. On the other hand, a tech company might need a "clean minimalist rectangular product label" for their electronics packaging. Getting specific with your search keywords will help you cut through the noise and find what you need much faster.
Your label is often the very first physical interaction a customer has with your brand. Choosing the right template ensures that first impression is a great one, showing off your quality and attention to detail from the get-go.
By focusing on the technical quality and your specific product needs, you’ll do more than just find a pretty design. You’ll be selecting a functional asset that truly sets your project up for printing success. For a closer look at all the different types of labels out there, check out our guide to the custom online labels you can create once you've found your perfect template.
Customizing Your Label for a Standout Brand Identity
A free label template download is a fantastic starting point, but it’s just that—a start. The real work begins when you take that generic design and make it truly yours. This is where a basic label transforms into a powerful piece of your brand that grabs attention and builds loyalty.
Think about it from the perspective of a small-batch honey producer. You found a great rustic-looking template online, but so did a dozen other vendors at the farmers market. To stand out, you have to infuse that design with your unique brand. This goes way beyond the default settings; it’s about making choices that reflect who you are. Before you even open a design file, it helps to have a solid grasp on how to create a brand identity that connects and converts.
Infusing Your Brand’s Personality
Your first step is to weave in your brand's core visual elements. This isn't just about slapping a logo on it. It's about making the entire label feel like it could only have come from your company.
Start by focusing on these three essentials:
- Brand Colors: Ditch the template’s default colors and bring in your brand’s primary and secondary palette. For our honey producer, that might mean swapping a generic brown for a rich, golden yellow and a deep, earthy green.
- Typography: Your fonts need to match your brand's voice. A bubbly, rounded font might be perfect for a candy brand, but our honey producer will likely lean toward a classic serif or a friendly handwritten script to communicate tradition and quality.
- Logo Placement: Put your logo where it will be seen immediately, but without overshadowing other key details. The top-center or top-left corner is usually prime real estate for instant brand recognition.
Taking design into your own hands has never been easier, thanks to the boom in user-friendly tools and free templates. In fact, Avery Design & Print alone has helped create 75 million custom labels since 2010, and 55% of those were for small business marketing. This just goes to show how many entrepreneurs are successfully customizing their own branding.
Establishing Clear Visual Hierarchy
Once your brand’s look is in place, you need to guide your customer’s eye. We call this visual hierarchy, and it’s all about making sure the most important information stands out. A cluttered label is a confusing one.
Ask yourself what a customer needs to know first. For that honey label, the hierarchy might break down like this:
- Most Important: Product Name ("Wildflower Honey") and Your Brand Logo.
- Secondary Info: Net Weight (e.g., 12 oz) and a key selling point ("Raw & Unfiltered").
- Fine Print: Ingredient list, contact info, and the barcode.
A well-designed label answers a customer's questions before they even have to ask. It should clearly communicate what the product is, who made it, and why they should choose it over the competition.
Use size, color, and placement to create this natural order. Your product name should be the largest text on the label. A bold font or a pop of contrasting color can draw attention to key benefits. This simple strategy ensures a shopper can instantly see what makes your product special, even from a few feet away.
You can also think about the physical shape of your label. Exploring options like custom die-cut shapes can make your product literally stand out on a crowded shelf, adding another powerful layer of distinction.
Prepping Your Design for a Flawless Print Run
Alright, your label design is looking sharp and full of brand personality. Now comes the part where so many DIY projects hit a wall—the technical prep. This is the make-or-break stage that ensures the design you love on your screen translates perfectly to a physical, printed label.
Don't worry, you don't need to be a graphic design guru for this. It's really just a final quality check before you hand off your file to a professional printer like us at 4OVER4. Getting a few key settings right from the get-go will save you from common headaches like blurry text, weird color surprises, or essential details getting sliced off.
The journey from a template to a finished label is a straightforward path. You pick a starting point, infuse your brand, and lock in the final text.

Each step builds on the last, bringing you closer to a professional, eye-catching label that's ready for the world.
Nail Your Bleed and Safe Zones
Picture a massive stack of your printed label sheets being trimmed by a giant guillotine. It’s incredibly precise, but even with modern machinery, tiny, microscopic shifts can happen. This is exactly why "bleed," "trim," and "safe zones" are non-negotiable.
- Trim Line: This is simply the final, intended edge of your label where the machine is set to cut.
- Bleed Area: Always extend your background colors, images, or any design element that touches the edge 1/8th of an inch (0.125") past the trim line. If the blade shifts just a hair, this extra bit of design ensures you won't get any ugly, unprinted white slivers on the final product.
- Safe Zone: On the flip side, pull all your important stuff—like logos, text, and contact info—at least 1/8th of an inch (0.125") inside the trim line. This buffer protects your critical elements from getting accidentally chopped off.
A design file sent without proper bleed is one of the most common reasons for print delays. Seriously, taking a minute to set this up correctly will save you the frustration of having your files rejected and needing to resubmit.
Choosing the Right Colors and File Formats
Ever notice how colors on your phone look different from colors on your TV? The same thing happens between your screen and a printer. What looks electric on a backlit monitor can appear flat or just plain wrong when printed with ink. This is all down to color models: screens use RGB (Red, Green, Blue) light, while commercial printers use CMYK (Cyan, Magenta, Yellow, Black) ink.
Before you save your final file, always convert your document's color space to CMYK. If you forget, the printer’s software has to guess at the conversion, and that’s when you get surprises. That vibrant lime green on your screen can easily turn into a dull, muddy olive.
Just as critical is the file format you send over. Once you've polished your design, getting it into professionally formatted print-ready files is the final hurdle.
Here’s the breakdown:
- Vector Formats (PDF, AI, EPS): These are the undisputed champions for print. Because vector graphics are built on mathematical paths instead of pixels, they can be scaled to any size—from a tiny product label to a giant billboard—without ever losing quality. Your text and logos will stay perfectly crisp.
- Raster Formats (JPG, PNG, TIFF): Reserve these for photographic images within your design. If your entire label must be a raster file, you absolutely have to save it at a high resolution of at least 300 DPI (dots per inch) to avoid a pixelated, blurry mess.
To help you double-check everything, here’s a quick rundown of what we look for in a print-ready file.
Essential Print-Ready File Checklist
This table is your quick reference guide to make sure your label file is technically sound before you upload it for printing.
| Technical Setting | Recommended Specification | Why It Matters |
|---|---|---|
| Color Mode | CMYK | Ensures the colors you see on screen are accurately reproduced with printing inks. |
| Resolution | 300 DPI (for raster images) | Prevents pixelation and ensures all images and graphics are sharp and clear. |
| Bleed | 0.125" on all sides | Avoids unprinted white edges by extending the design beyond the final trim line. |
| Safe Zone | 0.125" from the trim line | Protects important text and logos from being accidentally cut off during trimming. |
| File Format | Press-Ready PDF | Embeds all fonts, images, and settings into one reliable file, minimizing errors. |
Getting these settings right ensures a smooth process and a final product you'll be proud of.
Ultimately, a press-ready PDF is the most reliable format you can provide. It neatly packages all your fonts, images, and settings into a single, self-contained file, which drastically reduces the chances of something going wrong on our end. When you are ready to get your project running, you can explore the various digital printing options that bring your incredible designs to life with professional quality.
Ordering Your Custom Labels with Confidence
You did it. The design is perfect, the brand elements are sharp, and your print-ready file is good to go. Now comes the exciting part: turning that digital file into a real, tangible product that gets your brand noticed.
Ordering should be the easy part, not a source of stress. This is where you make the final decisions on the look, feel, and performance of your labels. Think of it as the last chapter of your product's story—the one that makes a potential customer stop and take a closer look.
Choosing the Right Material and Finish
The material you pick is about more than just looks; it's about function. Your label has a job to do, and it needs to hold up in its specific environment. A label for a hot sauce bottle, for instance, has to handle moisture and changing temperatures. On the other hand, a simple paper label is perfect for a one-time-use mailer.
Here’s a quick rundown of some of the most popular choices we see:
- BOPP (Biaxially Oriented Polypropylene): This is a tough, waterproof plastic that’s an absolute workhorse. It’s perfect for products that will be exposed to water, oil, or refrigeration—think cosmetics, beverages, and food jars. You can get it in white, clear, or even a sleek metallic silver.
- Classic Paper Labels: This is your cost-effective, versatile option for dry goods, product boxes, and pretty much any indoor application. Paper provides a great canvas for rich, vibrant colors.
- Vellum and Estate Papers: If you’re going for a more luxurious, textured feel, these are your go-to. They are ideal for high-end products like wine bottles or artisanal goods where you want to signal craftsmanship and quality from a mile away.
After material, you’ll pick a finish. A gloss finish will make your colors look deeper and more vibrant, giving your label a reflective shine that catches the eye. In contrast, a matte finish offers a smooth, non-reflective surface that feels sophisticated and modern.
Uploading Your File and Reviewing the Proof
With your material and finish locked in, it's time to upload your print-ready file. On a platform like 4OVER4, this is a simple process. You'll just use the instant price calculator to plug in your specs—size, shape, quantity, material—and then upload your design file.
Once your file is uploaded, you’ll receive a digital proof. This is your last, best chance to review everything before it heads to the press.
Do not skip the proofing step. Seriously. Check for typos, make sure the logo is right, and double-check that every single design element is safely inside the safe zone. A few minutes of careful review now can save you from a costly and frustrating reprint later.
This proof shows you precisely how your design will look with the trim lines applied. It’s the final handshake between your digital file and our printing equipment.
Once you hit "approve," your job is off to production. This is where all that hard work you put into that free label template download finally pays off. You can explore a huge variety of materials and finishes by checking out our full range of custom labels printing options to find the perfect combination for your brand. And if you really want to add that extra "wow" factor, consider premium finishes like foil stamping or embossing to make your product truly unforgettable on the shelf.
Common Questions About Label Templates and Printing
You’ve got your design dialed in, the free label template download is ready, but a few nagging questions always seem to creep up right before you hit 'print.' It’s a common part of the process, and we’ve seen just about every last-minute hurdle there is.
Let’s tackle some of the most frequent questions we hear. These are the details that can make or break your final product, and getting them right will give you total confidence when you’re ready to order.
Can I Print Professional Labels on My Home Printer?
It’s definitely tempting to try and run a batch of labels on your home printer, but professional results really do require professional equipment. The biggest issue is that desktop printers use RGB color and simply aren't calibrated for the precision needed for die-cut label sheets.
This almost always leads to misaligned prints, colors that don't match what you saw on screen, and labels that smudge or peel right off. Professional printers like 4OVER4 use CMYK color, specialized cutting technology, and a huge variety of durable materials to guarantee a flawless finish. Your product deserves a label that looks and feels the part.
What if My Design Software Doesn’t Have a CMYK Option?
Don't panic—this is a super common scenario. Most free or basic design tools, like Canva or even Microsoft Word, are built for digital screens, so they operate exclusively in RGB. If your software can't export to CMYK, all is not lost.
When you upload an RGB file to a professional printer, their pre-press software will automatically convert it to CMYK for you. The only catch is that this automatic conversion can sometimes cause colors to shift.
Here’s a pro tip: try to slightly desaturate your brightest on-screen colors before exporting. This helps prevent a vibrant digital color from turning into a muddy or dull tone when it's converted to CMYK ink.
Why Was My File Rejected for Low Resolution?
This is easily one of the most common issues we see. If your file got rejected, it’s almost certainly because the images—or the entire design—were saved at a resolution lower than 300 DPI (dots per inch). Screen resolution is typically just 72 DPI, which looks perfectly sharp on your monitor but will come out blurry and pixelated in print.
The only fix is to go back to your original design file and export it again, making sure the resolution is set to 300 DPI or higher. If you're working with photos, you have to start with a high-quality image from the beginning. Unfortunately, you can’t add resolution to a low-quality image after the fact.
At 4OVER4, our goal is to make professional printing straightforward and accessible for everyone. From our huge library of templates to our expert support team, we're here to help you bring your brand vision to life with stunning, high-quality labels. Explore our options and start your project today at https://4over4.com.
More from

19
Eco-friendly packaging isn't some fringe trend anymore. It’s a core part of how smart businesses build their brand and earn customer loy
![]() Emma Davis
Emma Davis
Mar 27, 2026

22
So you need a custom banner printed. The first question that pops into your head is probably, "Where do I even go for this?" You’v
![]() Emma Davis
Emma Davis
Mar 26, 2026

66
Ever wondered what are carbonless forms and how they create perfect copies without that messy blue paper? Think of them as th
![]() Emma Davis
Emma Davis
Mar 25, 2026

67
To design your own flyers effectively, you need to focus on a few key things: a strong visual hierarchy, a call-to-action that people can'
![]() Emma Davis
Emma Davis
Mar 24, 2026

165
Let’s get one thing straight about CMYK and RGB: one is for screens, the other is for print. Your monitor mixes red, green,
![]() Emma Davis
Emma Davis
Mar 23, 2026

54
Printing a high-quality business envelope is simpler than you might think. It all starts with a solid design file using CMYK color settings, y
![]() Emma Davis
Emma Davis
Mar 22, 2026

143
You might think sending an email or a text is all that matters these days, but don't underestimate the power of physical mail. It carries
![]() Emma Davis
Emma Davis
Mar 21, 2026

120
Picture this: your business has a silent, tireless salesperson working for you 24/7 on the busiest street in town. That’s t
![]() Emma Davis
Emma Davis
Mar 20, 2026