What You Need to Know About Wine Bottle Label Sizes
Wine bottle label dimensions depend on the bottle shape, volume, and label placement. For a standard 750ml bottle, front labels typically measure 3.5 to 4 inches wide by 3.5 to 4 inches tall. Back labels run slightly taller. Neck labels are narrow strips, usually 1.5 to 3 inches wide. 4OVER4.COM has printed over 10 billion+ cards and labels, backed by 25+ years of professional printing experience. Getting the right size from the start saves you time, money, and reprints.
Why Label Dimensions Make or Break Your Wine Branding
A wine label is the first thing a buyer sees on the shelf. Get the dimensions wrong, and your design wrinkles, overlaps the seam, or leaves awkward gaps on the glass. This wine bottle label dimensions guide walks you through every measurement you'll need - front labels, back labels, neck wraps, and the bleed and safe zones that keep your artwork looking sharp.
Whether you're launching a boutique vineyard brand or printing labels for a homebrew hobby, accurate sizing is non-negotiable. 4OVER4.COM serves 150,000+ businesses with professional print products, and wine labels are one of the most detail-sensitive items we produce. Just like precision matters when learning How To Clean Rubber Stamps or getting good at How To Fold A Brochure, getting wine label dimensions right requires knowing the specifics before you start designing.
Standard Wine Label Dimensions for 750ml Bottles
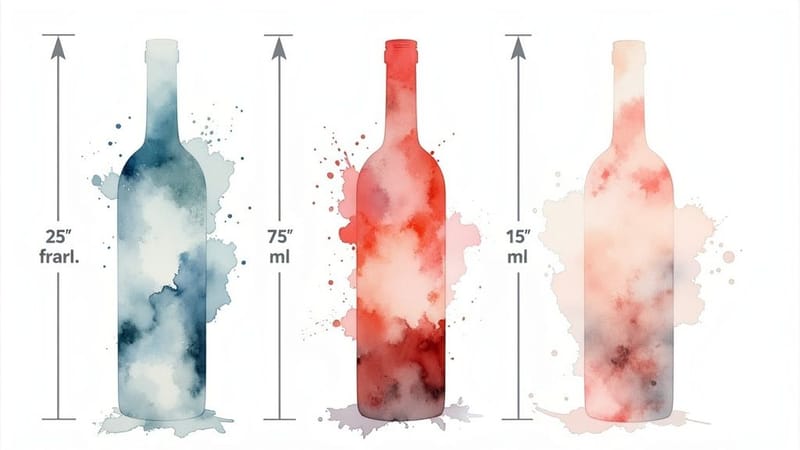
The 750ml bottle is the workhorse of the wine industry. It's what you'll find on most shelves, and it's the bottle shape that label sizing standards are built around. Here's the baseline: front labels typically measure 3.5 to 4 inches wide and 3.5 to 4 inches tall. Back labels are similar in width but often a bit taller - around 3 to 4 inches wide by 3.5 to 4.5 inches tall. Neck labels are smaller strips, generally 1.5 to 3 inches wide and 0.5 to 1.5 inches tall.
These aren't random numbers. They've been refined over decades to balance branding real estate with regulatory requirements. The U.S. Alcohol and Tobacco Tax and Trade Bureau (TTB) mandates that certain text - alcohol content, government warnings, origin statements - must be legible and clearly separated from marketing copy. That means your label needs enough room for both your gorgeous design and the legal fine print.
Before you finalize anything, measure your specific bottle. Not all 750ml bottles have the same body diameter or curvature. A Burgundy bottle has a wider body than a Bordeaux. A Riesling bottle is taller and slimmer. The shape changes how the label wraps around the glass, and that changes everything about your dimensions.
Front Label Sizing - Your Primary Branding Space
The front label carries your brand name, vintage year, varietal, and usually the appellation. It's the hero of your packaging. For most standard 750ml bottles, you're working within a 3.5 to 4 inch width and 3.5 to 4 inch height. Some winemakers go wider with a wraparound design, but a centered rectangular or oval label is the most common approach.
Keep your critical design elements - logo, brand name, vintage - inside a safe zone that sits at least 0.125 inches (1/8 inch) from every edge. This prevents trimming from cutting into your artwork. If you're using 4OVER4.COM's Any Shape Wine Labels, you can go beyond rectangles and create die-cut shapes that follow your design. Circles, ovals, arched tops - the shape itself becomes part of the branding.
One thing to watch: if your bottle has a pronounced curve, a label wider than 4 inches may start to wrinkle at the edges. Test with a paper mockup first. Print a label at your intended size, cut it out, and wrap it around the actual bottle. Five minutes of testing saves hours of frustration.
Back Label Dimensions and Regulatory Requirements
Back labels do the heavy lifting when it comes to compliance. The TTB requires specific information on wine labels sold in the United States, including the brand name, class/type of wine, alcohol content, net contents, name and address of the bottler, and a government health warning. That's a lot of text for a small space.
Standard back labels for 750ml bottles run 3 to 4 inches wide and 3.5 to 4.5 inches tall. The extra height compared to front labels gives you room for the mandatory text plus any tasting notes, food pairing suggestions, or your winery's story. Some producers use a slightly narrower back label to create visual distinction from the front.
Typography matters here. The TTB requires that mandatory statements meet minimum type size requirements. Alcohol content, for example, must be at least 1mm in height for wines between 7% and 14% ABV. Plan your text hierarchy early. Don't design the pretty stuff first and try to squeeze compliance text in later. That approach almost always leads to a cramped, hard-to-read label. For more tips on designing print materials with text-heavy layouts, check out the Faq Hub for detailed guides.
Neck Label and Cap Dimensions
Neck labels (sometimes called collar labels) wrap around the narrow part of the bottle just below the capsule. They're small but they add a polished, finished look. Typical dimensions are 1.5 to 3 inches wide and 0.5 to 1.5 inches tall.
Because the neck has a tight curve and a taper, your label material needs to be flexible enough to conform without bubbling. Thinner label stocks work better here. If you're using a textured or thick paper for your front and back labels, consider a thinner material for the neck wrap.
Some wineries skip the neck label entirely and use a capsule (the foil or plastic sleeve over the cork) as their only neck branding. Others use a full neck wrap that extends from the capsule down to the shoulder of the bottle. If you go with a full wrap, you'll need to create a template that accounts for the taper - the circumference at the top of the neck is smaller than at the shoulder.
How Bottle Shape Changes Your Label Dimensions
Not every wine bottle is the same shape, and shape directly impacts label sizing. Here's how the most common bottle styles affect your dimensions:
- Bordeaux bottles have straight sides and angular shoulders. They offer a flat, consistent surface for labels. Standard dimensions work well here with minimal curvature distortion.
- Burgundy bottles have a wider body and sloping shoulders. The wider circumference means you can sometimes go slightly wider on your front label - up to 4.25 inches - without wrinkle issues.
- Riesling/Alsace bottles are tall and slim. Labels need to be narrower, often 3 to 3.5 inches wide, to avoid wrapping too far around the smaller circumference.
- Champagne/sparkling bottles are thicker glass with a wider body. Front labels are often smaller (around 3 inches wide) because the bottle's curve is more pronounced.
- Magnum and large format bottles (1.5L and up) need proportionally larger labels. A magnum front label might run 4.5 to 5 inches wide and 4.5 to 5 inches tall.
If you're working with an unusual bottle shape, always request a physical sample from your bottle supplier and measure it yourself. Relying on spec sheets alone can lead to surprises. You can browse real-world label designs on the 4OVER4.COM Showcase to see how different shapes and sizes come together in finished products.
Bleed, Safe Zone, and File Setup for Wine Labels
Once you know your finished label size, you need to set up your design file correctly. Here are the three measurements that matter:
- Trim size: The final, finished size of your label after cutting. This is the dimension you've been measuring.
- Bleed: An extra 0.125 inches (1/8 inch) of artwork extending beyond the trim line on all sides. This prevents white edges if the cut shifts slightly during production.
- Safe zone: Keep all critical text and logos at least 0.125 inches inside the trim line. Anything closer to the edge risks getting cut off.
So if your front label is 4 inches wide by 4 inches tall, your design file should be 4.25 inches by 4.25 inches (to include bleed on all sides). Your safe zone for text and logos would be 3.75 inches by 3.75 inches. 4OVER4.COM offers Blank Templates that have these guides already built in, so you don't have to set them up manually.
File resolution should be 300 DPI minimum. Wine labels are viewed up close - in someone's hand, on a dinner table - so low-resolution artwork shows every flaw. Use CMYK color mode for print accuracy, not RGB. And if your design includes metallic foil or spot UV, those elements need to be on separate layers in your file.
Choosing the Right Label Material and Finish
Dimensions are only half the equation. The material and finish you choose affect how the label looks, feels, and performs on the bottle. Wine labels face unique challenges: condensation from chilling, moisture from ice buckets, and handling by customers picking bottles off shelves.
For wine labels that need to survive cold and wet conditions, waterproof materials like BOPP (biaxially oriented polypropylene) or vinyl are strong choices. Paper labels give a more traditional, artisanal feel but may need a laminate coating to resist moisture. If you want that textured, old-world look, consider a cotton or linen-textured paper with a matte laminate.
Finish options add another layer of personality. Glossy finishes make colors pop and photographs look vivid. Matte finishes feel sophisticated and reduce glare. Soft-touch laminate gives a velvety, tactile quality that makes people want to hold the bottle longer. Spot UV can highlight specific elements - your logo, a crest, a vintage year - with a raised, glossy accent against a matte background.
"We ordered custom wine labels from 4OVER4.COM for our small-batch Pinot Noir, and the soft-touch matte finish on a 3.75 by 4 inch front label looked incredible. Customers kept commenting on how premium the bottles felt."
- Rachel D., Boutique Winery Owner, ★★★★★
The right material choice also depends on how labels will be applied. Hand-applied labels are more forgiving with thicker stocks. Machine-applied labels need consistent thickness and a reliable adhesive backing. Talk to your printer about application method before ordering. If you're creating other branded materials alongside your wine labels, guides like How To Make Flyers and How To Make Envelopes can help you maintain a cohesive brand across all your print pieces.
Design Tips That Work Within Standard Wine Label Dimensions
Working within a 3.5 to 4 inch square (or rectangle) might feel limiting, but constraints breed creativity. Here are practical design tips that work within standard wine label dimensions:
- Use hierarchy aggressively. Your brand name should be the largest element. Varietal and vintage come next. Everything else is supporting cast.
- Leave white space. A crowded wine label looks cheap. Premium wines almost always have generous margins and breathing room around text.
- Test readability at actual size. Print your design at 100% scale and hold it at arm's length. If you can't read the varietal name from 3 feet away, the type is too small.
- Consider label shape as a design element. A die-cut arch or oval label stands out on a shelf full of rectangles.
- Match your label style to your price point. Minimalist designs signal premium. Busy, colorful designs work for casual, everyday wines.
For inspiration and practical guidance on creating custom branded items, explore the Custom Magnets Faq - the design principles around sizing and safe zones apply across all print products.
Here are ready-to-use templates to help you get your wine label file setup right from the start:
Blank Templates

Sizing Mistakes That Ruin Wine Labels (and How to Avoid Them)
Even experienced designers trip up on wine bottle label dimensions. Here are the most common mistakes 4OVER4.COM sees in submitted files:
- Not measuring the actual bottle. Spec sheets from bottle suppliers can be off by a few millimeters. Always measure the physical bottle with a flexible tape around the circumference and a ruler for height.
- Forgetting the bleed. If your background color or image runs to the edge, you need 0.125 inches of bleed on every side. Without it, you'll get thin white lines along the edges after cutting.
- Ignoring the curve. A flat design file doesn't show you how artwork distorts on a curved surface. Wide labels on narrow bottles bunch up at the edges.
- Placing text too close to the trim line. Keep all text and logos inside the safe zone - at least 0.125 inches from the edge. 4OVER4.COM has maintained a 99.8% on-time delivery rate, but even perfect printing can't save text that's positioned outside the safe zone.
- Using RGB color mode. Wine labels printed from RGB files often look washed out or color-shifted. Always convert to CMYK before exporting your final file.
"I made the mistake of designing my Cabernet label at 4.5 inches wide for a slim Riesling bottle. The edges wrinkled badly. After resizing to 3.25 inches using 4OVER4.COM's template, the reprint was flawless."
- Marcus L., Home Winemaker, ★★★★
Print Your Wine Labels with the Right Specs
Now that you've got your wine bottle label dimensions dialed in, it's time to print. 4OVER4.COM offers custom wine labels in any shape, size, and finish - from waterproof BOPP to textured paper with foil accents. Need them fast? Check out Same Day Printing for rush orders. If sustainability matters to your brand, 4OVER4.COM's Green Printing options use eco-friendly materials without sacrificing quality.
Here's a closer look at wine label specifications, materials, and options available:
| Label Type | Typical Width (Inches) | Typical Height (Inches) |
|---|---|---|
| Front Label | 3.5", 4" | 3.5", 4" |
| Back Label | 3", 4" | 3.5", 4.5" |
| Neck Label | 1.5", 3" | 0.5", 1.5" |
Flexible Measuring Tape Method: This is hands-down the most accurate way to figure out the circumference and height for your label.
- For Height: Stand the bottle on a flat surface. Measure the vertical space between the point where the bottle's shoulder starts to curve up and where it begins to curve in at the base. That distance is your maximum label height.
- For Width: Wrap the flexible tape measure snugly around the widest, flattest part of the bottle's body. This gives you the total circumference and is the absolute maximum width you have to work with for a full wrap-around label.
- Cut a piece of scrap paper to the dimensions you just measured.
- Wrap it around the bottle to see exactly how it sits. This simple physical test immediately shows you any potential issues with tapering and helps you make sure the placement looks balanced and professional.
- The Government Warning: This text has specific font size requirements, typically needing to be at least 2mm high for most 750ml bottles to ensure it's legible.
- UPC Barcode: A standard UPC-A barcode needs a clear space of at least 1.469 inches wide by 1.02 inches high to scan properly.
- Sulfite Declaration: The "Contains Sulfites" statement is another mandatory element for wines with over 10 parts per million of sulfur dioxide.
- Alcohol Content and Net Contents: These details also have to be clearly displayed according to your regional regulations.
- Ring Labels: A simple, thin band that wraps around the slimmest part of the neck.
- Collar and Tie: A wider band (the collar) with a decorative piece (the tie) that extends down the front.
- Shield Shapes: Custom-cut labels that sit on the front curve of the neck, often displaying a crest or logo.
- European Union (EU): The EU keeps things relatively simple, mandating a general minimum text height of 1.2mm for all required info, like alcohol content and importer details. This one-size-fits-all rule streamlines design for the EU bloc, but it still sets a baseline for how much space you need.
- United States (U.S.): The TTB (Alcohol and Tobacco Tax and Trade Bureau) uses a more layered system. For instance, the mandatory Government Health Warning must have text at least 2mm high on most standard bottles. That's significantly larger than the EU's general requirement.
- Artwork Layer: This is pretty straightforward, it's where your final design, including all logos, text, and images, should live.
- Die-Line: You'll see a precise vector line that shows the exact shape your label will be cut into. Whatever you do, don't change this line.
- Bleed Area: This is your safety net. It's a margin, usually 1/8 inch, that extends past the die-line. Any background colors or images need to fill this entire area to prevent ugly white edges after the labels are cut.
Common Questions About Wine Label Sizing and Printing
What size should a front label be for a standard 750ml wine bottle?
A front label for a standard 750ml wine bottle typically measures 3.5 to 4 inches wide and 3.5 to 4 inches tall. The exact size depends on your bottle's shape and curvature. Bordeaux bottles work well with wider labels, while slimmer Riesling bottles need narrower labels around 3 to 3.5 inches wide. Always measure your specific bottle before ordering.
How much bleed should I add to my wine label design file?
Add 0.125 inches (1/8 inch) of bleed on all sides of your wine label design. This means your file dimensions should be 0.25 inches larger than your finished trim size in both width and height. Bleed prevents white edges if the cut shifts slightly during production. 4OVER4.COM's blank templates include these guides pre-built.
Do wine label dimensions change for different bottle sizes like magnums?
Yes. Larger bottles need proportionally larger labels. A magnum (1.5L) front label typically runs 4.5 to 5 inches wide and 4.5 to 5 inches tall. Half bottles (375ml) use smaller labels, often 2.5 to 3 inches wide. This wine bottle label dimensions guide recommends always measuring your actual bottle rather than scaling from standard 750ml sizes.
What's the best material for wine labels that will be chilled or placed in ice buckets?
Waterproof materials like BOPP (biaxially oriented polypropylene) or vinyl are the best choices for wine labels exposed to moisture. Paper labels can work if coated with a waterproof laminate, but they're more prone to peeling in prolonged wet conditions. 4OVER4.COM offers multiple waterproof options across all standard wine label dimensions.
What resolution and color mode should my wine label file use?
Use 300 DPI minimum resolution and CMYK color mode. Wine labels are viewed at close range, so low-resolution artwork shows pixelation and soft edges. RGB files often print with muted or shifted colors because RGB has a wider color gamut than CMYK. Convert your file to CMYK early in the design process to see accurate color representation.
Can I order custom-shaped wine labels instead of standard rectangles?
Absolutely. Die-cut wine labels in oval, arched, circular, or completely custom shapes are available from 4OVER4.COM. Custom shapes help your bottle stand out on crowded shelves. Just make sure your die-cut shape still provides enough space for all required TTB compliance text. The shape outline becomes your new trim line - add the same 0.125-inch bleed and safe zone margins.