TABLE OF CONTENTS
- Home
- content hub
- Table table tent sizes: Quick Guide to Eye-Catching Displays
Table table tent sizes: Quick Guide to Eye-Catching Displays
Feb 24, 202618 views
Feb 24, 202618 views
When it comes to table tents, the industry workhorses are the 4" x 6" and 5" x 7" sizes. They strike that perfect sweet spot between being noticeable and not hogging all the table space. It's important to remember, these dimensions refer to the size of each visible panel after the card is folded into its standing A-frame or tri-fold shape.
Your Quick Reference for Table Tent Sizes
Choosing the right size is your first real decision in creating a tabletop display that actually works. The whole point is to find a size that gets noticed without overwhelming the customer’s experience, whether it's sitting on a restaurant table, a retail counter, or an event check-in desk. You want the dimensions to fit the environment and, just as importantly, the message you're trying to send.
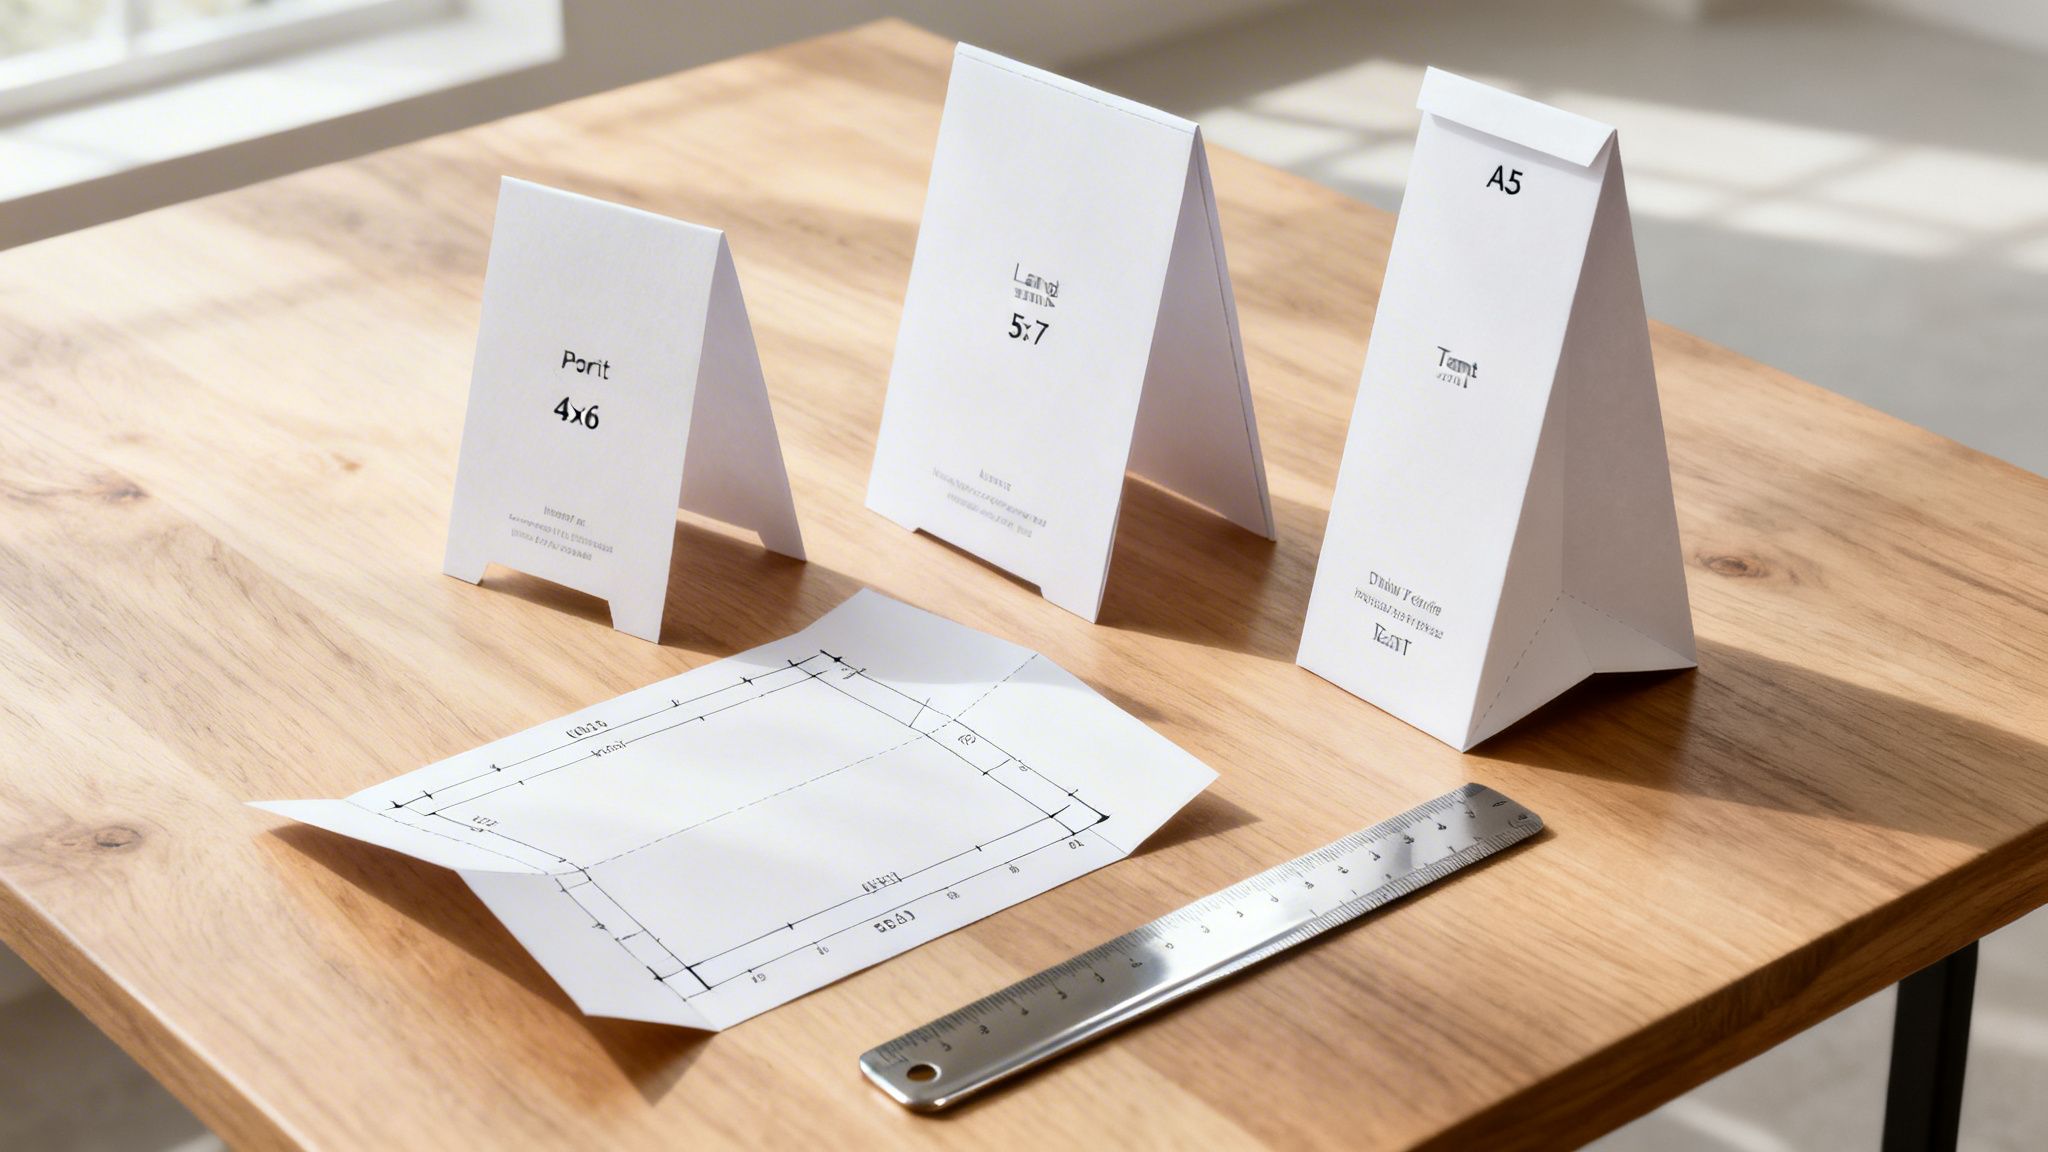
This handy visual guide breaks down the most popular table tent sizes and where they shine.

As you can see, a more compact 4" x 6" tent is a great fit for busy restaurant tables where space is at a premium. On the other hand, the larger 5" x 7" format gives you more real estate for visuals, making it a better choice for conferences and trade shows.
Making a Fast and Informed Decision
The best size for your table tent really just comes down to its job. Are you promoting a single happy hour special, or are you laying out a detailed event agenda with multiple points? Answering that question will make your choice a whole lot easier.
- For simple, punchy messages: A smaller size like 4.25" x 5.5" is perfect. Think QR codes, drink specials, or a quick "Welcome!" announcement.
- For more detailed information: A larger 5" x 7" gives you the room you need for more text and graphics, which is ideal for menus, lists of services, or sponsorship info at events.
To get a better sense of how different sizes can fit into a cohesive look, it helps to browse some restaurant table setting ideas. Making sure your table tent plays well with your other printed materials is key to a professional presentation. You can check out our standard collection of print products to keep your brand experience consistent across the board.
Detailed Breakdown of Standard Dimensions
Getting the dimensions right is the first step to creating a table tent that actually works. Each standard size strikes a different balance between being seen and not getting in the way, which makes them better suited for certain jobs. Let's dig into the most common sizes you'll come across.

This isn't just about general advice; we're talking about the exact flat and folded measurements you'll need for your design files. Knowing these specs helps you picture the final piece and get your artwork print-ready from the start.
The Compact and Efficient 4 x 6 Inch
The 4" x 6" table tent is a classic for a reason. It's big enough to catch the eye but small enough that it won't hog precious table space, which is critical in a busy cafe or restaurant.
- Flat Sheet Size: 4" x 16.25"
- Folded Panel Size: 4" wide x 6" high
- Best Use Case: This is your go-to for drink specials, happy hour deals, dessert menus, or a QR code for your digital menu. Its vertical layout naturally draws attention without creating a wall between guests.
Think of this size as the perfect choice for a short, punchy message that needs to be right in your customer's line of sight without being a nuisance.
The High-Impact 5 x 7 Inch
When you've got more to say or want to feature some killer visuals, the 5" x 7" gives you a serious upgrade in marketing real estate. This larger format is perfect for making a bold statement at events or in spaces where you don't have to worry about clutter.
- Flat Sheet Size: 5" x 18.25"
- Folded Panel Size: 5" wide x 7" high
- Best Use Case: It’s a natural fit for event registration desks, trade show booths, hotel lobbies, and spa service menus. That extra space means you can pack in more details, use bigger images, and play with a more intricate design.
That extra inch in height and width makes a surprisingly big difference in how noticeable it is, especially from a few feet away.
The Industry Standard 4.25 x 5.5 Inch
The 4.25" x 5.5" table tent hits a sweet spot, offering a unique footprint that’s both practical and sharp. It’s a little wider than the 4" x 6" but not as tall, giving it a sturdy, modern feel.
This is arguably the most common size out there, especially for the tri-fold style. It aligns perfectly with standard A5 paper and fits on a dining table without a fuss. Back in the early 2000s, this size owned 65% of the U.S. market. Sticking with these proven dimensions ensures 99% compatibility with standard holders and can cut material waste by 15-20% per campaign. You can learn more about trends in the table tent market.
This versatility makes it a rock-solid choice for just about anything. If you're thinking about something bigger and more rigid for your tabletop displays, you might also want to check out our guide on custom counter cards printing.
Choosing Your Best Orientation and Fold
Beyond just picking a size, the orientation and fold of your table tent are where your design strategy really comes to life. How you combine them affects everything from visual appeal to how easily a customer can read your message. Get it right, and you've got their attention.
First things first, you need to decide between a vertical or horizontal layout. Each one has its own strengths and is better suited for certain types of content.

Portrait (Vertical) Orientation: This is the go-to choice for most people, especially for the popular 4" x 6" and 5" x 7" sizes. The tall format is great at drawing the eye up, which makes it perfect for lists, QR codes, or a single, striking image. Think of it as the best layout for a focused message, like a happy hour menu or a product special.
Landscape (Horizontal) Orientation: A landscape layout gives you a much wider canvas to work with. It's excellent for showcasing panoramic photos, timelines, or side-by-side product comparisons. This format also has a stable, low profile that’s great for event agendas or displaying a wide company logo.
Understanding Common Fold Styles
Once you’ve settled on an orientation, it's time to pick a fold style. The fold determines how many panels your table tent has, which in turn dictates how much information you can fit and how you can organize it.
The two main players here are the standard A-Frame and the more versatile tri-fold.
My rule of thumb? If your message is simple and direct, an A-Frame fold is your best bet. If you've got more complex information to share, the three panels of a tri-fold let you guide the reader through different topics without cluttering the design.
A-Frame (Two-Sided): This is the classic table tent you see everywhere. It’s folded once down the middle to create two visible panels, standing up like the letter "A". It's incredibly straightforward, cost-effective, and perfect for getting a clear message out from two directions, which is why it's a favorite in restaurants and on retail counters.
Tri-Fold (Three-Sided): A tri-fold tent is scored to create three distinct panels, giving you a lot more marketing real estate. This setup lets you break up your information—for example, one panel for appetizers, another for entrees, and a third for drinks. The structure is also more stable, making it an excellent choice for organizing detailed content in a way that's easy to digest.
For a little more inspiration on using panels and layouts effectively, take a look at our complete folded collection of print products.
Selecting the Right Paper and Finishes
Getting the right size for your table tent is half the battle. The other half? Choosing the right paper stock and finish. These details are what give your display its final look and feel, and they say a lot about your brand's quality. A flimsy table tent can make even the best design look cheap.
Think of it this way: just like choosing the right tablecloth sets the stage for a meal, your paper choice sets the tone for your message. It’s a small detail that makes a huge difference in how sturdy and professional your table tents feel.

Comparing Paper Weights
Paper weight tells you how thick and stiff the cardstock is. It's measured in points (pt.), and a higher number means a heavier, more durable paper. You definitely want something that can stand up on its own without buckling.
- 14 pt. Cardstock: This is your trusty workhorse. It’s the industry standard because it hits that sweet spot between being sturdy and affordable. It's a solid go-to for restaurants, retail counters, or any high-volume promotion.
- 16 pt. Cardstock: If you want something with a bit more heft, 16 pt. cardstock is a fantastic upgrade. That extra thickness gives it more rigidity, so your tents will stand tall and proud, even in busy spots where they might get knocked around.
Choosing the Perfect Finish
The finish is the final touch that can really make your design sing. It affects everything from color vibrancy to readability. The two most popular choices have very different vibes.
Glossy UV: A high-gloss coating makes colors look super rich and saturated. It also adds a protective layer that helps resist moisture and fingerprints—a huge plus in restaurants or bars.
Matte: For a more modern, understated look, a matte finish is perfect. It gives you a smooth, non-reflective surface that feels sophisticated. It’s also the best choice for designs with a lot of text, since it cuts down on glare and is easier to read under bright lights.
In the world of table tent printing, certain standards have emerged for a reason. For instance, the 5 x 5 inch square tent is a trade show favorite, making up 35% of all production in North America. Adding a little something extra, like a foil accent, has been shown to boost how valuable creative agencies perceive them by 25%. With over 10,000 templates out there, getting the specs just right is easier than ever. You can learn more about these trends in the latest market research on table tents.
And if you really want to explore ways to make your prints more durable and eye-catching, check out our guide to lamination options.
How to Prepare Your Artwork for Printing
Even the most brilliant design can end up looking amateur if the artwork file isn't set up correctly for production. Getting your file print-ready is that final, make-or-break step to ensure your printed table tents look just as good in person as they do on your screen. A few technical guidelines are all it takes to prevent common headaches like weird white edges or text getting chopped off.
First things first, let's talk about the three most important zones in any print design file: the bleed, the trim line, and the safety margin. Think of them as a protective bubble for your artwork.
Understanding Bleed and Safety Margins
The bleed is the part of your design that stretches out past the final cut edge. This is absolutely critical because printing and cutting machines can have tiny shifts during production. By extending your background colors and images an extra 0.125 inches on every side, you're guaranteeing that you won’t see any accidental white slivers along the edges of the final piece.
The trim line is exactly what it sounds like—it’s the finished edge where the table tent will be physically cut. Anything outside this line is going to get trimmed away.
Inside the trim line, you need to create a safety margin. This is a "safe zone" where all your crucial elements, like text and logos, need to live. Keeping everything important inside this inner border ensures nothing gets accidentally cut off, even with those slight paper shifts during trimming.
A simple way to remember it: Bleed is for backgrounds you want to "bleed" off the edge. Safety is for content you want to keep safe from the edge.
Essential File Specifications
Beyond just getting your margins right, a few other technical specs will set you up for a flawless print job. These are the industry-standard settings that we and other printers rely on for top-notch results.
- Color Mode: You absolutely must design in CMYK (Cyan, Magenta, Yellow, Black), not RGB. CMYK is the color model for physical printing, while RGB is for digital screens. If you design in RGB, the colors will shift when converted for print, and you probably won't like the surprise.
- Resolution: Make sure your images and the entire design file are set to 300 DPI (Dots Per Inch). This high resolution keeps your graphics looking sharp and crisp, completely avoiding that dreaded pixelated or blurry look.
- File Format: The best file formats to send us are high-quality, print-ready PDFs. JPEGs or TIFFs can also work, as long as they meet the other specs.
Nailing these details will help your project fly through production without a hitch. For a deeper dive into different printing methods, feel free to check out our resources on digital printing services.
Common Design and Ordering Mistakes to Avoid
Even with the right table tent size picked out, a few common slip-ups can completely derail your marketing efforts. We see them all the time. But avoiding these preventable mistakes is easy and ensures your final product looks professional, gets your message across, and actually pays for itself.
One of the biggest culprits is using low-resolution images. A graphic might look perfectly fine on your monitor, but it can turn into a pixelated, blurry mess in print. Always, always use images with a resolution of at least 300 DPI (dots per inch). This is non-negotiable for crisp, professional quality.
Another classic mistake is designing without thinking about the fold lines. I can't tell you how many times we've seen a logo, headline, or phone number get crunched into a crease, making it distorted and hard to read. Keep all your critical information tucked safely inside the margins for each panel.
Forgetting Key Marketing Elements
Beyond the technical file setup, some design choices just don't perform well. A beautiful table tent that doesn't tell a customer what to do is nothing more than a pretty decoration.
- No Clear Call-to-Action (CTA): Your design must tell people what to do next. Whether it's "Scan to View Menu," "Ask About Our Daily Special," or "Visit Our Website," a strong CTA is the entire point.
- Overcrowded Design: Cramming too much information onto a small surface is a recipe for visual chaos. Stick to concise copy, use bullet points, and embrace white space. You want your message to be scannable, not a chore to read.
The most effective table tents get one main idea across almost instantly. If a customer has to spend more than a few seconds figuring out what you're offering, you’ve already lost them.
Finally, don't skimp on the paper. The wrong paper stock can make your whole project a letdown. A flimsy, thin paper will start to sag and just looks cheap. On the other hand, a super glossy finish in a brightly lit room can create an annoying glare. Go with a sturdy, durable stock like 14 pt. or 16 pt. cardstock to make sure your table tents stand tall and look the part.
Frequently Asked Questions About Table Tents
Figuring out the nitty-gritty of table tent sizes and design can bring up a few questions, especially when you’re trying to get your order perfect. Here are some straightforward answers to the questions we hear most often from business owners and marketers.
What Is the Most Popular Size for Restaurants?
The 4" x 6" portrait is the undisputed champion on restaurant tables. It hits that sweet spot—big enough for daily specials, a drink menu, or a QR code, but compact enough that it doesn’t clutter the table. It gets noticed without getting in the way of plates and glasses.
Coming in at a close second is the 4.25" x 5.5" size. It has a slightly different footprint but does the job just as well. Honestly, you can't go wrong with either one for a dining environment.
How Do I Choose Between Folds?
The right fold really just depends on how much you need to say. Your choice here is going to shape your whole design and messaging strategy.
- Two-Sided (A-Frame): Go with this classic fold for simple, direct messages. It’s perfect when you have one main thing to focus on, like a single promotion, an event announcement, or a featured product.
- Three-Sided (Tri-Fold): Pick the tri-fold when you need to break information into a few different categories. It gives you three distinct panels, which is ideal for things like separating appetizers, entrees, and desserts, or for laying out different service packages.
Should I Use a Design Template?
Yes. Absolutely. Using a professionally made design template from your printer is one of the smartest moves you can make. It’s not just a friendly suggestion—it’s a critical step for getting a flawless final product.
Think of a template as your best insurance against common print errors. It guarantees your artwork lines up perfectly with the printer’s specs for dimensions, bleed, safety margins, and those all-important fold lines, right from the start.
This simple step prevents essential text or logos from getting chopped off or looking weird after production. It saves you time, money, and the massive headache of a reprint, making sure your table tents look exactly how you pictured them.
Ready to create table tents that really stand out? At 4OVER4, we’ve got a huge range of sizes, paper stocks, and finishes to bring your vision to life. Check out our custom table tent options and get started today.
More from

14
Your car wash business cards aren't just little rectangles with your phone number on them. Think of them as a physical ha
![]() Emma Davis
Emma Davis
Feb 28, 2026

22
Let's get straight to it. The standard A7 envelope comes in at 5.25 x 7.25 inches, which translates to 133.35 x 1
![]() Emma Davis
Emma Davis
Feb 27, 2026

25
When you're trying to figure out the right door hanger size, the classic 4.25" x 11" is pretty
![]() Emma Davis
Emma Davis
Feb 25, 2026

31
Figuring out whether to go with vinyl or screen printing really boils down to your project's size, the complexity of your design, and what
![]() Emma Davis
Emma Davis
Feb 23, 2026

15
Bringing a trading card to life is a fascinating mix of creative brainstorming, smart material choices, and precision printing. The journey st
![]() Emma Davis
Emma Davis
Feb 22, 2026

15
Believe it or not, whipping up a professional-looking card in Microsoft Word is way easier than you might think. The whole process boils down
![]() Emma Davis
Emma Davis
Feb 21, 2026

25
Brand identity design is really about creating a complete visual language for your company. Think of it as the collection of all the tangible
![]() Emma Davis
Emma Davis
Feb 20, 2026

14
The best packaging for t shirts strikes that perfect balance between brand identity, product protection, and cost. Your optio
![]() Emma Davis
Emma Davis
Feb 26, 2026