Metallic Wonderfoil & Lenticular Printing
Important file prep instructions for our special finishes. Read these guidelines before ordering metallic foil, WonderFoil, 3D lenticular, Spot UV, or 5th Color White products to ensure perfect results every time.
4OVER4 offers five premium special finishes: Metallic Foil (gold or silver on 16pt silk), WonderFoil (multi-color foil from CMYK), 3D Lenticular (flip/motion effects on 21pt), Spot UV (raised glossy coating), and 5th Color White (opaque white ink on clear substrates). Each requires a separate mask file for precise finish placement.

File Prep Instructions for Special Finishes
Important Instructions to Read Before Ordering
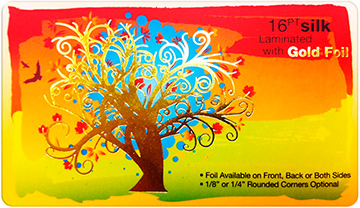
Metallic Foil Business Cards
Some key bullet points about Metallic Foil Business Cards from 4OVER4.COM:
- Foil Available on Front, Back or Both Sides
- Only one foil color available per project
- Printed on 16-point cardstock with silk lamination
- Avoid using small/ fine text or fonts for foil objects
- For best results, make sure that the foil coverage is less than 50% of the artwork area
- There may be up to a 1/16" shift on the placement of the foil. Keep this in mind if you are trying to align foil with other printed artwork on the card
All metallic foil business cards are printed on 16-point cardstock and are SILK LAMINATED. An order for metallic foil business cards can only have one type of foil, either Gold or Silver. Hence, an order with Gold foil on the front and Silver foil on the back is NOT POSSIBLE.
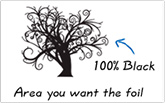
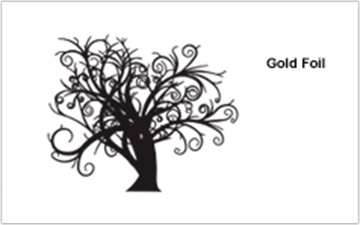
When doing a metallic foil business card, a foil mask must be created and uploaded with your full color file. The file for the Foil mask MUST ONLY be black and white (100% Black). 100% Black in the areas you want the foil, and white in the areas you do not want the foil. You must ensure that your foil mask file only has 100% black in it and will represent where there will be foil stamped on the final product. (please see images below illustrating how to correctly set up your files).
See Below How to Correctly Set Up Your File:

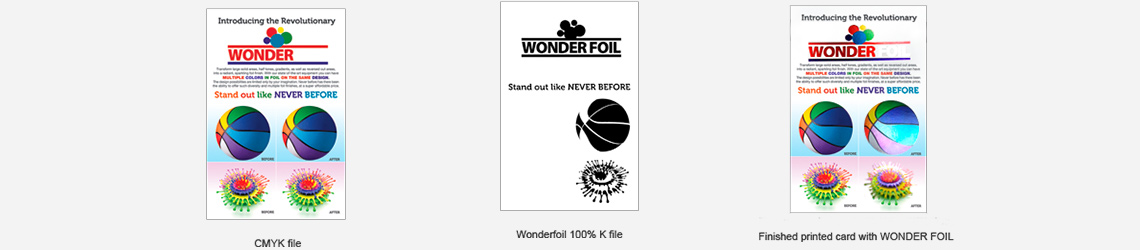
CMYK File
100% Black Foil Mask File
Note: Please make sure that you have prepared your foil mask file precisely and it is positioned correctly to where it is intended to be placed.
4OVER4.COM will absolutely not be held responsible for foil mask files that have not been saved correctly to the desired final positioning wanted by the customer.
For a printed sample of the example above, and 16-point silk laminated metallic foil business cards from 4OVER4.COM, please email support@4over4.com and ask for samples
Order Your METALLIC FOIL Cards Now!Wonderfoil
Some key bullet points about WonderFoil Business Cards from 4OVER4.COM:
- Printed on 16-point gloss cardstock with hi-gloss UV coating
- WonderFoil Available on Front, Back or Both Sides
- Make sure the mask and CMYK print file are aligned and match up properly
- Do not use WonderFoil on very thin or small text and art. Use san serif fonts above 12 point for best results
- White in the CMYK file that is 100% K (black) in the Wonderfoil Mask file will appear as METALLIC SILVER FOIL
- WonderFoil works best on lighter colors. The darker the CMYK color, the less the Wonderfoil effect
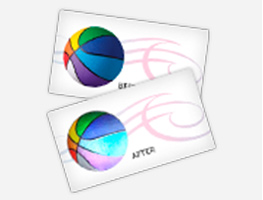
- When creating knockouts in the WonderFoil mask or in the CMYK file, beware of a "halo" of white around the knockout area (see illustrations below as well as how to eliminate this problem is your art calls for this effect)
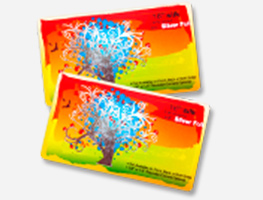
With WonderFoil, you can turn a wide range of CMYK colors, into multi-colored foils.
Transform large solid areas, half tones, gradients, as well as reversed out areas, into a radiant, sparkling foil finish. With our state-of-the-art equipment you can have MULTIPLE COLORS IN FOIL ON THE SAME DESIGN.
The design possibilities are limited only by your imagination. Never before has there been the ability to offer such diversity and multiple foil finishes, at a super affordable price.
Stand out like NEVER BEFORE.
When doing a WonderFoil business card, a foil mask must be created and uploaded with your full color CMYK file. The file for the WonderFoil mask MUST ONLY be black and white (100% Black). 100% Black in the areas you want the foil, and white (0%) in the areas you do not want the foil. You must ensure that your foil mask file only has 100% black in it and will represent where your full color artwork will be transformed into a full color foil.
See Below How to Correctly Set Up Your File:
Note: Please make sure that you have prepared your foil mask file precisely and it is positioned correctly to where it is intended to be placed. 4OVER4.COM will absolutely not be held responsible for foil mask files that have not been saved correctly to the desired final positioning wanted by the customer.
Avoid "HALO" effect of white around the knockout area. To prevent this effect, grow/stroke the WonderFoil area in the mask by 12 pixels. This will allow the WonderFoil to bleed into the CMYK area, reducing the white "Halo" effect. You can also fill in the knockout with a color to reduce the effect further.
For a printed sample of the example above, and 16-point high gloss UV, WonderFoil business cards from 4OVER4.COM, please email support@4over4.com and ask for samples.
Order Your WONDER FOIL Cards Now!3D Lenticular Business Cards

Some key bullet points about 3D Lenticular Business Cards from 4OVER4.COM
- Lenticular sheets are 75 LPI. LPI means Lenticules Per Inch.
- Dark solid colored and/or textured backgrounds work well with this effect.
- Avoid white backgrounds when possible.
- White and light colored areas are transparent, other views/flips will show through white areas causing a ghosting effect. White and light colored areas only work well if each view has white/light colors in the exact same area.
- Use bold sans serif fonts and avoid small text. Small, fine and thin type do not work well for 3D Lenticular prints; fonts get distorted through the lens/plastic surface, so the bolder the better.
- Text that varies from view to view/file to file should NOT overlap, but instead be in a different position on each view.
Common 3D Lenticular examples:
FLIP: Most popular effect used to show 2 or 3 distinct images, one right after the other. Sell multiple products, make your business card bi or tri-lingual, or simply induce a second look.
MOTION EFFECT: Present a simple video action sequence or product demonstration on your business card.
As you can see from the animation above, your images will transition from one to another as you move the card up and down.
3D LENTICULAR BUSINESS CARDS are guaranteed attention grabbers. People will look at them and pay attention to the effect created over and over. Additionally they'll show the card around and usually keep it handy to show others.
3D Lenticular Cards from 4OVER4.COM allow you to have two or three different pictures in one. We take your images and create a swapping effect, each image vanishing and then reappearing from one to another as you tilt the card up and down. In addition, an optional backside, printed in regular 4 color process, is also available.
Note: At the moment, only a vertical transition or flip is available for order.
Note: Another thing to keep in mind is how many files will be uploaded. It depends if you have a two or three image transition.
Two Image Transition AND NO Printed Backside (4/0): 2 files
Three Image Transition AND NO Printed Backside (4/0): 3 files
Two Image Transition WITH Printed Backside (4/4): 3 files
Three Image Transition WITH Printed Backside (4/4): 4 files
File Naming: When naming your files, please try to follow the following naming convention
Front1
Front2
Front3 (if you have 3 transitions, instead of 2)
Back
For a printed sample of the example above, and of 21-point 3D Lenticular business cards from 4OVER4.COM, please email support@4over4.com and ask for samples
Order Your 3D LENTICULAR Cards Now!Spot UV Printing
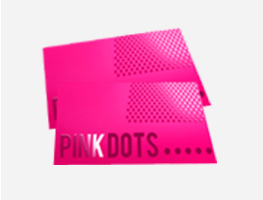
Some key bullet points about Spot UV Printing from 4OVER4.COM
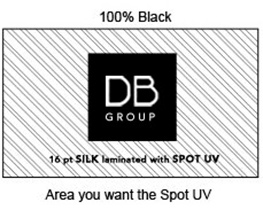
When doing a Spot UV business card, postcard or pocket folder a Spot UV mask must be created and uploaded with your full color file. The file for the Spot UV mask MUST ONLY be black and white (100% Black). 100% Black in the areas you want the Spot UV effect to be on, and white in the areas you do not want the Spot UV. You must ensure that your Spot UV mask file only has 100% black in it and that will represent where there will be a Spot UV Layer added to the final product. (Please see images below illustrating how to correctly set up your files).
There may be up to a 1/16" shift on the placement of the spot UV on your order. Keep this in mind if you are trying to align spot UV with other printed artwork on the card.
See Below How to Correctly Set Up Your File:
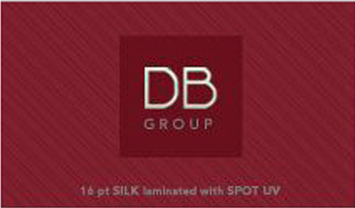
CMYK File
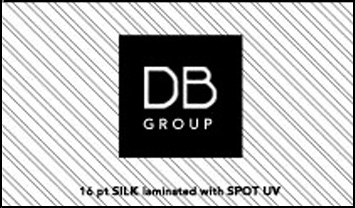
100% Black Spot UV Mask Files
Spot UV Finish
Note: Please make sure that you have prepared your Spot UV mask file precisely and it is positioned correctly to where it is intended to be placed. 4OVER4.COM will absolutely not be held responsible for Spot UV mask files that have not been saved correctly to the desired final positioning wanted by the customer. Below you will find images illustrating how to correctly set up your files and to see what the Spot UV mask file should look like:
For a printed sample of the example above, and of 16-point Silk Laminated Spot UV business cards from 4OVER4.COM, please email support@4over4.com and ask for samples
5th color White
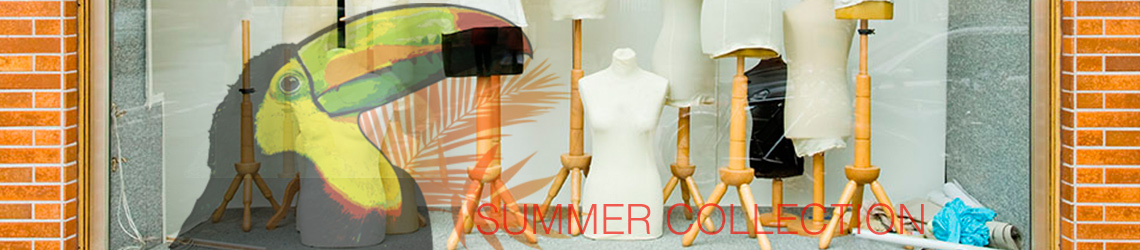
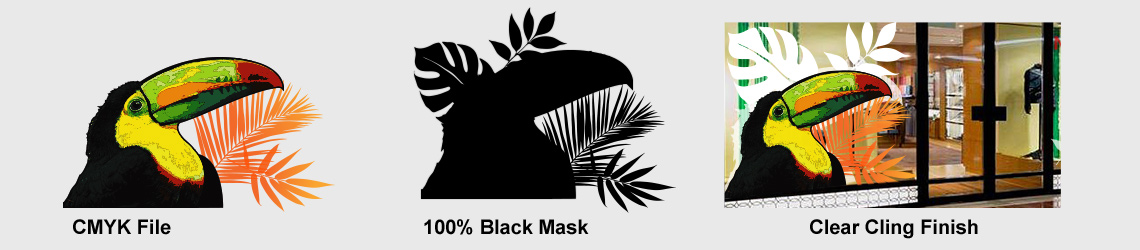
5th Color white is available for Clear Labels, Aluminum Signs and Clear Clings. We are using Clear Clings as an example, but the file prep and color mask work the same for all printing products with 5th color white option.
Clear cling with no white ink
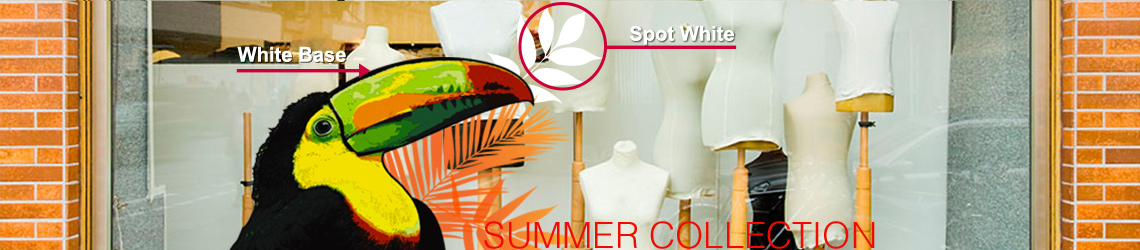
Clear cling using white as a spot color
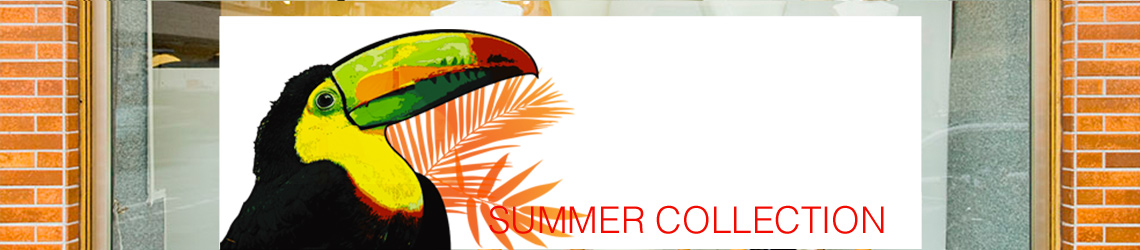
Clear cling with a Flood Base in White where the entire clear cling will now appear as if it was White
Similar to Spot UV masks, White Mask files are separate from your artwork files and black color indicates where the white ink will print.
Make sure to create your mask file the same size as your color art file. This will prevent alignment issues during printing.
Note: White Masks must be made in vector format and be saved as EPS or PDF and use 100% K.
Use vector paths/shapes to create black color areas that will indicate where the white ink base will go. The rest of the area will represent the Clear Window Cling stock.
Black in the White Mask file indicates where white ink will be printed. Remember the following when creating a white mask for your white ink base:
- White ink base will be printed behind any color that's in your Artwork Layer.
- Areas with color but without a White Mask will be printed with color directly on the material. These areas will have somewhat transparent color due to the Clear substrate.
- Areas with color and a White Mask will be printed as opaque or solid color.
- Areas with a White Mask and no color will be printed as white.
- The black for the White Mask file must be 0% C 0% M 0% Y 100% K or it will not be recognized by preflight.
Our Story
Partner With Innovators
They told us we were crazy. We don't want to be sane.
The Beginning
In 1999, Google was barely starting out. WiFi didn't exist. People were afraid of Y2K. And two best friends, second-generation immigrants and patent-holding engineers in Queens, New York, launched 4OVER4.COM as the second web-based printer in the entire United States.
The Innovation
4OVER4 was the first printer to introduce full-color printing with 24 to 48 hour turnaround. When the industry said it couldn't be done that fast, they did it anyway. No compromises, no excuses, just engineering.
27 Years and Counting
Over 350 products. More than 6,000 possible combinations. 150,000+ businesses served, from solo freelancers to Google and the United Nations. A facility in Queens that still runs on vegetable inks and waterless presses — built that way from day one because it was the right thing to do.
FAQ
Special Finishes Questions
Common questions about metallic foil, WonderFoil, 3D lenticular, Spot UV, and 5th Color White printing.
What types of metallic foil finishes are available?
We offer Gold and Silver metallic foil finishes on 16-point cardstock with silk lamination. Each order can use only one foil color, Gold or Silver, which can be applied to the front, back, or both sides of your print.
How do I create a foil mask file?
Your foil mask file must be black and white only (100% Black). Areas you want foiled should be 100% Black, and areas without foil should be white. Upload the mask alongside your full-color CMYK file. Make sure both files are aligned precisely.
What is WonderFoil and how is it different from metallic foil?
WonderFoil transforms your full-color CMYK artwork into multi-colored foil. Unlike standard metallic foil (which is a single color overlay), WonderFoil lets you have multiple foil colors in the same design, turning large solid areas, halftones, gradients, and reversed-out areas into a radiant, sparkling foil finish.
What is 3D Lenticular printing?
3D Lenticular printing creates a swapping or flip effect where images transition as you tilt the card up and down. You can use 2 or 3 images for the lenticular effect. Cards are printed on 21-point lenticular sheets at 75 LPI (Lenticules Per Inch).
How does Spot UV work?
Spot UV adds a raised, glossy UV coating to specific areas of your print. Like foil masking, you create a separate black-and-white mask file indicating where the Spot UV effect should be applied. Available on business cards, postcards, and pocket folders.
What is 5th Color White used for?
5th Color White is used on clear or transparent materials like Clear Labels, Aluminum Signs, and Clear Clings. White ink is printed behind your color artwork to create opaque, solid-looking colors on transparent substrates. Without the white base, colors appear somewhat transparent.
Can I get printed samples before ordering?
Yes! Email support@4over4.com and ask for samples of any of our special finish products. We can send you printed samples of metallic foil, WonderFoil, 3D lenticular, and Spot UV business cards.
How precise is the foil/Spot UV placement?
There may be up to a 1/16" shift on the placement of foil or Spot UV. Keep this in mind if you are trying to align special finishes with other printed artwork on the card. Always ensure your mask file is positioned correctly.
Get Started
Make Your Print Stand Out. Every Time.
Metallic foil, WonderFoil, 3D lenticular, Spot UV, and 5th Color White. Premium finishes on 1,000+ products since 1999.
Legal Disclaimer
Special finish placement may shift up to 1/16 inch during production. Foil mask files must be prepared precisely, 4OVER4.COM is not responsible for incorrectly prepared mask files. 3D Lenticular transitions are currently available in vertical orientation only. Color vibrancy of WonderFoil varies based on underlying CMYK color density. All products subject to standard production and shipping timelines. Contact support@4over4.com for specifications and samples.