Creating Lenticular Artwork Tutorials
Lenticular 3D printing gives any image a sense of depth and movement. The illusions meet our eyes while looking at the image from different angles. 3D Lenticular printing is most commonly used for party favors and other entertaining purposes. However, it has also started to have more presence in the marketing world, given that is the perfect format to make 2D more engaging.
The 3D Lenticular effect can be applied to different sized formats, so you can see it from small business cards to movie posters. The appeal is that it can show a product in motion or display different messages according to the angle you look from. We loved Lani Schreibstein example on behance.

#1 Get the image
3D lenticular design starts with the image capture. There is a fool-proof technique to be used and it involves taking the pictures moving on the same horizontal line, with a constant distance from each other. For example, if you are going to take 3 pictures, take each one every time you move 60mm on the straight line.
Remember that the goal is to make it seem like the object is moving, so you need the transitions to be clear. Professionals use camera tracks for this purpose, but there are methods you can try at home. For example, using a smooth surface as the base and marking the distance where the camera will be moved to create a stereoscopic effect. Or you can get creative and use a wheeled toy as the track. Another simpler option is to take 2 images of the same object with only a small change in position and add text to create the illusion of change and movement.
#2 Choose and align the focal point
You need to choose the focal plane of your pictures and then select a common point to align your pictures for creating a flip effect in lenticular printing. Using Photoshop, open your series of pictures and make them different layers of your file. Since you need to align, make the top ones opaque while you complete this step so you can see through for a DIY lenticular project. After you align, make sure to crop to the desired size.
#3 Interlace
The next step is to interlace the image. You can use a dedicated software for lenticular printing. But with photoshop, what you need to do is create masks. Alternating black & white stripes and applying the masks on each layer for a DIY lenticular printing project. It will look blurry but that’s exactly what you need to make it work once laminated.
To do this in Photoshop, follow these steps:
- Open your image and duplicate the layer.
- Select the duplicate layer and go to Filter > Other > Offset. Offset the image horizontally by half of the width of the image. This will create a seamless loop for interlacing.
- Create a new layer and fill it with a black and white striped pattern. You can do this by creating a new layer, selecting the rectangular marquee tool, and creating black and white stripes.
- Apply a layer mask to your duplicate layer. Then, load the black and white stripes as the layer mask.
- Repeat this process for each layer, alternating black and white stripes for each layer.
- Once you have applied the masks to all layers, save your file as a PSD to preserve the layers.
- When you are ready to print, flatten the image and send it to your lenticular printing company for final production.
By interlacing your image in this way, you will create the desired effect of depth and movement when viewed at different angles.

#4 Print and Laminate
Print your image in a glossy paper and cut it to the size you will laminate from the printer. Then put your lenticular plastic lens on the image and laminate. Once you have done this process, you should be able to see a moving object by looking at your lenticular print from different angles.
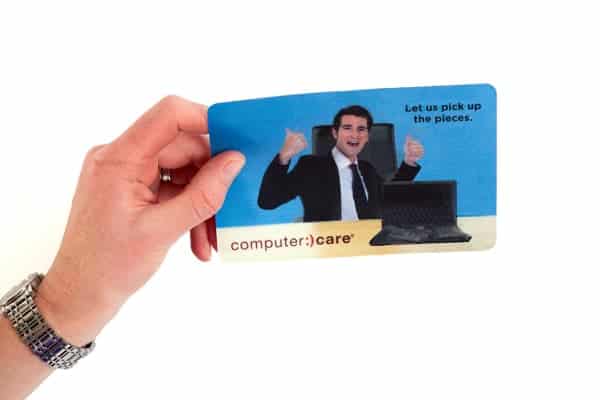
Try this technique with your own office printing products and consider adding a lenticular art feature. You can design lenticular art for a unique presentation. 3D lenticular business cards with your contact and service information to impress your customers. Or 3D lenticular postcards for promotional items to hand out on trade shows and be remembered over the competition.
Professional printing options today leave plenty of room for our creativity to flow freely. Customers need to be impressed by your unique 3D lenticular business cards because they’re over stimulated by numerous marketing initiatives. Give them a reason to remember you by using out of the ordinary techniques on traditionally ordinary products. Is there any particular product you would like to try 3D lenticular printing on? Feel free to let us know and get ahead of the printing game.
FAQs
Q: What is 3D Lenticular Printing?
A: 3D lenticular printing is a technology that creates an illusion of depth by interlacing multiple images and using a lenticular lens to display different images from different viewing angles.
Q: How can I create a lenticular print?
A: To create a lenticular print, you need to design multiple images that will be interlaced together and printed using a lenticular lens to achieve the 3D effect.
Q: What is a lenticular lens?
A: A lenticular lens is a sheet of material with small cylindrical lenses that can display different images when viewed from different angles.
Q: How can I align a common point in a lenticular image?
A: To align a common point in a lenticular image, you can use software like Photoshop to ensure that the left and right images match up correctly.
Q: What is the importance of binocular disparity in 3D lenticular printing?
A: Binocular disparity refers to the slight difference in perspective between the left and right eyes, which is essential for creating a realistic 3D effect in lenticular printing.
Q: Can I use Photoshop for creating 3D lenticular prints?
A: Yes, Photoshop is a commonly used software for designing and editing images for 3D lenticular printing as it offers various tools and features to manipulate images effectively.
Q: How do I apply a 3D effect to my images using Photoshop?
A: You can apply a 3D effect to your images in Photoshop by using tools like layers, masks, and filters to create depth and perspective in your designs.
Q: What is the role of a lenticular sheet in the printing process?
A: A lenticular sheet is a crucial component in lenticular printing as it contains the lenticular lenses that allow the printed images to display different views based on the viewing angle.


 Emma Davis


